Posts | Comments

Planet Arduino

Archive for the ‘automation’ Category

When you think of automation, what’s the first image that comes to mind?

For many of us, it’s a robot. From the blocky, square-headed characters of sci-fi comic fame to household more complex creations like the Replicants of Blade Runner — robots have captured our collective imagination for a long time.

It’s no surprise, then, that lots of Arduino users eventually set out to build a robot of their own.

In this article, we’ll look at how to build your own robot with Arduino and share some project examples from other makers.

What exactly is a robot?

The term “robot” can cover a lot of potential meanings, so let’s agree on a definition.

Here’s what the Oxford Dictionary says:

“(especially in science fiction) a machine resembling a human being and able to replicate certain human movements and functions automatically.”

It’s a good start, but do all robots resemble humans? Here’s Oxford’s second definition:

“a machine capable of carrying out a complex series of actions automatically, especially one programmable by a computer.”

This seems more accurate since it encompasses things like construction robots, robotic pets, and robotic vehicles.

Humans have been attempting to build robots for centuries, although most of our success has taken place within the last few decades. Today, thanks to advancements in hardware and automation technology, almost anyone can build their own robots at home.

What do you need to build a robot?

Building your own robot might seem like an unimaginably complex task. After all, aren’t robots the stuff of sci-fi movies and leaked military prototypes?

The good news is that building a robot doesn’t have to be a monumental undertaking, and can in fact be done with some fairly simple and easily obtained components.

Here’s what you’ll need:

  • Some simple components like wheels, sensors, and switches (this will vary greatly depending on the type of robot you’re planning to build)
  • Some basic coding and automation skills (you don’t need to be a coding wizard)
  • A microcontroller like the Arduino UNO R4, for example.

This is, of course, just a starting point. You can build a fairly simple robot, or you can ramp up the complexity and sophistication as much as you like — the sky really is the limit here. For beginners, though, you can find everything you need at the hardware store.

Explore Arduino robots

With Arduino’s products and other components, it’s possible to build your own robots more easily than ever before.

We need to look no further than the Arduino Project Hub to find a ton of inspiring ideas. Let’s explore a few.

Line-following robot

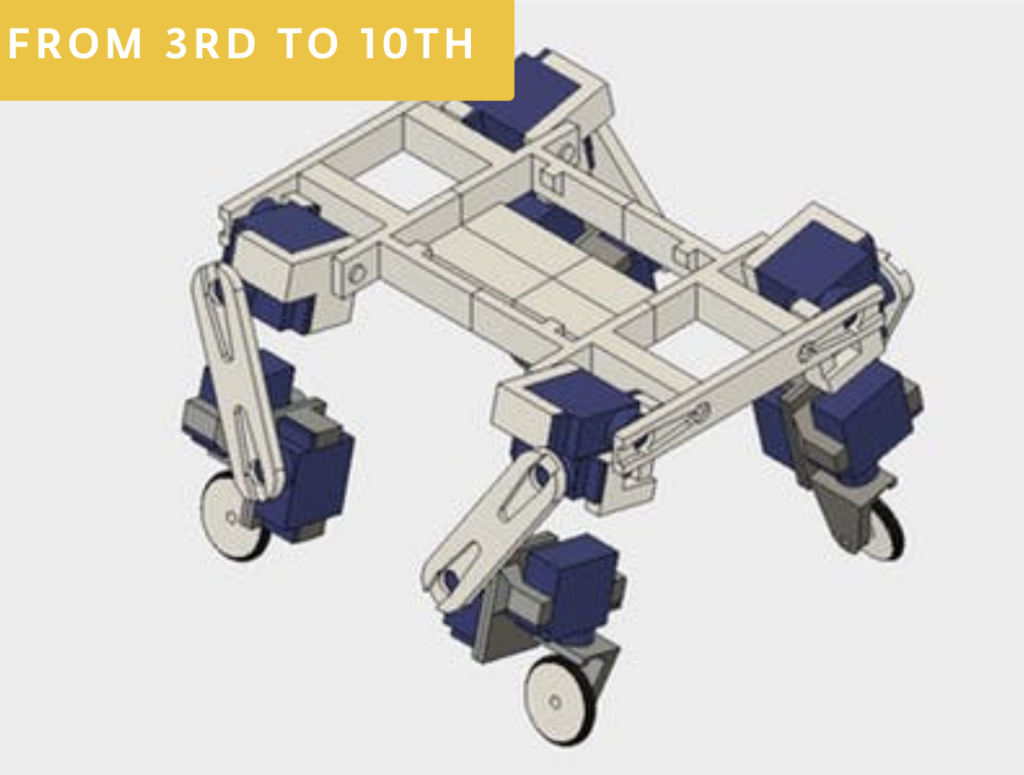
Robots don’t have to be ultra-complex humanoid feats of engineering.

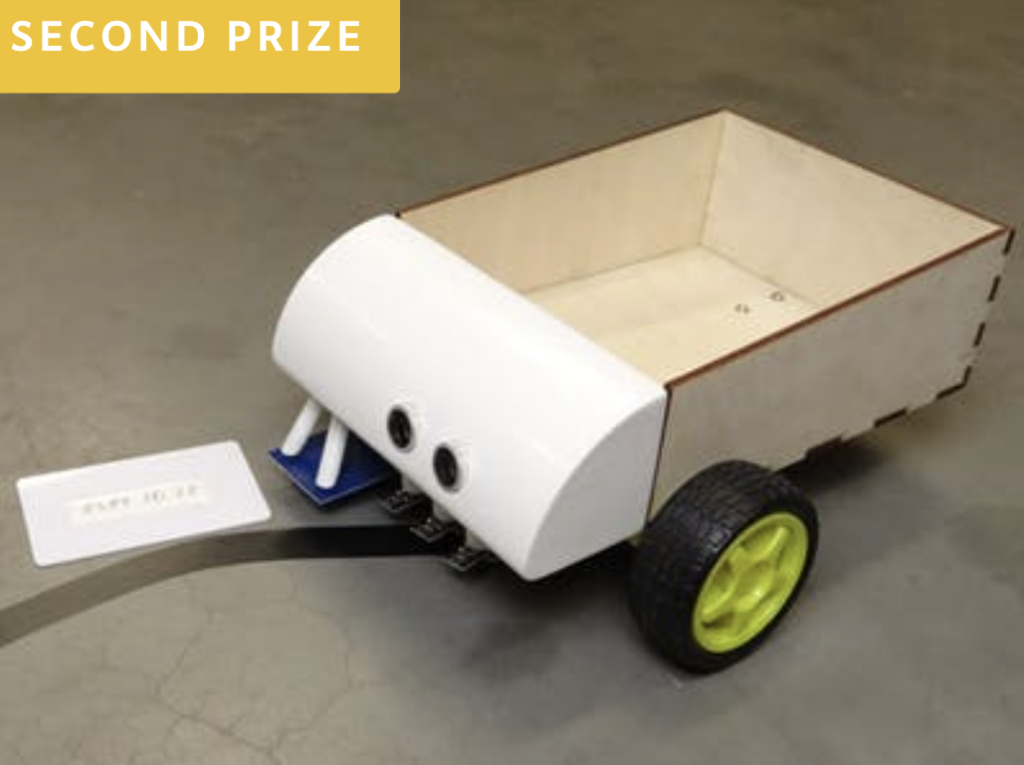
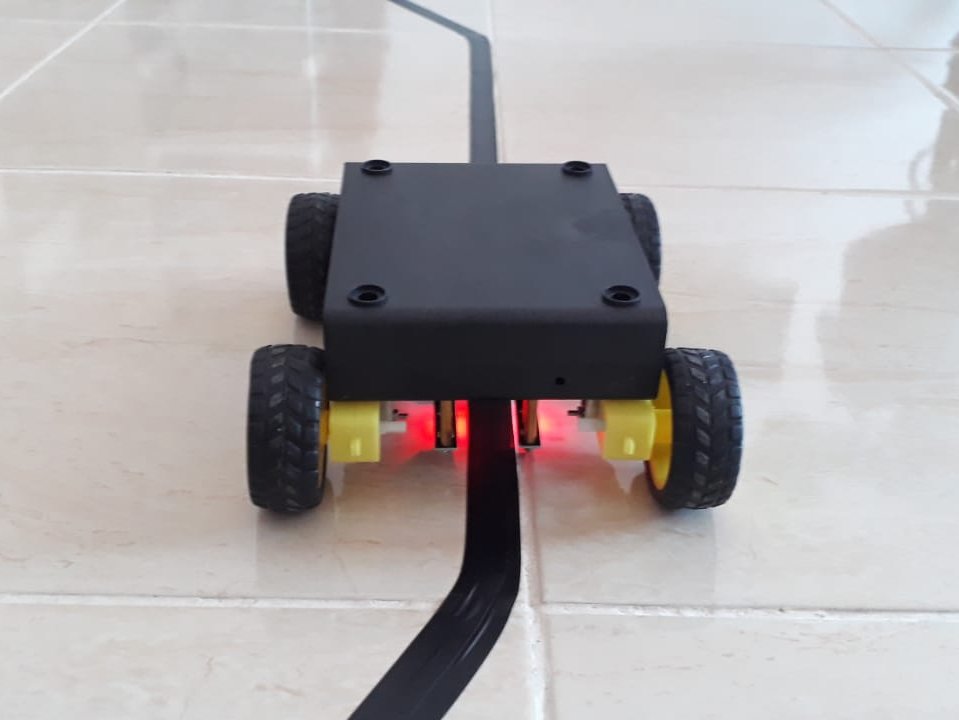
In fact, if you’re just getting started with robotics, it helps to keep things simple. Check out this great example — it’s a simple, car-shaped robot designed to follow a colored line on the floor.

The robot constantly monitors data from its infrared sensors in real time and adjusts movement based on feedback, ensuring it never strays from the line.

If this kind of project interests you, you’ll love the upcoming Arduino Alvik, which will have a line-follower functionality. Alvik’s user-friendly interface makes MicroPython coding and robotics project development easier than ever, making learning and creating a breeze. 

Alvik is also equipped with a range of sensors including a ToF distance sensor, line follower array, color sensor, and more. It’s especially impressive when it comes to swiftly detecting and navigating obstacles and colors.

Join the waiting list here to be first in line for updates about Arduino Alvik.

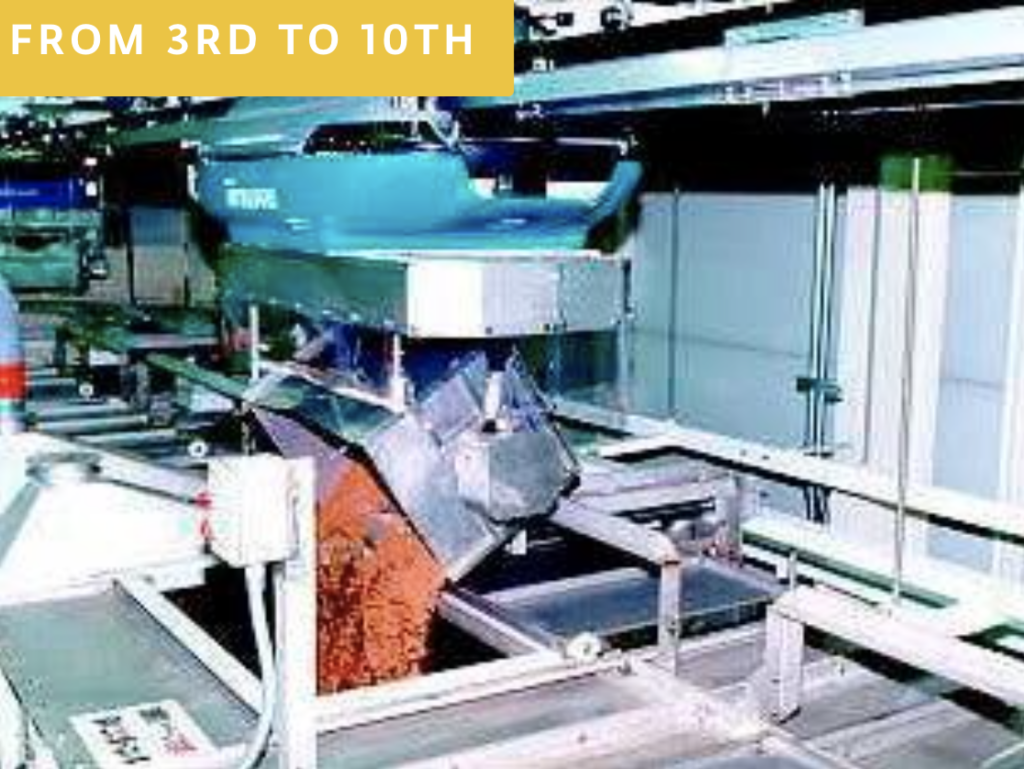
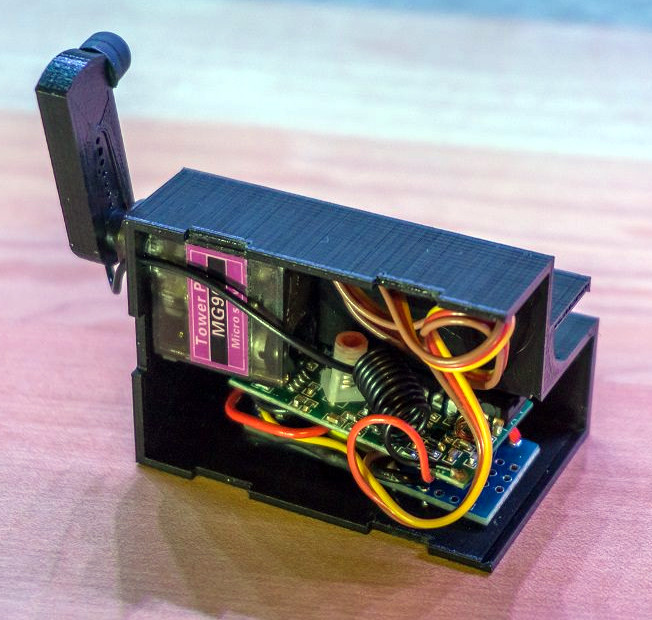
A piano-playing robot

Did you think playing music was a uniquely human trait?

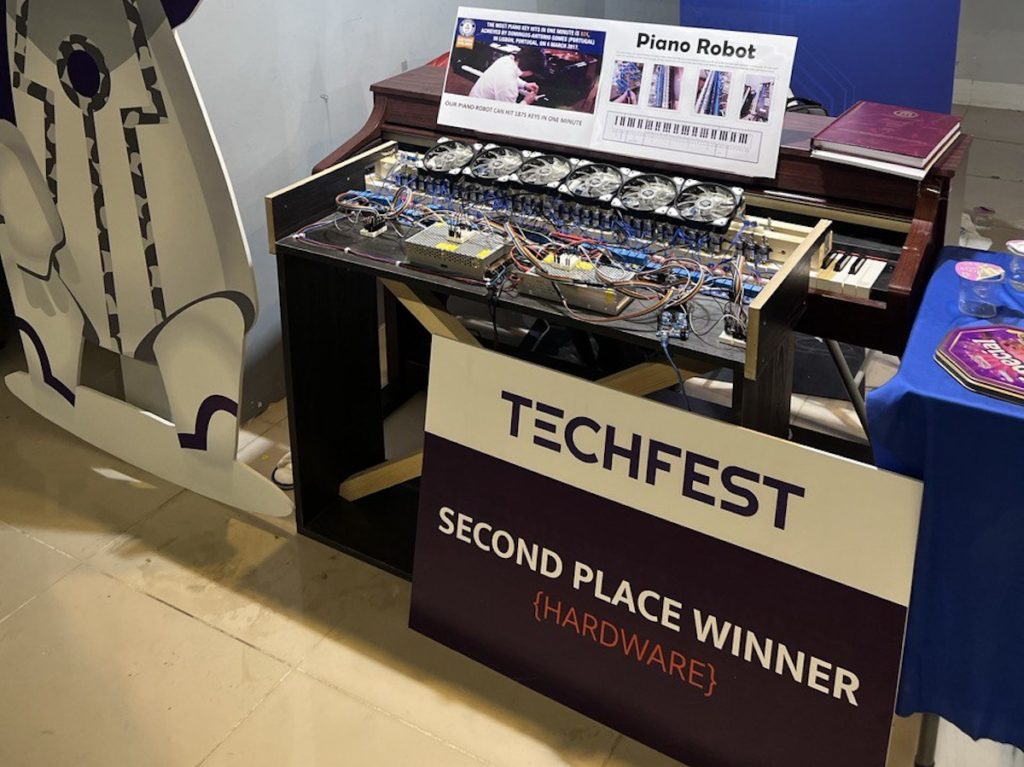
Well… think again — this musically-inclined robot is capable of controlling piano keys automatically. The device was able to play piano keys 1,875 times in the space of a minute, beating the human world record by a significant margin.

The project used a range of tools including solenoids and a custom-designed Java software interface.

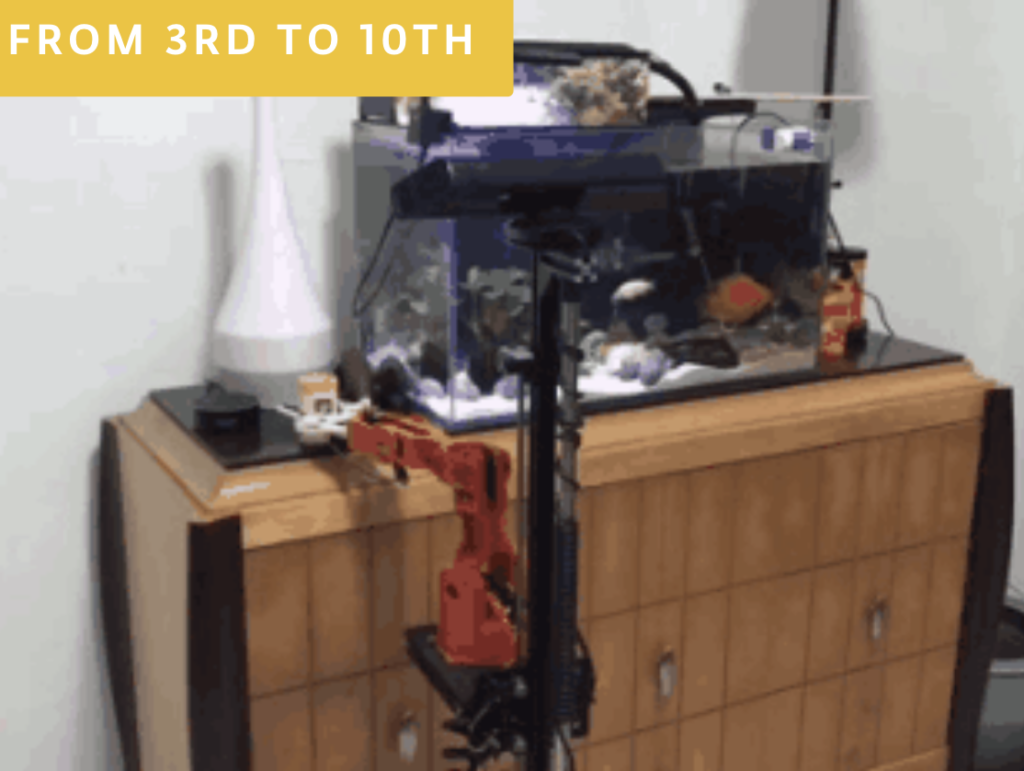
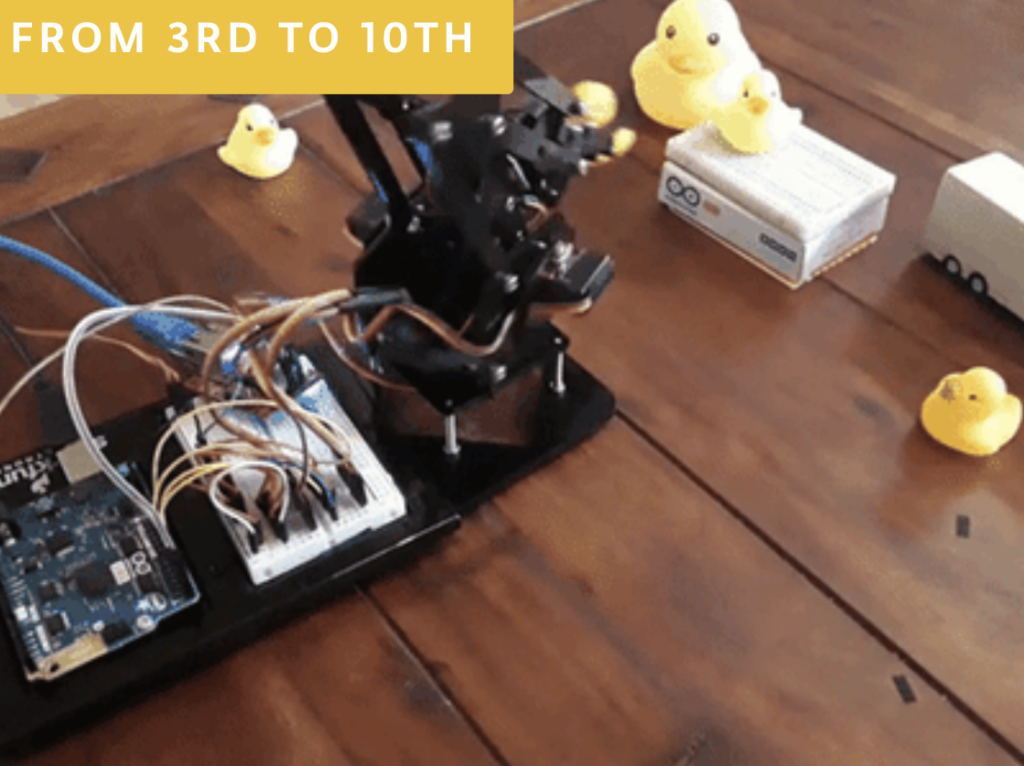
A chess-playing robot arm

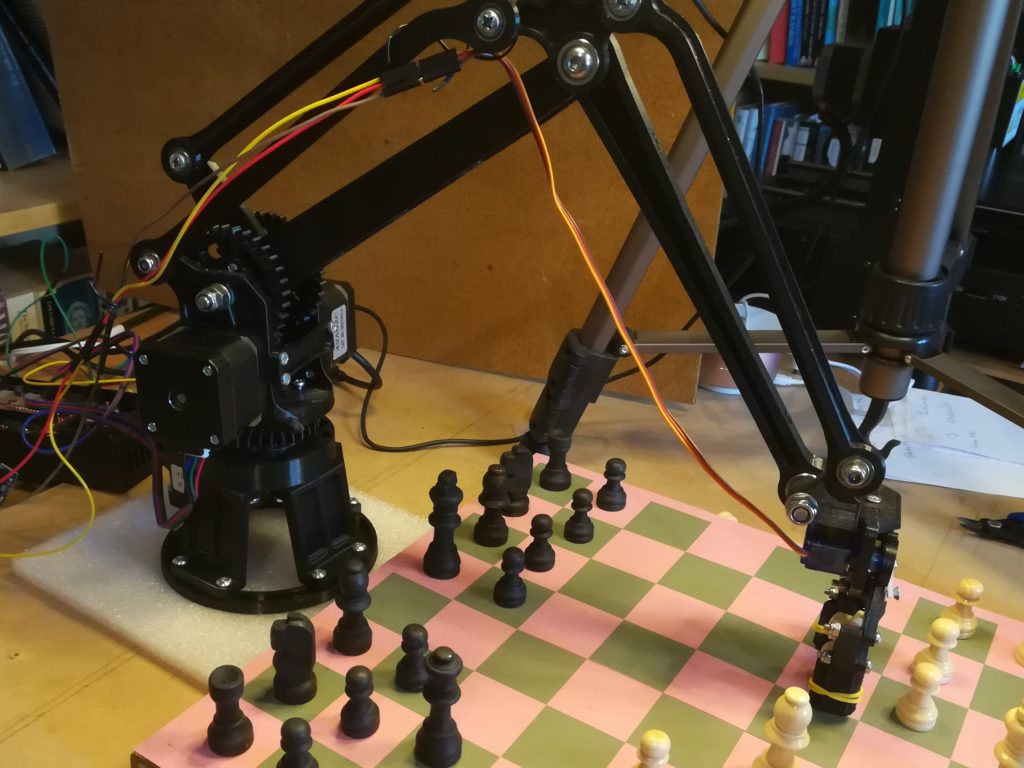
Robots have been giving us humans a run for our money in the world of chess for quite some time.

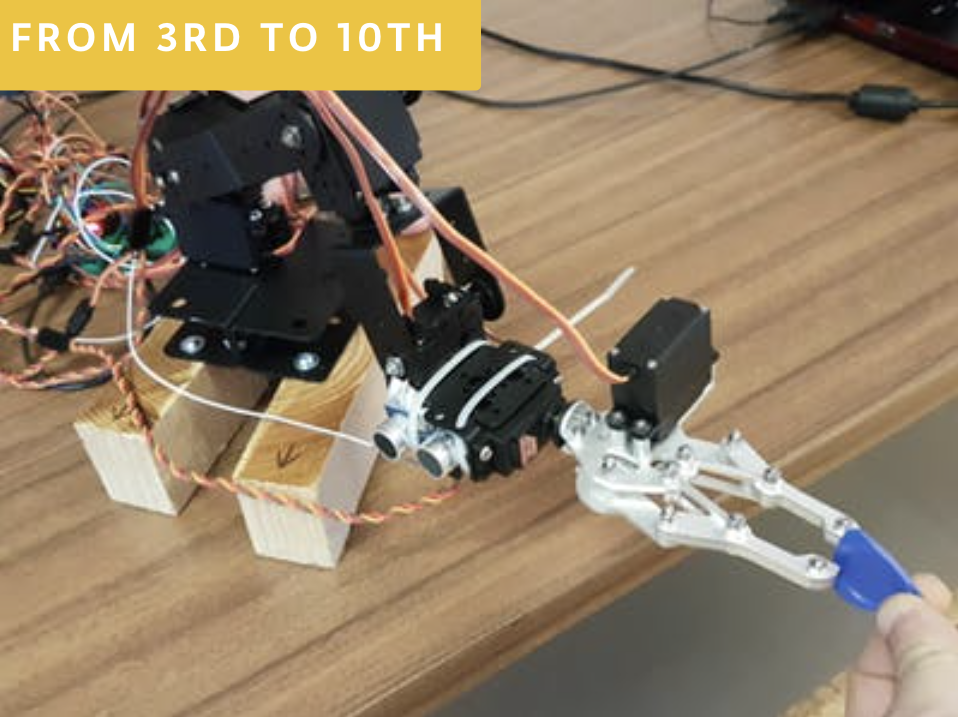
For a new spin on the machines vs. humans saga, take a look at this robotic arm capable of physically moving the chess pieces.

The arm was created using a 3D printer and works by using a visual recognition system to watch the opponent’s move and then formulate a response. 

One of the most interesting things about this robot is the code used for move recognition. Because the robot uses visual recognition to follow the human’s moves, there’s no need for additional complex hardware like reed switches to be built into the chessboard, unlike other chess-playing robots.

Stay tuned for Robotics Week!

If you have a passion for building robots or just want to learn more about this topic, you’ll love Robotics Week, which takes place this year from April 6th-13th.

It’s a full week of events — many of which are virtual — all centered around robotics and STEM.

And if that’s not enough for you, this year’s Control Automation Day will focus on the theme of robotics: register today to see Arduino’s session on March 26th, “Arduino Pro Opens the Door to Robot Control for Agriculture, Biotech, and Manufacturing,” showcasing a success story based on the Portenta Machine Control by “Robotics for the Real World” provider R2 labs.

In the meantime, visit our Project Hub for more inspiration — where you can search by category and difficulty level. And don’t forget to share your own projects with our community!

The post Can I build my own robot with Arduino? appeared first on Arduino Blog.

Renesas EK-RA2A2 evaluation board

Renesas Electronics RA2A2 Arm Cortex-M23 microcontroller (MCU) group offers a 7-channel high-resolution 24-bit Sigma-Delta ADC, as well as dual-bank flash and bank swap function for an easier implementation of firmware over-the-air (FOTA) updates. The 48MHz MCU also comes with 48KB SRAM, up to 512KB code flash, various interfaces, and safety and security features that make it suitable for smart energy management, building automation, medical devices, consumer electronics, and other IoT applications that can benefit from high-resolution analog inputs and firmware updates. Renesas RA2A2 specifications: MCU core – Arm Cortex-M23 Armv8-M core clocked at up to 48 MHz Arm Memory Protection Unit (Arm MPU) with 8 regions Memory 48 KB SRAM Memory Protection Units (MPU) Memory Mirror Function (MMF) Storage Up to 512 KB code flash memory in dual bank (256 KB × 2 banks); bank swap support 8 KB data flash memory (100,000 program/erase (P/E) cycles) Peripheral interfaces Segment LCD [...]

The post Renesas RA2A2 Arm Cortex-M23 microcontroller offers high-resolution 24-bit ADC, up to 512KB dual-bank flash appeared first on CNX Software - Embedded Systems News.

Fans off Wallace and Gromit will all remember two things about the franchise: the sort of creepy — but mostly delightful — stop-motion animation and Wallace’s Rube Goldberg-esque inventions. YouTuber Gregulations was inspired by Wallace’s Autochef breakfast-cooking contraption and decided to build his own robot to prepare morning meals.

Gregulations wanted his Autochef-9000 to churn out traditional full British breakfasts consisted of buttered toast, eggs, beans, and sausage. That was an ambitious goal, because each of those foods requires several steps to prepare. Gregulations’ solution was to, essentially, create one large machine that contains several smaller CNC machines. Each one is distinct and tailored to suit a particular food. In total — if you add up all of the different sections — this is a 12-axis CNC machine.

The Autochef-9000’s central controller is an Arduino Mega 2560 board. But even with the power and number of pins available, that wouldn’t have been able to handle everything. So it divvies out some tasks to Arduino UNO Rev3 boards.

As you would expect, this takes quite a lot of heat to cook everything. That’s why the Autochef-9000 contains several electric heating elements, which the Arduinos control via relays.

Users can order food using a touchscreen menu system or a smartphone interface. Autochef-9000 will then whir to life. It will open and heat a tin of beans, grab and heat a sausage, hard boil an egg, and toast and then butter bread fed from a magazine. Finally, it will deposit all of those items onto a plate.

There is a lot going on inside of this machine and Gregulations breezes past a lot of the technical details, but it is a joy to see in action. And unlike Wallace’s inventions, this one hasn’t caused any serious disasters (yet).

The post Autochef-9000 can cook an entire breakfast automatically appeared first on Arduino Blog.

Historically, there have been a few cases of useful wireless power transmission over great distances, like a team at MIT that was able to light up a 60 W bulb at several meters, and of course Nikola Tesla had grand dreams of drawing energy from the atmosphere. But for most of us wireless power is limited to small, short-range devices like cellphone chargers. While it’s not a lot of work to plug in a phone when it needs a charge, even this small task can be automated.

This build begins with a 3D printed cradle for the smartphone to sit in. When the device detects that the phone has been placed in the cradle, it uses a linear actuator to drive a custom-built charging cable into the phone’s USB port. Similarly, when the phone is lifted from the cradle the cable is automatically removed. It appears that there is some play in the phone’s position that lets the charger be plugged in smoothly, and the project’s creator [Larpushka] points out that the linear actuator is not particularly strong so we don’t imagine the risk of damage is very high.

While wireless charging still may have the edge when it comes to keeping debris out of the port, we still really enjoy a project like this that seems to be done for its own sake. There are some improvements that [Larpushka] plans to make, but for now we’re delighted by this build. For anyone looking to add true wireless charging to any phone that doesn’t have it, though, it’s not too difficult to accomplish either.

No, it’s not the kind of honeycomb you’re probably thinking of. We’re talking about the lightweight panels commonly used in aerospace applications. Apparently they’re rather prone to dents and other damage during handling, so Boeing teamed up with students from the California State University to come up with a way to automate the time-consuming repair process.

The resulting machine, which you can see in action after the break, is a phenomenal piece of engineering. But more than that, it’s an impressive use of off-the-shelf components. The only thing more fascinating than seeing this robotic machine perform its artful repairs is counting how many of its core components you’ve got laying around the shop.

Built from aluminum extrusion, powered by an Arduino Due, and spinning a Dewalt cut-off tool that looks like it was just picked it up from Home Depot, you could easily source most of the hardware yourself. Assuming you needed to automatically repair aerospace-grade honeycomb panels, anyway.

At the heart of this project is a rotating “turret” that holds all the tools required for the repair. After the turret is homed and the condition of all the cutting tools is verified, a hole is drilled into the top of the damaged cell. A small tool is then carefully angled into the hole (a little trick that is mechanical poetry in motion) to deburr the hole, and a vacuum is used to suck out any of the filings created by the previous operations. Finally a nozzle is moved into position and the void is filled with expanding foam.

Boeing says it takes up to four hours for a human to perform this same repair. Frankly, that seems a little crazy to us. But then again if we were the ones tasked with repairing a structural panel for a communications satellite or aircraft worth hundreds of millions of dollars, we’d probably take our time too. The video is obviously sped up so it’s hard to say exactly how long this automated process takes, but it doesn’t seem like it could be much more than a few minutes from start to finish.

We often like to say that if something is worth doing, then it’s worth overdoing. This automatic cat feeder built by [krizzli] is a perfect example of the principle. It packs in far more sensors and functions than its simple and sleek outward appearance might suggest, to the point that we think this build might just set the standard for future projects.

The defining feature of the project is a load cell located under the bowl, which allows the device to accurately measure out how much feed is being dispensed by weight. This allows the feeder to do things such as detect jams or send an alert once it runs out of food, as well as easily adjust how much is dispensed according to the animal’s dietary needs. To prevent any curious paws from getting into the machine while it’s doling out the food, the lid will automatically open and close during the filling process, complete with optical sensors to confirm that it moved as expected.

All of the major components of the feeder were printed out on a Prusa i3 MK3S, and [krizzli] says that the feed hopper can be scaled vertically if necessary. Though at the current size, it’s already packing around a week’s worth of food. Of course, this does depend on the particular feline you’re dealing with.

In terms of electronics, the feeder’s primary control comes from an ESP8266 (specifically, the Wemos D1 Mini), though [krizzli] also has a Arduino Pro Mini onboard so there’s a few more GPIO pins to play with. The food is dispensed with a NEMA 17, and a 28-BYJ48 stepper is in charge of moving the lid. A small OLED on the side of the feeder gives some basic information like the time until the next feeding and the dispensed weight, but there’s also a simple API that lets you talk to the device over the network. Being online also means the feeder can pull the time from NTP, so kitty’s mealtime will always be on the dot.

Over the years we’ve seen an incredible array of automatic cat feeders, some of which featuring the sort of in-depth metrics possible when you’ve got on onboard scale. But we can’t help but be impressed with how normal this build looks. If nothing else, of all the feeders we’ve seen, this one is probably the most likely to get cloned and sold commercially. They say it’s the most sincere form of flattery.

Do you like plants, but not so much the tending to and watering them? If that sounds like you, then you might be interested in your own CNC plant growing machine. The system—created by 15-year-old maker “daily3dprinting”— is controlled by an Arduino Uno, and uses a single stepper motor to pull a watering head into position based on hygrometer readings.

A relay is used to turn the grow light on at 6am and off at 8pm, and another to activate the unit’s water pump. A third relay is employed to power off the L298N stepper driver when not needed. 

The project took home second place in the math and engineering category at daily3dprinting’s high school science fair, and more info on the build is available in its write-up here.

Earlier this year, Distrelec launched an Automation & Robotics Contest that invited our community to help advance Industry 4.0 leveraging the Arduino ecosystem. Submissions were required to use Arduino hardware—ranging from WiFi (MKR1000 and Yún Rev2) to GSM/narrowband (MKR FOX 1200, MKR WAN 1300, and MKR GSM 1400) to feature-rich boards like the popular Mega and Due—along with Arduino Create to set up, control, and connect their devices.

Fast forward five months and the winning entries have now been selected, with the top project receiving a Keithley DMM6500 Bench Top Multimeter and a trip to Maker Faire Rome to showcase their work. Other prizes included a Weller WT1010 Set (2nd place) and Grove Starter Kits for Arduino (3rd-10th).

So without further ado, let’s take a look at the winners!

1st Place: Arduino Data Glasses for My Multimeter

2nd Place: Industrial Line Follower for Supplying Materials

Runner-Up: Accessibility Controls for Droids

Runner-Up: Skating Robot  

Runner-Up: Autonomous Home Assistant Robot

Runner-Up: Object Avoiding FSM Robot Arm

Runner-Up: Automatic Monorail Control

Runner-Up: Smart Crops: Implementing IoT in Conventional Agriculture

Runner-Up: Building a Sensor Network for an 18th Century Gristmill

Runner-Up: Robot Arm Controlled Through Ethernet

Congratulations to everyone! Be sure to also check out the contest page to browse through several other projects, such as an IoT platform for vehicles, a universal CNC machine, a gesture-controlled robotic arm, and more!

One of the biggest advantages of e-readers such as the Kindle is the fact that it doesn’t weigh as much as a traditional hardcover book, much less the thousands of books it can hold in digital form. Which is especially nice if you drop the thing on your face while reading in bed. But as light and easy to use as the Kindle is, you still need to hold it in your hands and interact with it like some kind of a baby’s toy.

Looking for a way to operate the Kindle without having to go through the exhaustive effort of raising their hand, [abm513] designed and built a clip-on device that makes using Amazon’s e-reader even easier. At the press of a button, the device knocks on the edge of the screen which advances the book to the next page. Going back a page will still require you to extend your meaty digit, but that’s your own fault for standing in the way of progress.

The 3D printed case holds an Arduino and RF receiver, as well as a small servo to power the karate-chop action. There’s no battery inside, meaning the device needs to stay plugged in via a micro USB connection on the back of the case. But let’s be honest: if you’re the kind of person who has a remote-controlled Kindle, you probably aren’t leaving the house anytime soon.

To fool the Kindle into thinking a human finger is tapping the screen, the page turner’s arm has a stylus tip on the end. A channel is designed into the 3D printed arm for a wire to run from the tip to the Arduino’s ground, which triggers the capacitive screen to register a touch.

All joking aside, the idea holds promise as an assistive technology for individuals who are unable to lift an e-reader or operate its touch screen controls. With the Kindle held up in a mount, and this device clipped onto the side, anyone who can push a button (or trigger the device in whatever method they are physically capable) can read a book on their own. A simple pleasure that can come as a huge comfort to a person who may usually be dependent on others.

In the past we’ve seen physical buttons printed for touch screens, and an Arduino used to control a touch screen device. But this particular combination of physical and electrical interaction is certainly a unique way to tackle the problem without modifying the target device.

Here at Hackaday we are big fans of the TV show, “How It’s Made”. It’s not much of a stretch to assume that, as somebody who is currently reading this site, you’ve probably seen it yourself. While it’s always interesting to see the behind the scenes process to create everyday products, one of the most fascinating aspects of the show is seeing how hard it is to make things. Seriously, it’s enough to make you wonder how companies are turning a profit on some of these products when you see just how much technology and manual work is required to produce them.

That’s precisely the feeling we got when browsing through this absolutely incredible overview of how [HDC3] makes his maple syrup. If that’s not a sentence you ever thought you’d see on Hackaday, you aren’t alone. But this isn’t a rusty old pail hanging off of a tap, this is a high-tech automated system that’s capable of draining 100’s of gallons of sap from whole groves of trees. We’ll never look at a bottle of syrup in the store the same away again.

It all starts with hundreds of tiny taps that are drilled into the trees and connected to a network of flexible hoses. The plumbing arrangement is so complex that, in certain, areas high tension support wires are necessary to hold up the weight of the hoses and their sweet contents. The main hose leads to an Arduino-powered collection station which maintains a 100 kPa (29 inHg) vacuum throughout the entire system.

The sap is temporarily held in a 250 gallon container, but at this point it’s still just that: sap. It needs to be refined into something suitable for putting on your pancakes. The first step of that process utilizes a reverse osmosis filtration system to pull the water out of the sap and increase its sugar concentration. [HDC3] says the filtration system is built from eBay scores and parts from the home improvement store, and it certainly looks the part of something that would be under a kitchen sink. This system is able to increase the sugar concentration of the sap from around 2% as it comes out of the trees to 8%. But it’s still a far way off from being ready to use.

Interestingly enough, the last steps of the process are about as old-school as they come. The semi-concentrated sap is placed in a long low metal pan, and heated over a wood fire to drive off more of the water. This process continues until the sap is roughly 60% sugar, at which point it is filtered and moved into the house to finish boiling on the stove.

All told, the syrup is boiled for eight hours to bring its sugar content up to 66%. Even with the improvements [HDC3] has made to the system, he reveals that all this hard work only results in slightly more than a half-gallon of final syrup. Talk about dedication.

It probably comes as no surprise that this is the first time Hackaday has ever run a story about producing maple syrup. However we’ve seen a number of automated beer brewing systems that seem to have been tackled with similar zeal. There’s probably a conclusion to be drawn there about the average hacker’s diet, but that’s a bit outside our wheelhouse.

[via /r/DIY]


  • Newsletter

    Sign up for the PlanetArduino Newsletter, which delivers the most popular articles via e-mail to your inbox every week. Just fill in the information below and submit.

  • Like Us on Facebook