Posts | Comments

Planet Arduino

Archive for the ‘arduino pro micro’ Category

There’s this whole class of vertically scrolling rhythm games that take both hands and look really fun to play, albeit hard on the joints. You can buy specialized controllers for them, but they’re ridiculously expensive for what they are — just a handful of switches and two knobs. It’s exactly the kind of thing you should build to your taste for far less money.

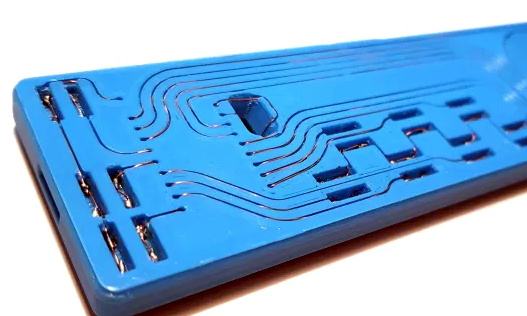
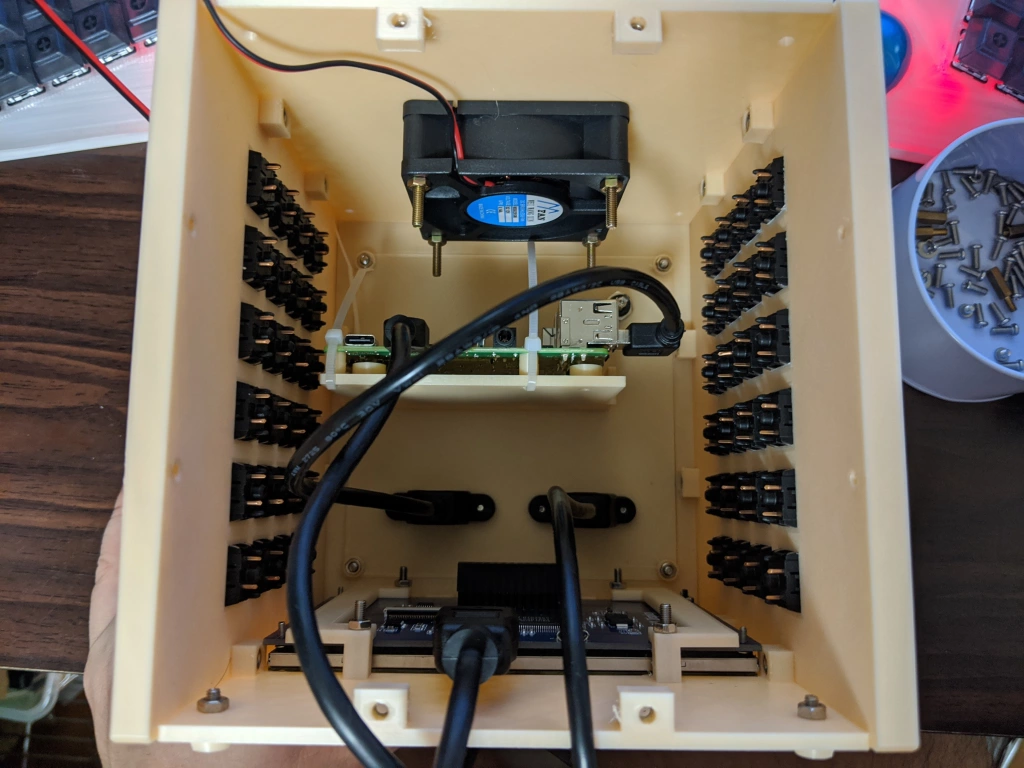
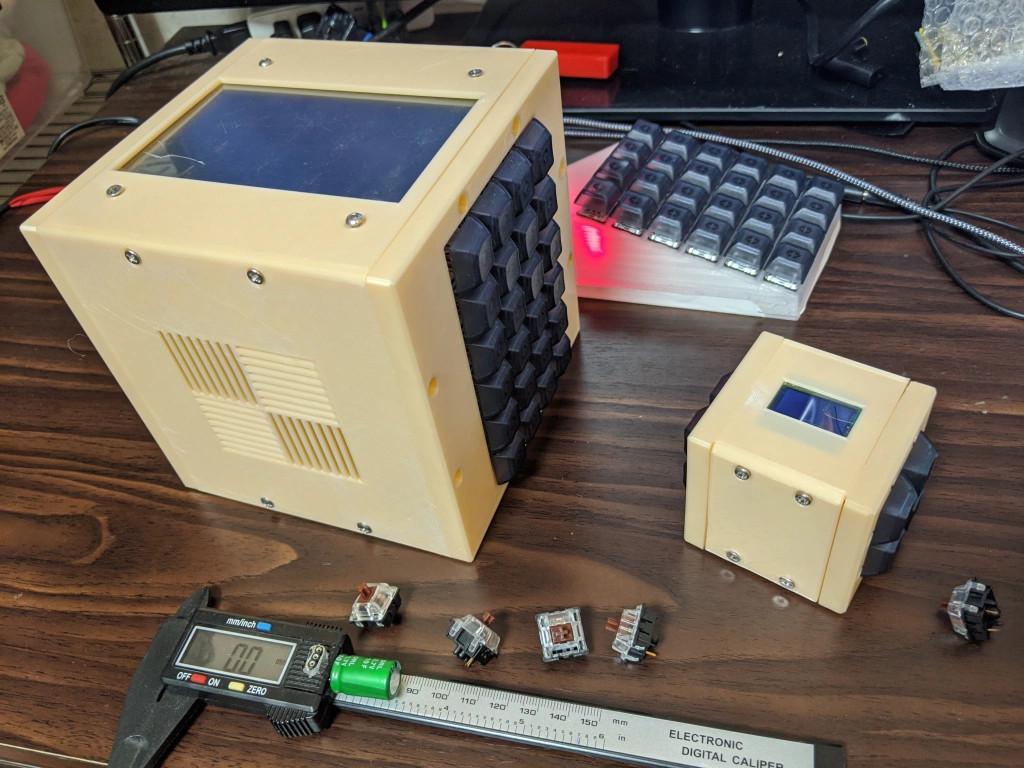
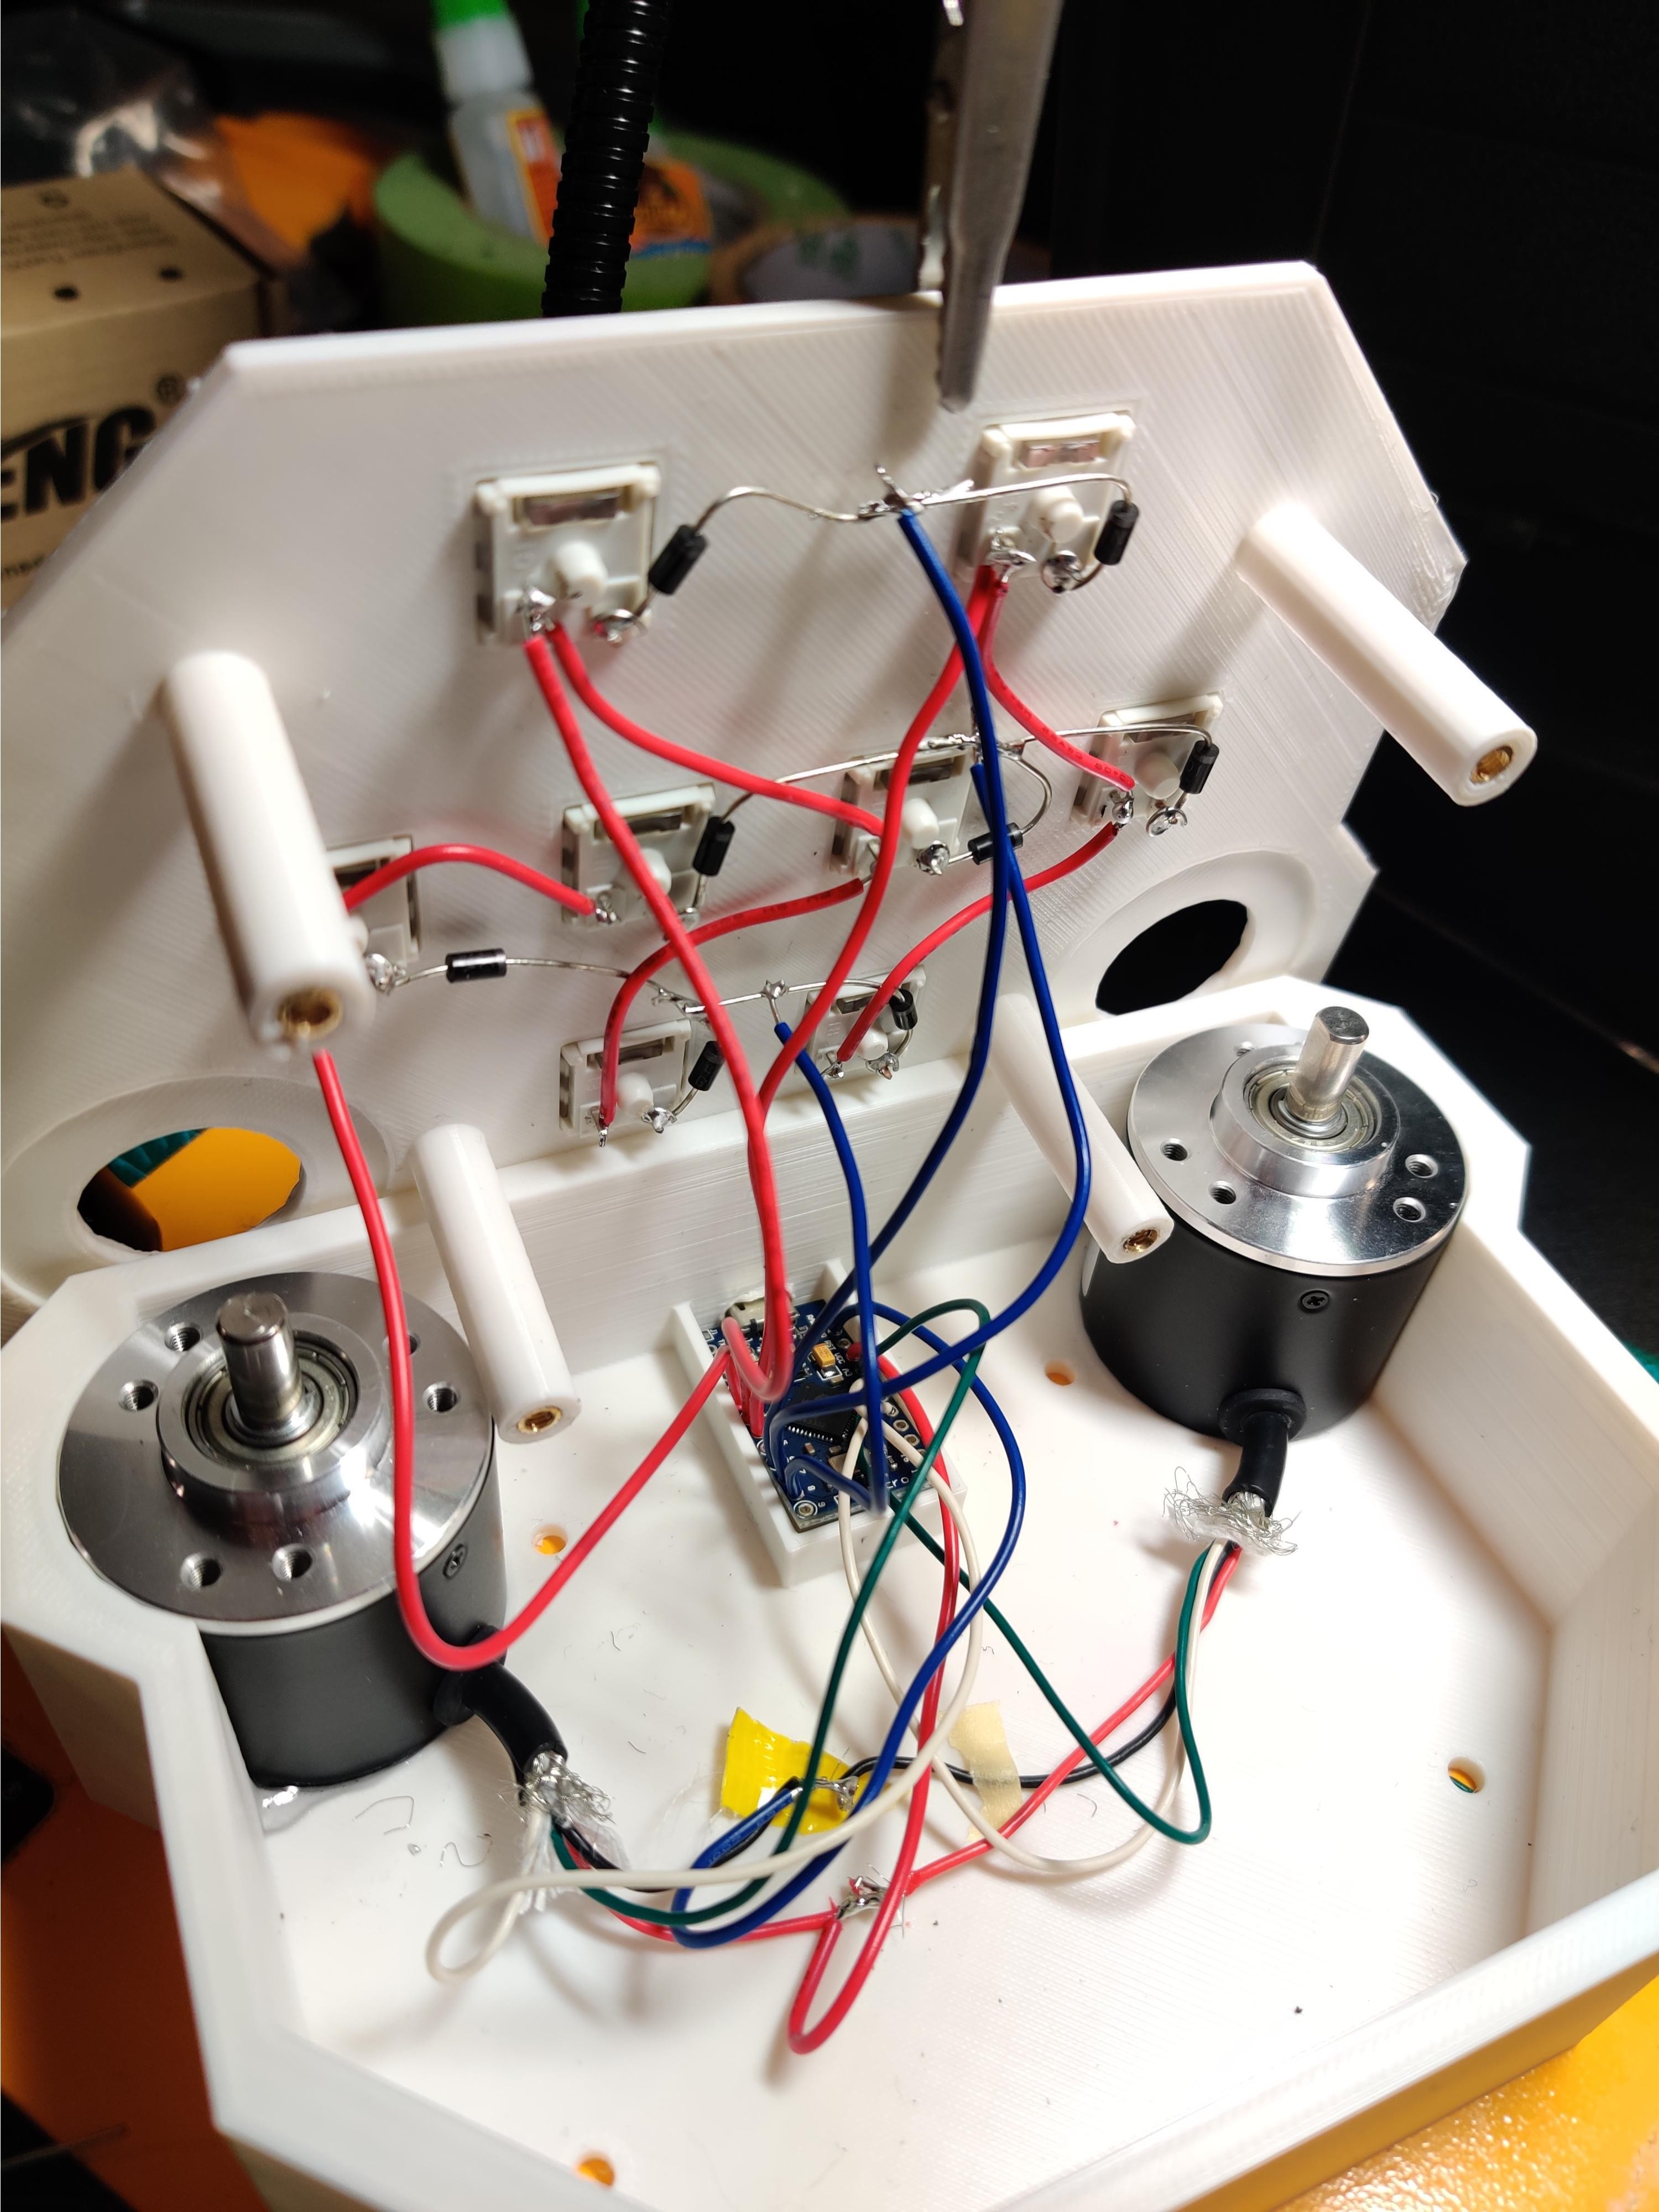
Inspired by a pocket version of the Voltex controller that is also pretty darned expensive, [OmniSaiRen] set out to make their own on the cheap by building an awesome little macro keyboard that’s smaller and easier to use than the specialized controller. Inside there’s an Arduino Pro Micro taking input from eight Cherry MX switches and two optical encoders. The game treats the encoders as vertical and horizontal mouse movements, so [OmniSaiRen]’s code scans the encoders for their positions.

[OmniSaiRen] wrote their own matrix code and says it’s ugly, but it works well enough to play the game. What more can you ask for? A cool sticker to go on the top? Done. It’s too cold outside to paint, anyway. If it’s a one-handed game pad you need, check out this sweet little thing.

Via r/duino

Have you ever wanted to experiment with MIDI, but didn’t know where to start? Or perhaps you didn’t think you could afford to properly outfit your digital beat laboratory, especially given the average hacker’s penchant for blinkenlights? Well worry no more, as [Johan von Konow] has unveiled a collection of DIY MIDI devices that anyone with a 3D printer can build on the cheap.

The LEET modular synthesizer is made up of a keyboard, drum pad, chord keyboard, arpeggiator and a step sequencer that plug into your computer and interface with industry standard digital audio workstation (DAW) programs. The down side is that they don’t do anything on their own, but this simplification allowed [Johan] to really streamline the design and bring the cost of the build down to the bare minimum.

Integrated wire channels mean no PCB is required.

You don’t need to build all the components either, especially if you’re just testing the waters. The keyboard is a great starting point, and even if you have to buy all the components new from eBay, [Johan] says it shouldn’t cost you more than $10 USD to build. You just need an Arduino Pro Micro, some tact switches, and a section of WS2812 RGB LED strip. There’s an excellent chance you’ve already got some of that in the parts bin, which will make it even cheaper.

There is one missing element though: the PCB. But not because you have to source it yourself. Like his clever Arduboy clone we covered earlier in the year, the 3D printed bodies for all of the LEET devices have integrated wiring channels that serve as a stand-in for a traditional circuit board. Simply place all your components, push some stiff 0.3 mm diameter wire down into the channels, and solder the ends. It’s a very neat approach, and something we could see becoming more popular as desktop 3D printers become an increasingly common sight in the home workshop.

Does it seem like everyone you game against can do everything faster than you? Chances are good that they have some kind of dedicated game pad or macro pad with a bunch of custom shortcuts. If you can’t beat ’em, join ’em, but why buy one when you can build your own? [lordofthedum] did the smart thing when they built their own version of the Azeron game pad, which is an outrageously expensive but ergonomic and cool-looking macro pad that reminds us of the DataHand ergonomic keyboard.

Each finger hovers over a C-shaped group of three switches — one actuates by moving the finger forward, another by moving backward, and the third by pushing down like a regular button. The thumb gets a 4-way joystick. All of these inputs are wired up to an Arduino Pro Micro, which has sort of become the standard for DIY macro pads and keyboards. We think this looks fantastic, and really raises the bar for DIY macro pads.

Need a few more keys, but still want a thumb joystick? Check out the smooth and sweet Sherbet game pad.

Oh, sure, there have been a few cube-shaped PCs over the years, like the G4 and the NeXT cube. But can they really be called cubes when the display and the inputs were all external? We think not.

[ikeji] doesn’t think so either, and has created a cube PC that puts them all to shame. Every input and output is within the cube, including our favorite part — the 48-key ortholinear keyboard, which covers two sides of the cube and must be typed on vertically. (If you’ve ever had wrist pain from typing, you’ll understand why anyone would want to do that.) You can see a gif of [ikeji] typing on it after the break.

Inside the 3D printed cube is a Raspberry Pi 4 and a 5″ LCD. There’s also an Arduino Pro Micro for the keyboard matrix, which is really two 4×6 matrices — one for each half. There’s a 6cm fan to keep things cool, and one panel is devoted to a grille for heat output. Another panel is devoted to vertically mounting the microcontrollers and extending the USB ports.

Don’t type on me or my son ever again.

When we first looked at this project, we thought the tiny cube was a companion macro pad that could be stored inside the main cube. It’s really a test cube for trying everything out, which we think is a great idea and does not preclude its use as a macro pad one of these days. [ikeji] already has plenty of plans for the future, like cassette support, an internal printer, and a battery, among other things. We can’t wait to see the next iteration.

We love a good cyberdeck around here, and it’s interesting to see all the things people are using them for. Here’s a cyberduck that quacks in Python and CircuitPython.

[Adam Welch] has built macro pads in the past out of pre-fab key matrices and handfuls of Cherry MX clones. But all the stickers and custom keycaps in the world wouldn’t make those macro pads as versatile as a stream deck — those visual shortcut panels with tiny touchscreens for each button that some streamers use to change A/V settings or switch between applications.

Let’s face it, stream decks are expensive. But 0.96″ OLED displays are not, and neither are SMD tactile buttons. Why not imitate a screen deck on the cheap by making it so the screens actuate buttons behind them? [Adam] based this baby on the clever design of [Kilian Gosewisch]’s FreeDeck, and they ended up working together to improve it with a dedicated PCB.

The brains of the operation is an Arduino Pro Micro, which addresses each screen individually via two 74HC4051 mux ICs. Thanks to an SD card module, there’s no need to flash the ‘duino every time you want to change a shortcut or its picture. Even if this deck doesn’t hold up forever, it won’t break the bank to build another one. Poke past the break for the build video, which has all the links you’d need to make your own, including a handy configurator.

There’s more than one way to do a visual macro pad. Here’s one that uses a single screen and splits it Brady Bunch style to match the matrix.

Thanks for the tip, [arturo182]!

[FabroLabs Technologies] is an industrial designer who uses several creative-type software programs in a given day. Unfortunately, they all have slightly different shortcut schemes, and trying to remember all the different modifiers is a waste of time better spent elsewhere.

This lovely little macro keyboard is every bit as useful as it is cool looking. Spinning the rotary encoder cycles through a menu of programs on the 16×2 LCD, and the key map just updates automatically for the chosen program. At the heart of this build is an Arduino Pro Micro and 20 of the loudest key switches ever made — Cherry MX blues. We like that it manages to look like toy cash register and a serious peripheral all at once — it probably has something to do with those way-cool circular keycaps that were made on a resin printer.

We’re glad that [FabroLabs] laid down such a comprehensive and open build guide during the process of making this macro keyboard. The average hacker can learn a lot from industrial designers who show their work. Remember the time [Eric Strebel] showed us all how to improve our foam board design game?

Sometimes you might want to browse your favorite social media site while eating a sandwitch, or throwing darts, or fending off an attacker with a sword. You know, normal things that might occupy only one of your hands. If you’ve ever found yourself in such a situation, then this custom Reddit keyboard could be for you.

Built by [jangxx], this little board is about as simple as it gets. Even if you aren’t looking for a way to browse /r/cooking while practicing your single-handed egg cracking technique, the same principles could be used to quickly throw together a macro keyboard for whatever your particular needs might be.

Inside the 3D printed enclosure is nothing more exotic than an Arduino Pro Micro and five Cherry MX Red switches. The switches have been wired directly to the GPIO pins on the Arduino, and a simple Sketch takes care of the rest. [jangxx] has written the code in such a way that you can easily define the mapping of USB HID keys to physical switches right at the top of the file, making it easy to reuse for your own purposes.

As simple as this project is, we really like the trouble that [jangxx] went through on the 3D printed key caps. The white up and down arrows allow you to navigate through the posts, and the center key selects the one you want to view. Since it’s for Reddit, naturally the red and blue buttons for rapid voting. When you want to go back to the list of posts, just hit the center button again.

Back in 2011 we saw a dedicated Reddit voting peripheral, but we think the addition of simple navigation keys makes this project a bit more compelling. Incidentally, if you can think of any other reason you might want a one-handed keyboard for browsing Reddit…we definitely don’t want to hear about it.

[Elite Worm] wrote in to tell us about a cool little keyboard designed to make playing a certain game a whole lot easier. One of the ways you can move your character is with the numpad in directional mode plus Control and Shift, but those are too far apart to drive blindly with one hand. This is all the motivation [Elite Worm] needed to build a custom keyboard with only the essentials.

The keyboard is controlled by an Arduino Pro Micro, which is fairly standard for this type of build — it’s usually that or a Teensy. [Elite Worm] used Cherry MX browns for a nice tactile feel, and added LEDs for a purple-white under-glow. We love the way the printed keycaps turned out, and are impressed because tolerances are notoriously tight for those fruity switch stems.

Starting to think of a few uses for a small custom keypad? This thing is wide open, and [Elite Worm] will even send you the PCB files if you ask nicely. See if you can get past the break without your mouse, and check out the build video while you wait.

Want more flexibility? Just use more switches!

Media keyboards are nice in theory. But in practice they never have all the keys you want, and they almost always have a few you don’t. Sure, you could maybe reassign the ones you don’t use, but then the caps are wrong, and it’s a whole thing. So really, the only winning move is to make a micro macro keyboard as [littleSilvr] did to make all your shortcuts one-button accessible.

This lovely input has an Arduino Pro Micro for a brain, and Gateron browns for brawn. That knob there is a rotary encoder, not a potentiometer, because endless volume knob twiddling is just so much nicer. In case you’re wondering, those shortcuts open Fusion 360 and Cura, but we’re still not sure what the hyphen does.

Can we talk about those keycaps, though? [littleSilvr] used [Make Anything]’s process of of printing in multi-color with a single extruder. The technique involves building a vector for each color, each of which gets its own STL file. Then you add retraction as you go up through the layers, slow the print speed, change filament colors while the nozzle and bed are still warm, and voila, a vibrant canvas of colors.

If you don’t have a printer and you don’t mind a bit of compromise on the number of inputs, try basing your build on an existing input, like an old rotary telephone dialer.

Via r/duino

USB-C versus USB Micro connectors are turning into one of the holy wars of our time. Rather than be left on the wrong side of the divide [Stefan S] has come up with his own USB-C version of of an Arduino Pro Micro to avoid having to always find a different cable.

Home made Arduinos come in all shapes and sizes from the conventional to the adventurous, and from the pictures it seems that this one is firmly in the former camp. The USB-C is present in connector form alone as the device is only capable of talking at the much slower speed of the ATMEGA32U4 processor, but having the newer connector should at least make cabling more accessible.

This is one of the most practical Arduino clones we’ve ever seen, but one of our other favourites is also a bit impractical.


  • Newsletter

    Sign up for the PlanetArduino Newsletter, which delivers the most popular articles via e-mail to your inbox every week. Just fill in the information below and submit.

  • Like Us on Facebook