Posts | Comments

Planet Arduino

Archive for the ‘3d Printer hacks’ Category

With how cheap they’re getting, everyone seems to be jumping on the resin printer bandwagon. They may not be able to fully replace your trusty old FDM printer, but for certain jobs, they just can’t be beaten. Sadly though, creating those smooth time-lapse videos of your prints isn’t quite as easy to do as it is on their filament-based counterparts.

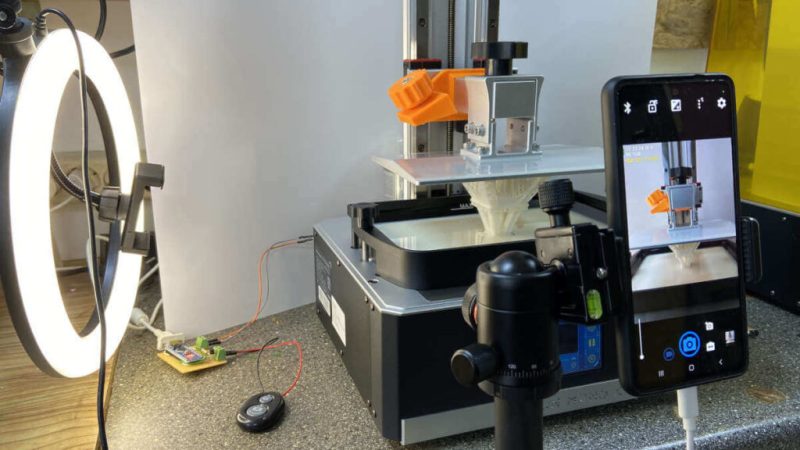
Not as easy, perhaps, but not impossible. [Fraens] found a way to make time-lapses on any resin printer, and in a wonderfully hacky way. First, you need to find a smartphone, which shouldn’t be too hard, given how often we all tend to upgrade. [Fraens] recommends replacing the standard camera app on the phone with Open Camera, to prevent it from closing during the long intervals with nothing happening. The camera is triggered by any readily available Bluetooth dongle, which is connected via a simple transistor circuit to an Arduino output. To trigger the shutter, a light-dependent resistor (LDR) is connected to one of the microcontroller’s inputs. The LDR is placed inside the bed of the resin printer — an Anycubic Photon in this case — where light from the UV panel used to cross-link the resin can fall on it. A simple bit of Arduino code triggers the Bluetooth dongle at the right moment, capturing a series of stills which are later stitched together using DaVinci Resolve.

The short video below shows the results, which look pretty good to us. There are other ways to do this, of course, but we find the simplicity of this method pleasing.


[Bytewelder] fondly remembers the Palm III and Sharp HC-4500, so taking on the design of Decktility, a custom handheld cyberdeck , was a natural next step. The blog post goes into much detail about the design decisions and challenges throughout the project. The end result, though, looks great.

The device uses a Raspberry Pi CM4 and an IPS touchscreen. The bulk of the design work was to get the power system working. There is a custom FET board and an Arduino that manages charging and battery state.

The 3D-printed case is compact, and the whole thing weighs about 375 grams. You can replace the batteries after their 6-hour stint or charge them in situ via USB-C.

The battery charger is of particular interest. [Bytewelder] wanted to integrate power management but didn’t want to write custom Linux drivers. The solution was simple: have the Arduino emulate an existing power management device with Linux driver support. In this case, the power management system looks to the Raspberry Pi like an LTC294x device, so the normal Linux OS knows how to handle it.

If you are really worried about batteries, you can swap processing power for battery life. This build reminds us of some of the organizers that were popular once upon a time. We have a soft spot for decks that look like retro computers or even if they could have been.

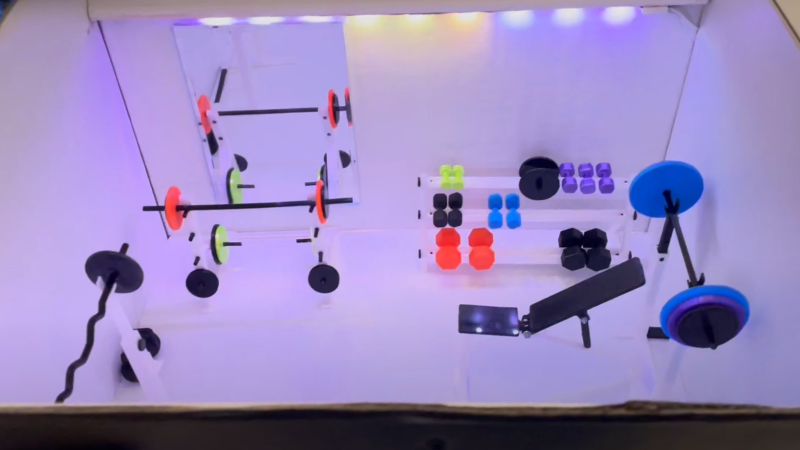
3d printed tiny gym in a box with mirror and led strip lighting

[Duncan McIntyre] lives in the UK but participated in a secret Santa gift exchange for his Dutch friends’ Sinterklaas celebration. In traditional maker fashion, [Duncan] went overboard and created a miniature gym gift box, complete with flashing lights, music and a motorized lid.

[Duncan] used [TanyaAkinora]’s 3D printed tiny gym to outfit the box with tiny equipment, with a tiny mirror added to round out the tiny room. An ATmega328P was used as the main microcontroller to drive the MP3 player module and A4988 stepper motor controller. The stepper motor was attached to a drawer slide via a GT2 timing belt and pulley to actuate the lid. Power is provided through an 18V, 2A power supply with an LM7805 providing power to the ATmega328P and supporting logical elements. As an extra flourish, [Duncan] added some hardware audio signal peak detection, fed from the speaker output, which was then sampled by the ATmega328P to be able to flash the lights in time with the playing music. A micro switch detects when the front miniature door is opened to begin the sequence of lights, song and lid opening.

[Duncan] provides source on GitHub for those curious about the Arduino code and schematics. We’re fans of miniature pieces of ephemera and we’ve featured projects ranging from tiny 3D printed tiny escalators to tiny arcade cabinets.

Video after the break!

While the price of 3D printers has come down quite a lot in the past few years, filament continues to be rather pricey especially for those doing a lot of printing. This has led to some people looking to alternatives for standard filament, including recycling various forms of plastic. We’ve seen plenty of builds using various materials, but none so far have had this level of quality control in the final project.

What sets this machine apart from others is that it’s built around an Arduino Nano and includes controls that allow the user to fine-tune a PID controller during the conversion of the recycled plastic into filament. Different plastic bottles have different material qualities, so once the machine is started it can be adjusted to ensure that the filament produced has the exact specifications for the printer. The PCB is available for download, and the only thing that needs to be done by hand besides feeding the machine to start it is to cut the plastic into strips for the starter spool. There is also a separate 3D printed tool available to make this task easy, though.

Not only could this project save printing costs, but it also keeps harmful plastics out of landfills and other environments. Recycling plastic tends to be quite difficult since producing new plastic is incredibly cheap, and the recycled material can’t be used as often as other materials such as aluminum. But there are still plenty of people out there trying to reuse as much of it as they can.

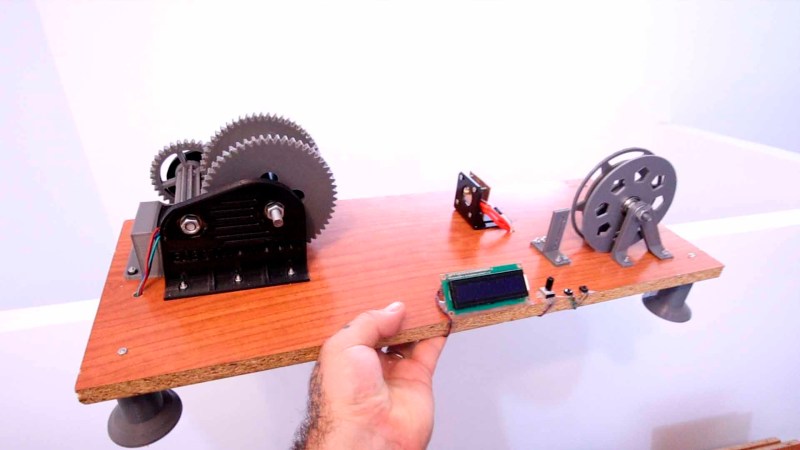
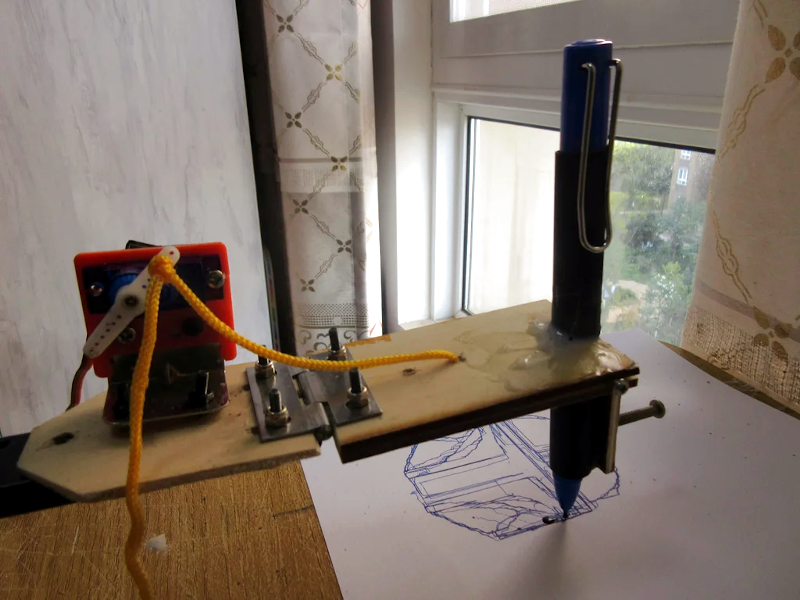
Although the widespread use of 3D printers has made things like linear bearings and leadscrews more common, you still can’t run down to your local big-box hardware store and get them. However, you can get drawer slides and any hobby shop can sell you some RC servos. That and an Arduino can make a simple and easy plotter. Just ask [JimRD]. You can also watch it do its thing in the video below.

Of course, servos aren’t usually what you use in a plotter. But the slides convert the rotation of the servo into linear motion. One servo for X and one for Y is all you need. Another microservo lifts the pen up and down using a hinge you could also get from a hardware store.

Is it pretty? No. Does it do amazing artwork? No, again. But it is the kind of thing you could probably throw together from things you happen to have hanging around, especially if you are about to trash an old desk or cabinet with slides in it.

This would make a great rainy day project. We are suckers for simple plotter projects even though you could just mate a pen to your 3D printer or CNC machine. Those won’t fit your whiteboard, though.

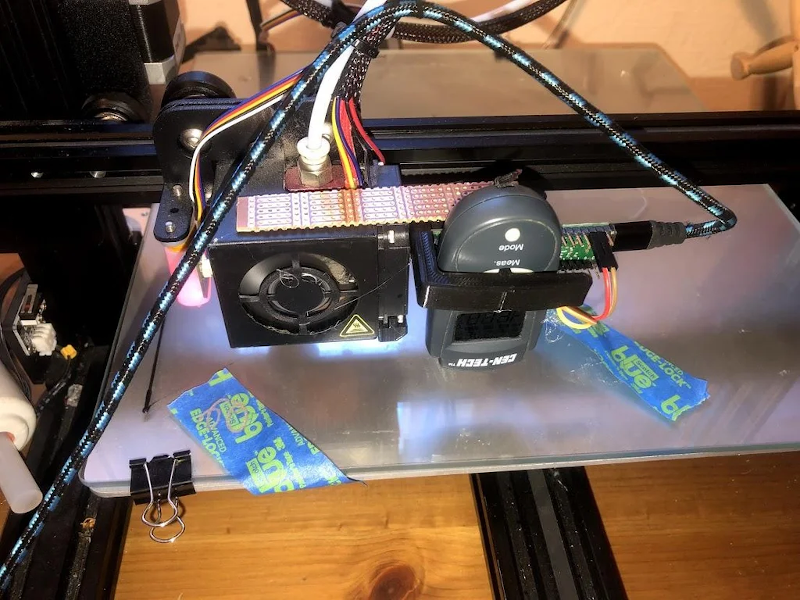
Don’t blame us for the title. [CCrome] admits it may well be the cheapest and worst IR camera available. The concept is surprisingly simple. Mount a cheap Harbor Freight non-contact thermometer on a 3D printer carriage and use it to scan the target. The design files are available on GitHub.

There is, of course, an Arduino to grab the data and send it to the PC. Some Python code takes care of converting it into an image.

Perhaps you don’t need a camera, but having a way to communicate with an $11 IR temperature sensor might come in handy someday. You do have to mash the measurement button down, so [CCrome] used the 3D printer to make a clamp for the button that also holds the POGO pins to the PCB. We would have been tempted to solder across the switch and also solder the wires to the pad. But, then again, you need a 3D printer for the project anyway.

Don’t expect the results you would get from a real thermal sensor. If you want that, you may have to build it yourself or open your wallet wide. If you need some inspiration for a use case, look at the thermal camera contest from a few years back.

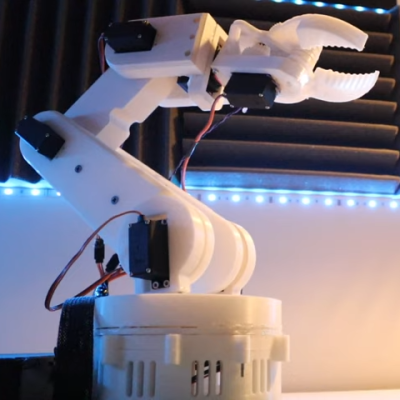
Ever wanted your own gesture-controlled robot arm? [EbenKouao]’s DIY Arduino Robot Arm project covers all the bases involved, but even if a robot arm isn’t your jam, his project has plenty to learn from. Every part is carefully explained, complete with source code and a list of required hardware. This approach to documenting a project is great because it not only makes it easy to replicate the results, but it makes it simple to remix, modify, and reuse separate pieces as a reference for other work.

[EbenKouao] uses a 3D-printable robotic gripper, base, and arm design as the foundation of his build. Hobby servos and a single NEMA 17 stepper take care of the moving, and the wiring and motor driving is all carefully explained. Gesture control is done by wearing an articulated glove upon which is mounted flex sensors and MPU6050 accelerometers. These sensors detect the wearer’s movements and turn them into motion commands, which in turn get sent wirelessly from the glove to the robotic arm with HC-05 Bluetooth modules. We really dig [EbenKouao]’s idea of mounting the glove sensors to this slick 3D-printed articulated gauntlet frame, but using a regular glove would work, too. The latest version of the Arduino code can be found on the project’s GitHub repository.

Most of the parts can be 3D printed, how every part works together is carefully explained, and all of the hardware is easily sourced online, making this a very accessible project. Check out the full tutorial video and demonstration, embedded below.

3D printing has been a boon for many projects, especially those involving robotic arms. All kinds of robotic arm projects benefit from the advantages of 3D printing, from designs that focus on utility and function, to clever mechanical designs that reduce part count in unexpected ways.

A lighthouse beams light out to make itself and its shoreline visible. [Daniel’s] lighthouse has the opposite function, using lasers to map out the area around itself. Using an Arduino and a ToF sensor, the concept is relatively simple. However, connecting to something that rotates 360 degrees is always a challenge.

The lighthouse is inexpensive — about $40 — and small. Small enough, in fact, to mount on top of a robot, which would give you great situational awareness on a robot big enough to support it. You can see the device in action in the video below.

This lighthouse uses a common solution to the rotating connection problem: a slip ring. While these are mechanical, commercial units can be relatively reliable. To route all the signals, the slip ring needs six wire capsules meaning there are six wires that logically pass through the rotating part. The drive motor spins at 60 RPM, but there are two sensors 180 degrees apart to double the scanning rate. The 3D printed housing uses PLA and looks great.

Of course, the real trick will be using all this data meaningfully in your robot or whatever is listening to the lighthouse. That, however, is a different topic. If you think two ToF sensors are good, why not try three?


[Ty Palowski] doesn’t like folding his many shirts. He saw one of those boards on TV that supposedly simplifies folding, but it does require you to manually move the board. That just won’t do, so [Ty] motorized it to create a shirt folding robot.

The board idea is nothing new, and probably many people wouldn’t mind the simple operation required, but what else are you going to do with your 3D printer but make motor mounts for a shirt folding machine. The folding board is, of course, too big for 3D printing so he made that part out of cardboard at first and then what looks like foam board.

The side “wings” were easy to manipulate, but the top fold required a little more effort. The machine still requires a manual fold at the end and, of course, you have to put the shirt on the right way for things to work out.

Honestly, we aren’t sure this is a very practical project, but we still enjoyed the idea and we can’t deny it seems to work. We don’t think there’s much torque required so we wondered if some beefy RC servos would have been just as effective and probably a lot easier to work with. Still, just about anything that could move would work. You could probably even use a spring and a solenoid to get the same effect. There’s not much build detail, but we think you could figure it out using whatever motors you happen to have on hand.

If you find laundry too time-consuming, there’s always Eleven. If you want a better folding robot, you’ll have to put in some serious work.

When it comes to cleaning your hands, [Arnov Sharma] is not messing around. He built an automatic soap dispenser using ultrasonic sensors, a stepper motor for activating the pump, and 3D printed components for housing a bottle of soap – a spectacular display of over-engineering. At least he won’t be needing to stand in line at the supermarket for motion detection soap dispensers anytime soon.

Initially, he had the idea to build the dispenser using a common servo motor-based method.  This would involve activating motors to push down on the plunger for the soap bottle to dispense soap. Instead, he for a different approach that ended up being fairly straightforward in theory, although the execution is pretty involved.

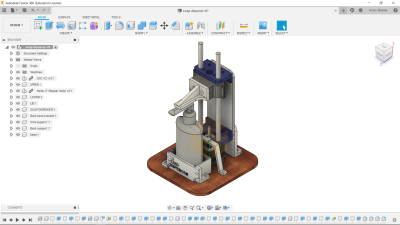
Model of the soap dispenser made in Fusion 360

He started off by 3D printing the compartment where the soap bottle would sit and the structural support for the Z-axis rail that would be pushing down on the soap bottle. It’s similar to the type of linear actuator you might find in a 3D printer or PCB mill, where a motor controls a rotating screw that moves the carriage across a belt. (We presume the linear rail came first, and the ultrasonic soap dispenser second.)

In this build, there are two additional rods added to help support the lever pressing down on the soap dispenser.


The setup is controlled by an Arduino, which triggers the movement from the linear actuator if it receives a signal from an ultrasonic sensor. He’s added the model files and Arduino code for other makers curious about building a similar project. Check out his video for the soap dispenser in action – the stepper motor definitely makes for a much more powerful plunge than you might expect.


  • Newsletter

    Sign up for the PlanetArduino Newsletter, which delivers the most popular articles via e-mail to your inbox every week. Just fill in the information below and submit.

  • Like Us on Facebook