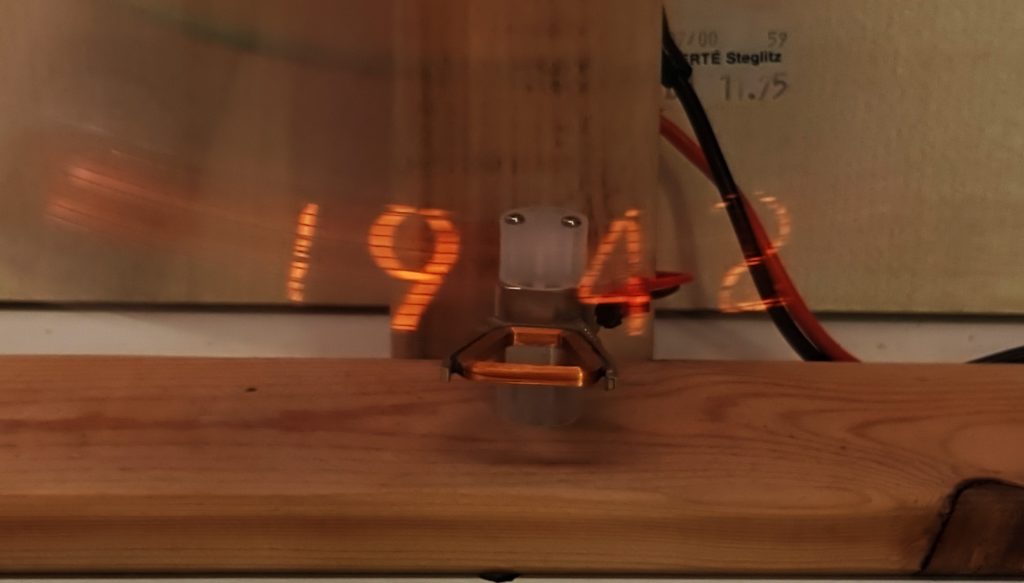
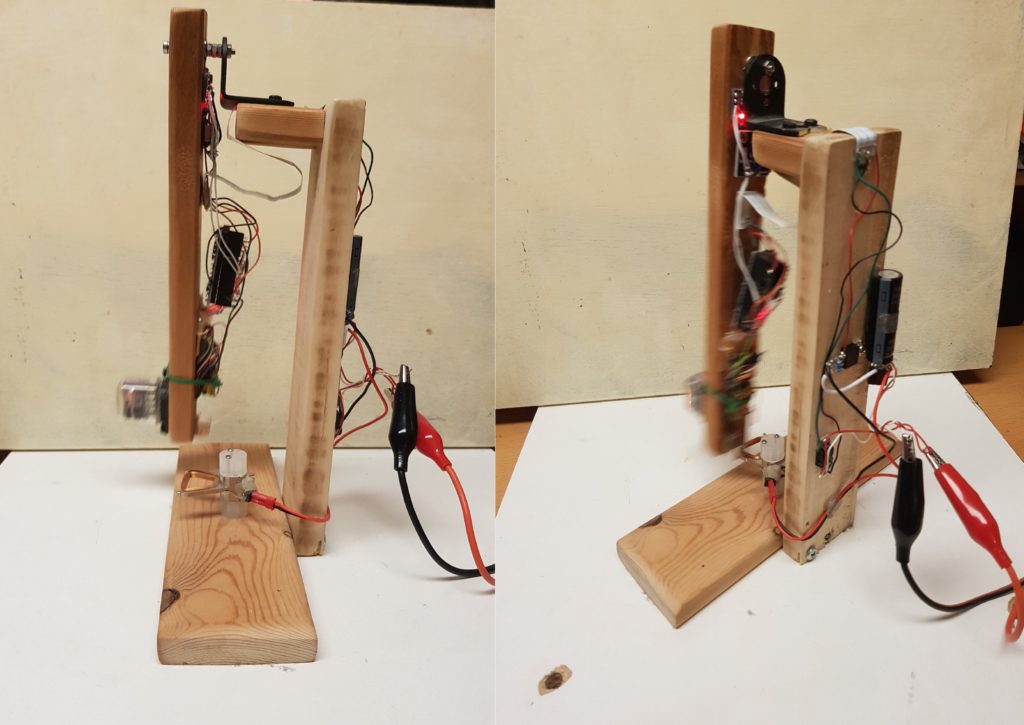
Clock pendulums are generally mechanical devices that time each second as it ticks away, but do little else. Jason Oeve’s concept, however, places the face itself – a single IN-12B Nixie tube – onto its large wooden pendulum. As it swings back and forth, four digits are progressively displayed on the tube for a unique timepiece.
An Arduino Nano is the brains of the operation, along with an RTC module and an accelerometer that senses the pendulum’s position. When it’s straight up and down, an electromagnetic coil gives it a boost, keeping it ticking along “forever.”
Once you’ve ground the beans and tamped the grounds just so, pulling the perfect shot of espresso comes down to timing. Ideally, the extraction should last 20-30 seconds, from the first dark drips to the tan and tiger-striped crema on top that gives the espresso a full aftertaste.
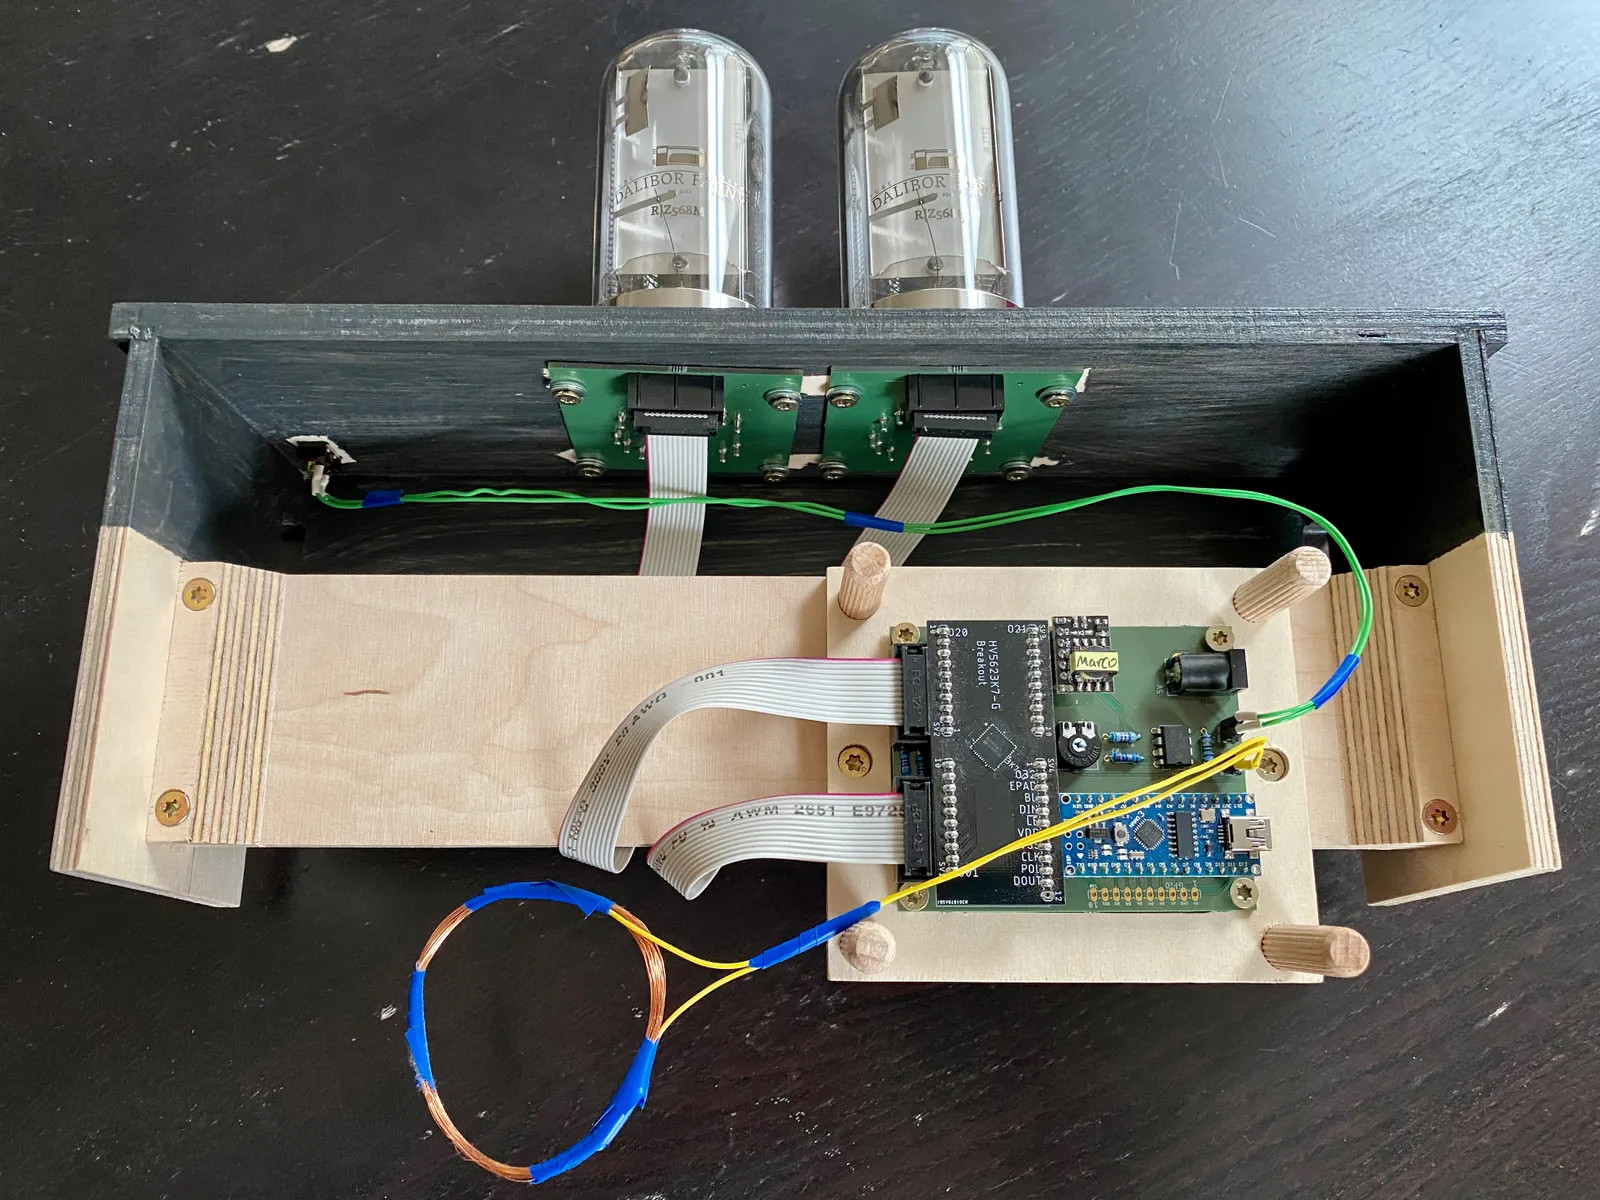
[Marco] has a beautiful espresso machine that was only missing one thing: an equally beautiful shot timer with a Nixie tube display. Instead of messing with the wiring, [Marco] took the non-invasive approach and is using a DIY coil to detect the magnetic field of the espresso machine’s pump and start a shot timer.
An LM358-based op-amp magnifies the current induced by the machine and feeds it to an Arduino Nano, which does FFT calculations. [Marco] found a high-voltage interface driver to switch 170 V to the Nixies instead of using two handfuls of transistors. Grab yourself a flat white and check it out after the break.
The renaissance of Nixie tube popularity amid the nostalgia surrounding older tech has made them almost prohibitively expensive for individual projects. Seeing an opportunity to modernize the beloved devices, [Connor Nishijima] has unleashed this new, LED edge-lit display that he has dubbed Lixie.
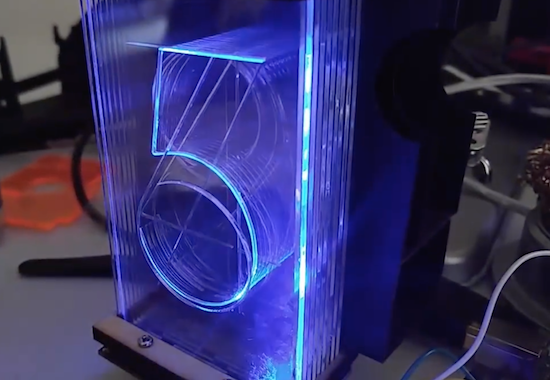
We featured his prototype a few years ago. That design used dots to make up each character but this upgrade smooths that out with sleek lines and a look one would almost expect from a professional device — or at the very least something you’d see in a cyberpunk near-future. The color-changing Neopixel LEDs — moderated by a cleverly designed filter — allow for customization to your heart’s content, and the laser-cut acrylic panes allow for larger displays to be produced with relative ease.
The image above (and the video below) show two revisions of the most recent Lixie prototypes. There is a huge improvement on the right, as the digits are now outlines instead of single strokes and engraved instead of cut completely through the acrylic. The difference if phenomenal, and in our opinion move the “back to the drawing board” effect to “ready for primetime”. [Connor] and his team are working on just that, with a Tindie preorder in place for the first production-ready digits to roll off their line.
Considering that Nixie Tubes were originally considered too expensive for mass-produced items like clocks, it’s ironic they’re seeing a revival in hobbyist projects for just that purpose. Lixie, then, may fit the purpose for those seeing a cheaper solution without sacrificing on the quality of the result. The design is fully open-source, so get to hacking!
For a suitably cyberpunk application of a Nixie tube, check out this motorcycle speedometer. Oh, and lest you think we’re duplicating ourselves, there was another edge-lit Nixie-alike project featured here just a few weeks ago. Seems good ideas come in waves.
Using a series of etched acrylic panes, the “Lixie” display can show numbers in the style of a Nixie tube.
Nixie tubes are beautiful pieces of display hardware that are no longer in production, and are becoming harder and harder to find. They also generally require relatively high DC voltages to operate, making them difficult and potentially dangerous. Connor Nishijima, however, has come up with an alternative called the Lixie.
This laser-cut item employs etched panes of acrylic to reflect the light from WS2812B LEDs as required, revealing digits 0-9. Since the LEDs are RGB, different colors can be selected as desired.
Edge-lighting panes of acrylic etched with a design has been done for decades, but they’ve always been static information like an “EXIT” sign. If you stack multiple panes of acrylic (each with a unique design) and light them individually, you can change what design the user sees! This makes edge-lighting perfect for a numeric display! And since I love the look of Nixies, we’ll emulate the typography as well. At the end of the day, what I’ve made is a beautiful over-sized numeric display using WS2812Bs and a laser cut digit assembly!
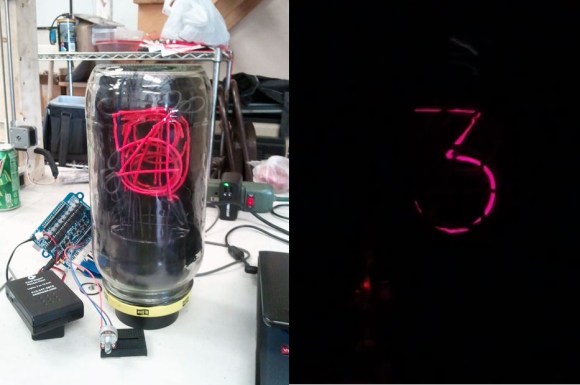
Nixie tubes are awesome, but sometimes a little out of reach for some makers, whether it is a matter of obtaining them, or figuring out how to drive them. The hackerspace over at H3 Laboratories decided to try making a fun alternative — EL wire nixie tubes.
[Marty] leads us through the build in a very detailed Instructable, which makes use of CoolNeon EL wire. He’s using an Arduino Uno with a CoolNeon shield to control it. The trickiest part of this build is forming the numbers to minimize the overlap — to figure this out he modeled it in Blender. He created a test jig and formed the numbers using coat hanger wire first before playing around with the EL wire.
EL wire can be soldered together — it’s just a bit of a fine art, which is explained in another detailed Instructable. To black out parts of the number and the trailing wires, [Marty] made use of black plastic dip. The numbers are mounted on a Styrofoam cylinder which fits into the bottom of a large masonry jar. It’s a great build and a fun project to get into Nixies … without actually getting into Nixies.
Planet Arduino is, or at the moment is wishing to become, an aggregation of public weblogs from around the world written by people who develop, play, think on Arduino platform and his son. The opinions expressed in those weblogs and hence this aggregation are those of the original authors. Entries on this page are owned by their authors. We do not edit, endorse or vouch for the contents of individual posts. For more information about Arduino please visit www.arduino.cc
You are currently browsing the archives for the nixie tube category.