09
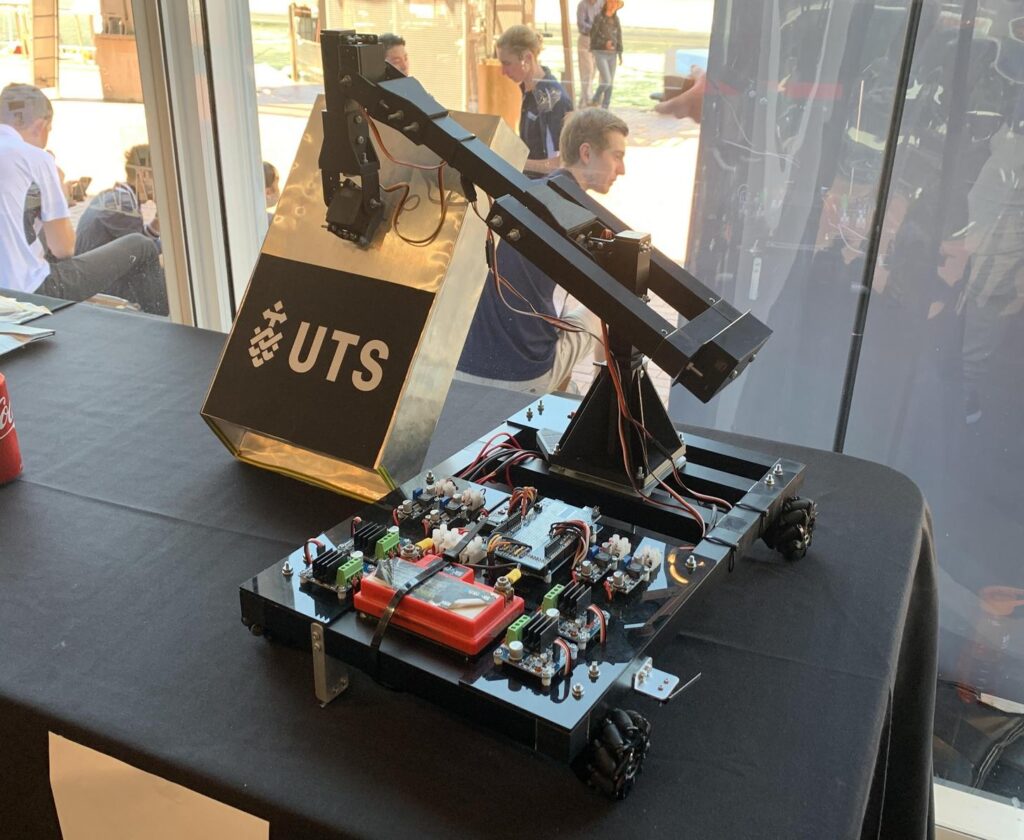
For the Warman Design and Build Competition in Sydney last month, Redditor ‘Travman_16 and team created an excellent Arduino-powered entry. The contest involved picking up 20 payloads (AKA balls) from a trough, and delivering them to a target trough several feet away in under 60 seconds.
Their autonomous project uses Mecanum wheels to move in any direction, plus a four-servo arm to collect balls in a box-like scoop made out of aluminum sheet.
An Arduino Mega controls four DC gear motors via four IBT-4 drivers, while a Nano handles the servos. As seen in the video, it pops out of the starting area, sweeps up the balls and places them in the correct area at an impressive ~15 seconds.
It manages to secure all but one ball on this run, and although that small omission was frustrating, the robot was still able to take fifth out of 19 teams.