Posts | Comments

Planet Arduino

Archive for the ‘belt’ Category

For a recent event, [MakerMan] was tasked with creating an interactive display that could move back and forth along an image of the Moscow skyline to highlight different points of interest. The end result is certainly gorgeous, but since this is Hackaday, we were more excited to see all the behind the scenes video of how it was built.

As with many of his projects, this one started with little more than scrap parts. Two metal I-beams were welded together to make a track, and a wheeled cart was fashioned to ride on it. Using a belt and pulley system that’s not unlike a scaled up version of what you might see on a desktop 3D printer, the motor in the cart is able to move the arrangement back and forth with minimal slop.
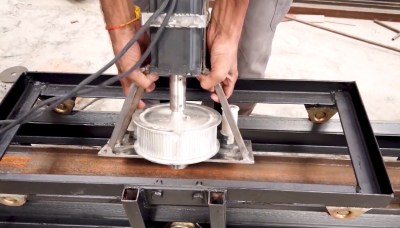
Installing the motor and pulley in the cart.

The cart actually holds all of the electronics in the project, including the power supplies, MA860H motor controller, a pair of endstop switches, and the Arduino that pulls it all together. A drag chain is used to keep the wires tight to the side of the rail without getting tangled up in anything.

[MakerMan] doesn’t explain much of the software side of this one, though we suppose he might only have been contracted to develop the hardware. But towards the end of the video you can see how the cart, now with large touch screen display mounted on top, moves back and forth when the appropriate commands are sent to the Arduino.

We’re not really sure what application such a contraption would have for the average hacker, but that doesn’t mean we can’t be jealous. There’s just something about huge illuminated screens that just speaks to us.

When teaching Industrial Automation to students, you need to give them access to the things they will encounter in industry. Most subjects can be taught using computer programs or simulators — for example topics covering PLC, DCS, SCADA or HMI. But to teach many other concepts, you  need to have the actual hardware on hand to be able to understand the basics. For example, machine vision, conveyor belts, motor speed control, safety and interlock systems, sensors and peripherals all interface with the mentioned control systems and can be better understood by having hardware to play with. The team at [Absolutelyautomation] have published several projects that aim to help with this. One of these is the DIY conveyor belt with a motor speed control and display.

This is more of an initial, proof of concept project, and there is a lot of room for improvement. The build itself is straightforward. All the parts are standard, off the shelf items — stuff you can find in any store selling 3D printer parts. A few simple tools is all that’s required to put it together. The only tricky part of the build would likely be the conveyor belt itself. [Absolutelyautomation] offers a few suggestions, mentioning old car or truck tyres and elastic resistance bands used for therapy / exercise as options.

If you plan to replicate this, a few changes would be recommended. The 8 mm rollers could do with larger “drums” over them — about an inch or two in diameter. That helps prevent belt slippage and improves tension adjustment. It ought to be easy to 3D print the add-on drums. The belt might also need support plates between the rollers to prevent sag. The speed display needs to be in linear units — feet per minute or meters per minute, rather than motor rpm. And while the electronics includes a RS-485 interface, it would help to add RS-232, RS-422 and Ethernet in the mix.

While this is a simple build, it can form the basis for a series of add-ons and extensions to help students learn more about automation and control systems. Or maybe you want a conveyor belt in your basement, for some reason.


Filed under: Arduino Hacks, hardware
Mar
18

Using Arduino Micro to make a blinking belt #ArduinoMicroMonday

arduino, Arduino micro, belt, micro Comments Off on Using Arduino Micro to make a blinking belt #ArduinoMicroMonday 

microbelt

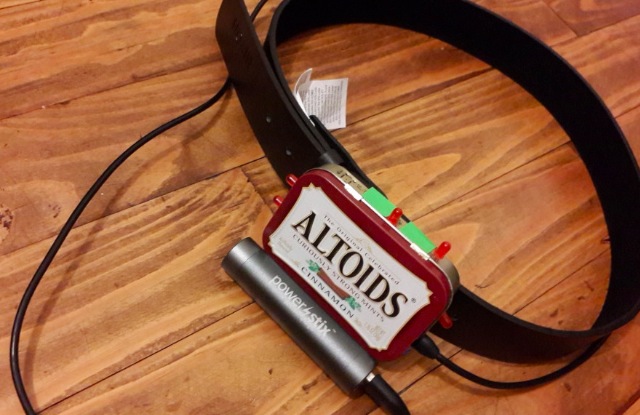
Making a blinking belt with Arduino Micro, Altoids box, LED and some code:

This project had many ups and downs, sadly ending in a down. My greatest strength caused my demise since my aesthetically pleasing container, the Altoids box, is conductor and my LEDs, connected to the side, failed to blink properly. Even though my project didnt end up exactly like I intended, I still learned a lot from this project and had a bunch of fun experimenting with my Arduino Micro.

ArduinoMicroBelt

Check the video with the belt in action:


  • Newsletter

    Sign up for the PlanetArduino Newsletter, which delivers the most popular articles via e-mail to your inbox every week. Just fill in the information below and submit.

  • Like Us on Facebook