The most fascinating project you can build is something with a bunch of blinky hypnotic LEDs, and the easiest way to build this is with a bunch of individually addressable RGB LEDs. [Ole] has a great introduction to driving RGB LED matrices using only five data pins on a microcontroller.
The one thing that is most often forgotten in a project involving gigantic matrices of RGB LEDs is how to mount them. The enclosure for these LEDs should probably be light and non-conductive. If you’re really clever, each individual LED should be in a light-proof box with a translucent cover on it. [Ole] isn’t doing that here; this matrix is just a bit of wood with some WS2812s glued down to it.
To drive the LEDs, [Ole] is using an Arduino. Even though the WS2812s are individually addressable and only one data pin is needed, [Ole] is using five individual data lines for this matrix. It works okay, and the entire setup can be changed at some point in the future. It’s still a great introduction to individually addressable LED matrices.
If you’d like to see what can be done with a whole bunch of individually addressable LEDs, here’s the FLED that will probably be at our LA meetup in two weeks. There are some crazy engineering challenges and several pounds of solder in the FLED. For the writeup on that, here you go.
By far the most desirable booth for the crowds at SXSW Create was the Sparkfun quadrant. We call it a quadrant because they had a huge footprint approaching 1/4 the tented area, but it was well used. They brought a number of staff down to Austin in order to give away a legit electronic badge project they call BadgerHack.
We love badge hacking. LOVE IT! But South-by isn’t purely a hardware conference so the badges aren’t made of PCBs (for shame). Add to that, free entry to Create scores you a wristband but no badge.
This is the answer to that, a badge giveaway and build-off aimed at kids but cool enough to make me feel only slightly awful for accepting one when I pretty much knew they were going to run out before the final day was done.
The USB stick PCB is, as you guessed it, an Arduino compatible loaded up with an FTDI chip and an ATmega328p which they call the BadgerStick. Accompanying this is a multiplexed 8×7 LED matrix board. Solder the three pin headers and the battery holder leads, connect to the plastic badge using the supplied double-stick tape, and you have a badge that scrolls a message in LEDs.
What an awesome giveaway. I really like it that they didn’t cut corners here. First off, the kids will value the badge much more because they had to actually assemble it rather than just being handed a finished widget. Secondly, there is the USB to serial chip and USB footprint that means they can reprogram it without any extra equipment. And an LED matrix… come on that’s just a gateway drug to learning Wiring. Bravo Sparkfun and Atmel for going this route with your marketing bucks.
The badge activity rounded out with some hardware interfacing. There’s a 3-pin socket that attendees could plug into 4 different stations around the booth. Once done they received a coupon code for Sparkfun that scrolls whenever the badge is booted up. For some at-home fun, the writeup (linked at the top) for the BadgerHack firmware is quite good. It offers advice on changing what is displayed on the badge and outlines how to build a game of Breakout with just a bit of added hardware.
With all the Flappy Bird clones floating around in the ether after the game’s unexpected success, there are some that are better than others. And by better, we mean, hacked together from misc hardware. If you’ve got an Arduino on hand, then you’re half way to making your own:
The “Minimalist” Version
[aron.bordin] created his own Flappy Bird game with a short list of parts some of us likely have lying around on our bench. An Arduino loaded with the appropriate code is wired to a 16×16 LED matrix, which apparently displays the minimal amount of visual information you’d need to play the game. The only other parts required are a single pushbutton and resistor tethered on a breadboard to control your flapping. With the wire hookup laid out by convenient diagrams and the libraries required for the code all found on the same page, this is easily something one could bang out in an afternoon. If afterwards you still find yourself with more time to kill than you can stand to play Flappy Birds, there is always the option of fashioning a humorously-sized cell phone case to squeeze it all into… which we’d like to see.
The “Fancy” Version
If you want more resolution than solid colored LEDs, or you just have a fondness for the terrifying bird abstraction the game is known for, you can switch out the 16×16 matrix for a Nokia LCD screen. [Huy’s] rendition of this build over on Hackaday.io will deliver a “more detailed” graphic for the game, and is still roughly just as easy to assemble. Similarly, an Ardunio is loaded with the smarts required to generate the game, along with a single pushbutton tacked on for control. The code and the daunting (/sarcasm) two steps needed to wire the Arduino to the screen can be found on his project’s page.
If you must kill boredom playing Flappy Bird, there is no excuse not to do so on something you made yourself.
We’re surprised we haven’t seen this kind of clock before, or maybe we have, but forgot about it in the dark filing cabinets of our minds. The above picture of [danjhamer’s] Matrix Clock doesn’t quite do it justice, because this is a clock that doesn’t just tick away and idly update the minutes/hours.
Instead, a familiar Matrix-esque rain animation swoops in from above, exchanging old numbers for new. For the most part, the build is what you would expect: a 16×8 LED Matrix display driven by a TLC5920 LED driver, with an Arduino that uses a DS1307 RTC (real-time clock) with a coin cell battery to keep track of time when not powered through USB. [danjhamer] has also created a 3D-printed enclosure as well as added a piezo speaker to allow the clock to chime off customizable musical alarms.
You can find schematics and other details on his Hackaday.io project page, but first, swing down below the jump to see more of the clock’s simple but awesome animations.
As seasoned data-travelers, we’re used to wielding the internet to send messages and communicate to others without any limitations. No one has to be stranded on a figurative island blowing smoke signals… unless of course they wanted to be. What [Harm Alexander Aldick] has done with his project “Lorem Ipsum”, is create a situation where others can only communicate to him through a sort of message in a bottle. The bottle in this case is an electronic widget.
In this social experiment, [Harm] has stationed a small Ikea picture frame at his desk, which shows images and text sent to him in real-time from others in the world. With an Arduino as the brain, a small 8×8 LED matrix mounted at the bottom right of the frame displays the data received by means of an ethernet module. Anyone can use his web interface to modify the pixels of the matrix on a virtual version of the installation. Once sent, the message is transmitted through an IPv6 internet connection and is translated to UDP which the unit is controlled by.
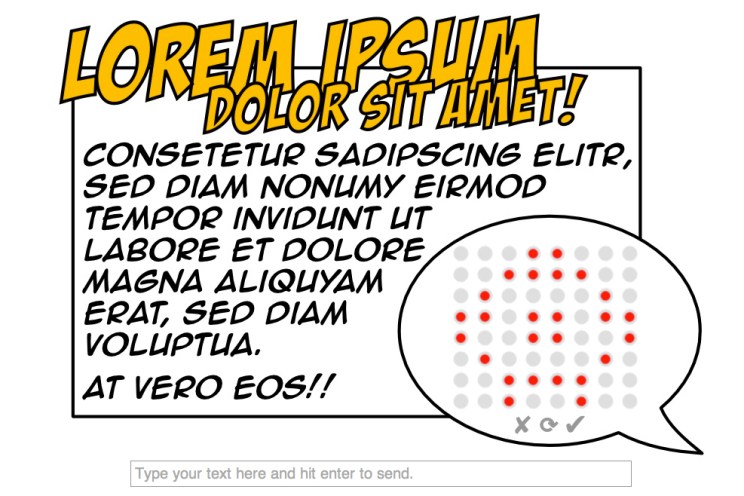
[Harm]’s project investigates how people react when given the chance to send a message in complete anonymity to someone they don’t know… in of all things, the form of something as limited as 64 pixels. The project name “Lorem Ipsum” refers to the filler text used in graphic design to hold the place of what would otherwise be more meaningful information, so that it doesn’t detract from the experience of viewing the layout. Curious about what sort of ‘graphical experience’ I would come up with myself, I took a shot at punching away at [Harm’s] GUI. I got momentarily lost in turning the little red dots on and off and eventually turned out this little ditty:
It was supposed to be something of a triangle, yet turned into a crop circle… or pronged nipple. After it was sent, I wondered whether or not [Harm] actually saw it. In the case that he did, I can only imagine what I communicated to our fellow hacker abroad with my squall of dots. All of these thoughts though are the whole point of the project. Awesome work!
Eduardo Zola’s New Pong v2.0 offers up retro gaming goodness using a pair of 8 X 8 LED matrix boards.
A MAX7219 and Arduino MEGA 2560 microcontroller provide the muscle to get the game off and running.
There is nothing better than a project that you can put on display for all to see. [Tristan's] most recent project, a Decorative LED Matrix Frame, containing 12×10 big square pixels that can display any color, is really cool.
Having been built around a cheap IKEA photo frame this project is very doable, at least for those of you with a 3D printer. The 3D printer is needed to create the pixel grid, which ends up looking very clean in the final frame. From an electronics perspective, the main components are a set of Adafruit Neopixel LED strips, and an Arduino Uno with an Ethernet shield. The main controller even contains a battery backup for the real time clock (RTC) when the frame is unplugged; a nice touch. Given that the frame is connected to the local network, [Tristan] designed the frame to be controlled by a simple HTML5 interface (code available on GitHub). This allows any locally connected device to control the frame.
Be sure to check out the build details, they are very well done. If you are still not convinced how cool this project is, be sure to check out a video of it in action after the break! It makes us wish that you could play Tetris on this frame. Very nice job [Tristan]!
Here, we show how a 7 Bi-color 8×8 LED Matrix Scrolling Text Display is built, in which messages and commands can be sent to it via Bluetooth using an Android Smart Phone. Logically, any devices capable of sending text messages via Bluetooth may be adapted to work with the display.
To build this project, basic electronics component soldering skills and some knowledge on using the Arduino or Arduino based micro-controllers are required.
The reason for building a 7 LED Matrices long display is that it is quite adequate for ease of reading scrolling text and also because the largest tinted acrylic sheet easily available in Hobby or Art shops is 18 inches by 12 inches, which is just the right length for making the enclosure for the display as each LED matrix is around 60mm x 60mm in size.
7 Bi-color LED Matrix Scrolling Text Display - [Link]
Planet Arduino is, or at the moment is wishing to become, an aggregation of public weblogs from around the world written by people who develop, play, think on Arduino platform and his son. The opinions expressed in those weblogs and hence this aggregation are those of the original authors. Entries on this page are owned by their authors. We do not edit, endorse or vouch for the contents of individual posts. For more information about Arduino please visit www.arduino.cc
You are currently browsing the archives for the LED matrix category.

 The Tamagotchi is a thing of the past. Bring your virtual pet into the 21st century with LEDs and an Arduino-compatible processor.