Posts | Comments

Planet Arduino

Archive for the ‘watch’ Category

It used to be that building your own watch was either a big project or it meant that you didn’t really care about how something looked on your wrist. But now with modern parts and construction techniques, a good-looking smart watch isn’t out of reach of the home shop. But if you don’t want to totally do it yourself, you can turn to a kit and that’s what [Stephen Cass] did. Writing in IEEE Spectrum, he took a kit called a Watchy and put it through its paces for you.

Watchy is an open source product that uses an ESP32, an E-ink display, and costs about $50. The display is 1.5 inches — good enough for a watch — and it has a real time clock, a vibration motor, an accelerometer, and four buttons. The whole thing runs on a 200 mAh lithium polymer battery. The charger is microUSB and you can also upload software to it using the usual Arduino tools.

However, [Stephen] found that none of the examples he tried would work at first. He found problems with the Mac software, but he also had problems under Windows. The answer? Switching to a Raspberry Pi seemed to work and once the watch was wiped clean, the Mac tools would work, too. It sounds like this isn’t a common problem, but he has to erase the watch with the Pi before each programming cycle.

Unlike a normal Arduino program, all the work in a typical Watchy program happens in setup() so the watch can mostly sleep and it updates the 200×200 typically just once a minute. As an example, [Stephan] wrote a watch face that uses an old Irish alphabet to tell time. He plans to add code to grab online data, too, and the phone has support for connecting wirelessly and parsing JSON to make tasks like that easier.

We always thought the EZ430-Chronos was a good-looking watch, but its screen is dated now. You can also pick up a lot of cheap import watches that can be hacked.

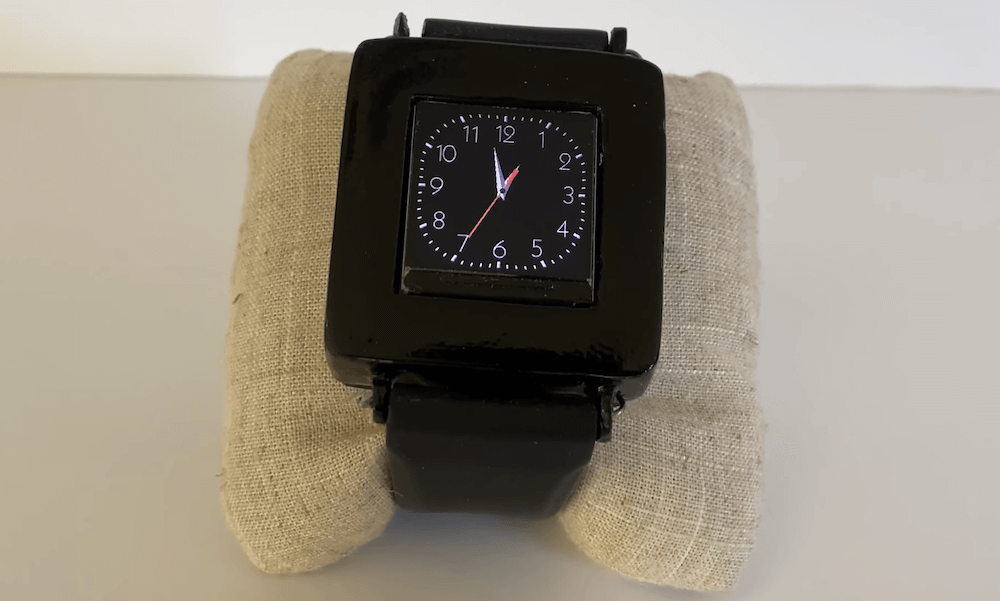
The Nano is one of our smallest boards, and as YouTuber Craft Channel has proven, it’s tiny enough to act as the brains of a wristwatch. This DIY wearable device features a nicely made wooden enclosure, with power supplied by a 1S 300mAh LiPo battery, and the face itself shown on a 1.3″ ST7789 display.

Its lack of a real-time clock unit, along with a fairly limited battery, means that the watch will only work for a short time before needing attention. However, creator Craft Channel notes that the build is an experimental project, and it’s a great demo of what can be done with a short bill of materials and a bit of ingenuity!

What could you do with a dual-core 240 MHz ESP32 that supports Arduino-style programming, with 16 MB of flash, 8 MB of PSRAM, and 520 k of RAM? Oh, let’s throw in a touchscreen, an accelerometer, Wifi, and Bluetooth. Besides that, it fits on your wrist and can show the time? That’s the proposition behind Lilygo T Watch 2020. If it sounds like a smartwatch, it is. At around $25 –and you can snag the hardware from a few different places — it is not only cheaper than the latest flagship smartwatch, but it is also infinitely more hackable.

OK, so the screen is only 1.54″, but then again, it is a watch. If Arduino isn’t your thing, you can use anything else that supports the ESP32 like Micropython or even Scratch. There are variants that have LoRA and GPS, at slightly higher prices. You can also find ones with heart rate monitors and other features.

If you would like a preview of the firmware, it is all there on GitHub and there is a smattering of documentation. There are even a few examples, although brush up on your Mandarin. The watch actually looks passable for a smartwatch, although the one blemish is that it is 20 mm thick.  That’s almost double the thickness of an Apple Watch 5 or a Samsung Active 2.

Still, if you want total hackability, that extra 10 mm is probably worth it. You can, of course, hack some watches that are not meant to be used this way. Besides, this watch is a bit more socially acceptable than one that would earn you hacker street cred.

When you read “Arduino wristwatch”, you fall into the trap of envisioning an Arduino UNO clumsily strapped to someone’s wrist. [Marijo Blažević’s] creation is much more polished than that. A round circuit board holds two surface mount ICs and 12 LEDs. The whole thing looks nice fit snugly inside of a watch body. It isn’t a Rolex, but it does have considerable geek cred without being unwearable in polite company.

Once IC is an AVR micro, of course. The other is a DS3231 real time clock with built-in crystal. A CR2032 keeps it all running. The main body, the outer ring, the bottom, and the buttons are 3D printed in PLA. The crystal and the band are the only mechanical parts not printed. The bill of materials shows a 36mm crystal and even provides links for all the parts.

You don’t want to run LEDs all the time because it is bad on the battery. When you press the button once, you get one of the LEDs to light to show the hours. Another press reads the minutes in units of 5 minutes. A third press shows you one of five LEDs to show how many minutes to add. For example, if the time is 9:26 you’d get LED 9 (hours), LED 5 for 25 minutes, and the third press would show LED 1 for 1 extra minute. If either of the minute indicators show 12 o’clock, that indicates zero minutes.

The exciting thing, of course, is that you can program it beyond the code on GitHub. Already it can tell time and display the temperature. You don’t have a lot of I/O, but you ought to be able to get some more options and maybe some flashy LED blinking patterns in if you try.

Miniaturization has made smart watches possible, even for the DIY maker to tinker with. For those just getting to grips with basic digital electronics, it can be daunting, however. For those just starting out, [陳亮] put together a handy guide to building the core of an Arduino-based watch.

The writeup starts at the beginning, going over the basic hardware requirements for a smart watch. This involves considering size, packaging and power draw, as well as the user interface. The build settles on an Arduino Pro Micro, as it uses the ATmega32U4 which eliminates secondary USB-to-serial chips, helping cut down on power consumption. A square IPS LCD display is used to display an analog-style watch face, and time is kept by a DS3231 real-time clock. A pair of small vibration sensors are used to wake the watch when the user moves their wrist to check the time.

While it doesn’t cover the final assembly into a watch-like form factor, it’s a handy guide on what it takes to build a working watch for those who are still getting their feet wet with hardware. Once you’ve got that down, it’s time to contemplate how you’ll build the sleek exterior. Naturally, a good maker has that covered, too.

When you show up at a party wearing this bare PCB watch, there are effectively two possible reactions you might receive from the other people there. Either they are going to snicker at the nerd who’s wearing a blinking circuit board on their wrist in public, or they are going to marvel at the ridiculously low part count. We’ll give you one guess as to which reaction you’d likely get at any event Hackaday is involved in.

Designed and built by [Electronoobs], this extremely simple watch consists of a ATmega328P microcontroller, a dozen LEDs with their associated 200 Ω resistors, and a battery. There’s also a single push button on the front which is used to not only set the watch, but turn the LEDs on when you want to check the time. Short of dropping down to one LED and blinking out the time, it’s hard to imagine a timepiece with fewer components than this.

You’re probably wondering how [Electronoobs] pulled this off without an external clock source for the ATmega328P chip. The chip actually has an internal 8 MHz oscillator that can be used, but you need to flash the appropriate bootloader to it first. Accordingly, the backside of the PCB has both SPI and a UART solder pads for external bootloader and firmware programming.

As you might expect, there’s a downside to using the internal oscillator: it’s not very good. The ATmega328P spec sheet claims a factory calibrated accuracy of ±10%, and [Electronoobs] has found that equates to a clock drift of around 15 seconds per day. Not exactly great, but considering the battery only lasts for two days anyway, it doesn’t have much of an impact in this case.

Compared to other “analog” LED watches we’ve seen, the simplicity of this build is really quite remarkable. The closest competitor we’ve seen so far is this slick binary watch.

Some of the entries for the 2017 Coin Cell Challenge have already redefined what most would have considered possible just a month ago. From starting cars to welding metal, coin cells are being pushed way outside of their comfort zone with some very clever engineering. But not every entry has to drag a coin cell kicking and screaming into a task it was never intended for; some are hoping to make their mark on the Challenge with elegance rather than brute strength.

A perfect example is the LiquidWatch by [CF]. There’s no fancy high voltage circuitry here, no wireless telemetry. For this entry, a coin cell is simply doing what it’s arguably best known for: powering a wrist watch. But it’s doing it with style.

The LiquidWatch is powered by an Arduino-compatible Atmega328 and uses two concentric rings of LEDs to display the time. Minutes and seconds are represented by the outer ring of 60 LEDs, and the 36 LEDs of the inner ring show hours. The hours ring might sound counter-intuitive with 36 positions, but the idea is to think of the ring as the hour hand of an analog watch rather than a direct representation of the hour. Having 36 LEDs for the hour allows for finer graduation than simply having one LED for each hour of the day. Plus it looks cool, so there’s that.

Square and round versions of the LiquidWatch’s are in development, with some nice production images of [CF] laser cutting the square version out of some apple wood. The wooden case and leather band give the LiquidWatch a very organic vibe which contrasts nicely with the high-tech look of the exposed PCB display. Even if you are one of the legion that are no longer inclined to wear a timepiece on their wrist, you’ve got to admit this one is pretty slick.

Whether you’re looking to break new ground or simply refine a classic, there’s still plenty of time to enter your project in the 2017 Coin Cell Challenge.


Filed under: Arduino Hacks, clock hacks, contests

We first thought [Alexis Ospitia]’s watch was a sports watch made with an Arduino, but it’s actually a sporty watch made with an Arduino. This explains the watch’s strange ability to tell you the current temperature and humidity.

The core of the watch is an Arduino Mini. To make it good for time telling, a real-time clock module was added. A DHT11 monitors the temperature and humidity. A charge circuit and lithium battery provide power. Finally, the watch displays the date, time, and other data with an LCD from a Nokia 5110. We can tell you the last part that’s going to break on this.

Even if you think the watch is a bit chunky, the tutorial is very slick. [Alexis] has taken the trouble to individually draw and describe each portion of the watch’s construction. He explains each pin, what they do, and provides a Fritzing drawing of the wires to the Arduino. The code is provided; to program the watch a USB-to-serial module must be used.

For the housing he made a box from a thin gauge aluminum sheet and attached leather straps to the assembly. The final construction is cool looking in a techno-punk way, and is fairly compact. One might even say sporty.


Filed under: Arduino Hacks

RePhone Kit CreateToday SeeedStudio launched an intriguing new Kickstarter project, the RePhone. Reminiscent of Google's Project Ara, the RePhone is a modular phone built from open source components.

Read more on MAKE

The post A First Look at the RePhone, a Modular Cellphone You Build Yourself appeared first on Make: DIY Projects, How-Tos, Electronics, Crafts and Ideas for Makers.

owatch

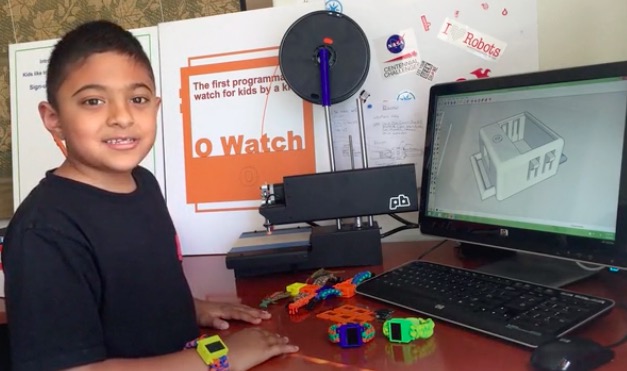
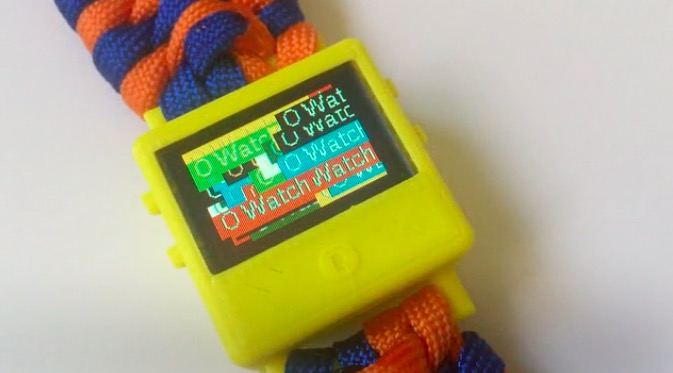
Omkar is a special 8 years old who created a wearable device called O Watch: an Arduino Zero-based smartwatch kit for kids. The project, recently kickstarted, allows young people to learn programming, 3D printing and a bit of craft while making their own smartwatch and customizing it. The kit will be released with a series of learning tools including a kid-friendly website with easy tutorials, examples and a community to share creations.

He’s not new to DIY tech and learning as he’s been doing a few workshops to teach Arduino to other kids and likes it when they get excited about making Arduino projects. Omkar told us:

I was first interested in robots. But my dad got me started with projects that light up LEDs that were easier to learn and code myself. (ps: my dad did not let me get a robot kit at first :).

I decided to do a wearable project because there were many of them I saw in the news and I thought they were cool. I wanted to make a smartwatch so that I could wear it myself and share my project with my friends in school.

If you are a kid and are new to making, O Watch could be a great starting point as you’ll learn about coding, 3d printing, craft and also sharing. The Arduino IDE will be your  primary programming tool for the watch, the case can be 3D printed in a color of your choice and you’ll experiment on how to knot yourself a cool band to wear it.

owatch2

What are you waiting for? You have just a few days to back the project on Kickstarter and have an O Watch delivered to your home!


  • Newsletter

    Sign up for the PlanetArduino Newsletter, which delivers the most popular articles via e-mail to your inbox every week. Just fill in the information below and submit.

  • Like Us on Facebook