Posts | Comments

Planet Arduino

Archive for the ‘Tachometer’ Category

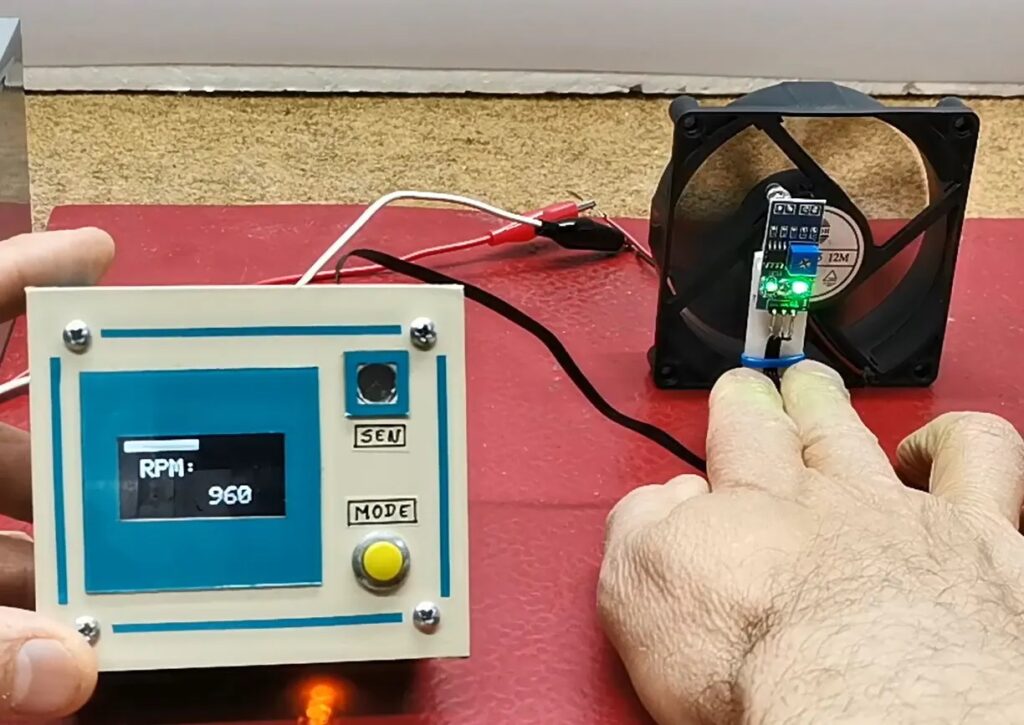
A tachometer is a device that display the speed of a rotating object. The most well-known example is the automotive tachometer, which shows a driver the RPM of the engine — information that is particularly useful when the car has a manual transmission. But there are many other uses for tachometers and this tutorial from Mirko Pavleski explains how to build a tachometer with an infrared sensor.

To calculate the rotational speed of something like a wheel, you need to monitor at least one point on that wheel and time the interval between passes by a static reference point. A common way to achieve that is with a Hall effect sensor that detects the magnetic field from a permanent magnet attached to the wheel’s rim. But Hall Effect sensors are unsuitable for some applications, such as when there are strong magnetic fields nearby. Pavleski’s write-up demonstrates how to instead use an infrared sensor to detect the passing of the wheel’s spokes.

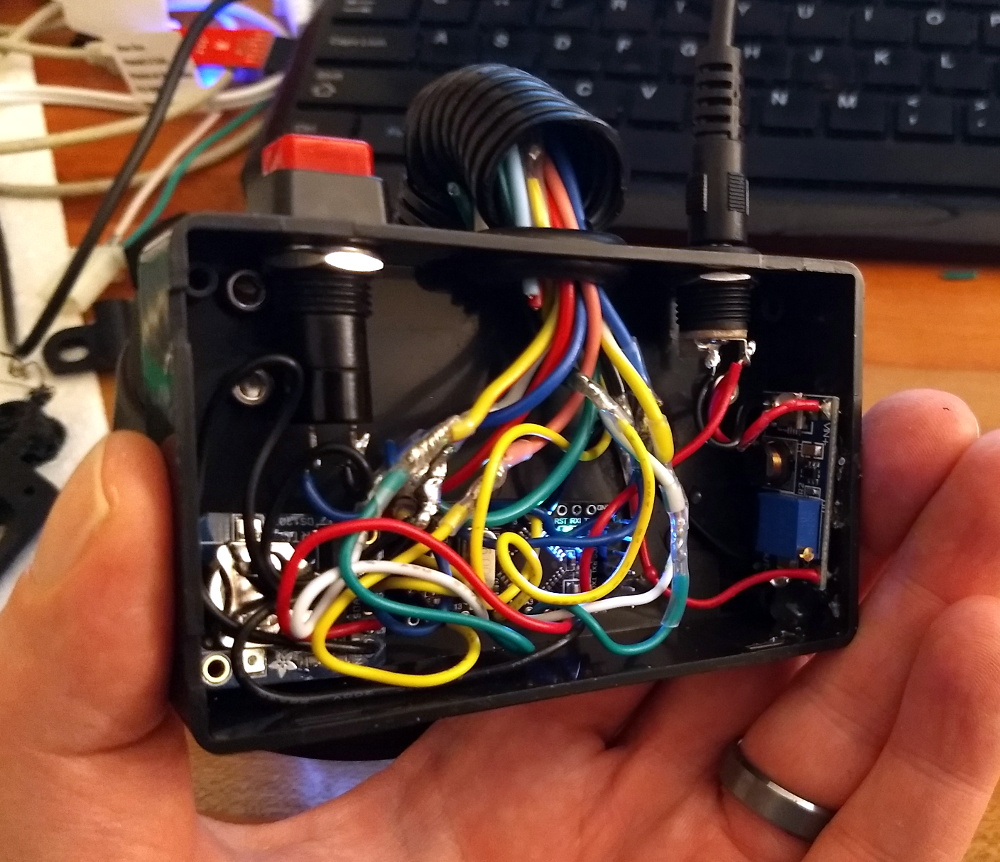
This infrared sensor module works by emitting infrared light from an LED and monitoring the reflection. When one of the wheel’s spokes passes in front of the sensor, the reflection becomes strong and easy to detect. An Arduino Nano board measures the time between those events and multiplies the result by the number of spokes to determine the total time for a complete revolution. Divide 60 by that number and you get the RPM. The Arduino continuously calculates that value and displays the number on a small OLED screen. Power comes from a 9V battery.

One of the great things about this design is that it doesn’t require contact with the measured object and it is portable, so one can measure the RPM of anything spinning that has spokes.

The post Build your own tachometer with an IR sensor and an Arduino appeared first on Arduino Blog.

Does your drill go as fast as the manufacturer says it will? Well, you’d need a tachometer to figure that out. They’re not that expensive to buy, but as [Elite Worm] shows, they’re not that expensive to make, either — about $10 total if you get your parts from the right places. Lucky for you, he has links to everything.

Really, the links are just the tip of the iceberg here as far as the gifts that [Elite Worm] bestows upon those who choose to undertake this project. The build video (after the break, as usual; our favor to you) is fantastic, and would be perfect for a beginner because of the entrancing speed at which he builds it. The video is straight up relaxing to watch, whether you want to build one or not.

It’s a fairly simple circuit — just push the momentary switch, and the laser diode and sensor pair count the revolutions over one second. The Arduino Nano multiplies this number by 60 and displays the RPM on the OLED screen. What we absolutely love about this build is the care that taken in designing the case. There’s a designated spot for each component, and the ones without their own special holder are kept in place with printed crossbar pieces. [Elite Worm] says this has a higher refresh rate than his store-bought tacho, and we say it looks way cooler, too.

Still don’t want to make one yourself? Well, okay. Before you buy one, try using your phone to calculate RPM.

Via r/duino

We’re certainly no strangers to unique timepieces around these parts. For whatever reason, hackers are obsessed with finding new and interesting ways of displaying the time. Not that we’re complaining, of course. We’re just as excited to see the things as they are to build them. With the assumption that you’re just as enamored with these oddball chronometers as we are, we present to you this fantastic digital tachometer clock created by [mrbigbusiness].

The multi-function digital gauge itself is an aftermarket unit which [mrbigbusiness] says you can get online for as little as $20 from some sites. All he needed to do was figure out how to get his Arduino to talk to it, and come up with some interesting way to hold it at an appropriate viewing angle. The mass of wires coming out of the back of the gauge might look intimidating, but thanks to his well documented code it shouldn’t be too hard to follow in his footsteps if you were so inclined.

Hours are represented by the analog portion of the gauge, and the minutes shown digitally were the speed would normally be displayed. This allows for a very cool blending of the classic look of an analog clock with the accuracy of digital. He’s even got it set up so the fuel indicator will fill up as the current minute progresses. The code also explains how to use things like the gear and high beam indicators, so there’s a lot of room for customization and interesting data visualizations. For instance, it would be easy to scrap the whole clock idea and use this gauge as a system monitor with some modifications to the code [mrbigbusiness] has provided.

The gauge is mounted to a small project box with some 3D printed brackets and bits of metal rod, complete with a small section of flexible loom to cover up all the wires. Overall it looks very slick and futuristic without abandoning its obvious automotive roots. Inside the base [mrbigbusiness] has an Arduino Nano, a DS1307 RTC connected via I2C, a voltage regulator, and a push button to set the time. It’s a perfectly reasonable layout, though we wonder if it couldn’t be simplified by using an ESP8266 and pulling the time down with NTP.

We’ve seen gauges turned into a timepiece before, but we have to admit that this is probably the most practical realization we’ve seen of the idea yet. Of course if you want to outfit the garage with something a bit more authentic, you can always repurpose a Porsche brake rotor.

Unlike most cars today, deepsyx’s old Opel Astra did not have a tachometer. So what’s a Maker to do? Build your own, of course.

To accomplish this, deepsyx used an Arduino Uno along with a few LEDs. The first LED turns on at 4000 RPM, while the others light up with every 500 RPM increment. At 5800 RPM, however, all the LEDs flash as a warning. There’s even a serial output of the RPM value, so logging real-time data can be a possible enhancement down the road.

I started by cutting a 5cm x 1.5cm piece of an old credit cart, drilled 4 holes in it, painted it black and glued 4 LED diodes to it. Then I soldered 220ohm resistors to each positive LED pin and used a common ground. I connected them to an Arduino via 5 x 30cm jumpers and hid the Arduino in a hole under the wheel. I connected the Arduino data pin via voltage divider to the signal pin of the coil and used an old phone charger to power the Arduino. In order to work, I shared the phone charger and Arduino’s grounds.

Intrigued? You can read more about this project on deepsyx’sGitHub page and over on Hackaday.


A tachometer used to be an accessory added to the dash of only the sportiest of cars, but now they’re pretty much standard equipment on everything from sleek coupes to the family truckster. If your daily driver was born without a tach, fear not – a simple Arduino tachometer is well within your reach.

The tach-less vehicle in question is [deepsyx]’s Opel Astra, which from the video below seems to have the pep and manual transmission that would make a tach especially useful. Eschewing the traditional analog meter display or even a digital readout, [deepsyx] opted to indicate shift points with four LEDs mounted to a scrap of old credit card. The first LED lights at 4000 RPM, with subsequent LEDs coming on at each 500 RPM increase beyond that. At 5800 RPM, all the LEDs blink as a redline warning.  [Deepsyx] even provides a serial output of the smoothed RPM value, so logging of RPM data is a possible future enhancement.

The project is sensing engine speed using the coil trigger signal – a signal sent from the Engine Control Unit (ECU) which tells one of the ignition coilpacks to fire. The high voltage signal from the coilpack passes on to the spark plug, which ignites the air-fuel mixture in that cylinder. This is a good way to determine engine RPM without mechanical modifications to the car. Just make sure you modify the code for the correct number of cylinders in your vehicle.

Simple, cheap, effective – even if it is more of a shift point indicator than true tachometer, it gets the job done. But if you’re looking for a more traditional display and have a more recent vintage car, this sweeping LED tachometer might suit you more.

[via r/Arduino]


Filed under: Arduino Hacks, transportation hacks
Sep
19

Measure RPM – DIY portable digital tachometer

arduino, rpm, Tachometer Comments Off on Measure RPM – DIY portable digital tachometer 

F647NTCI06J8TVZ-600x452

Electro18 posted a tutorial on how to make a portable digital optical tachometer using an Arduino Uno, an instructable here:

A tachometer is a device used to measure the RPM or Revolutions Per Minute of any rotating body. Tachometers can be contact based or non-contact ones. The non-contact or contact-less optical tachometers usually use laser or Infrared beam to monitor the rotation of any body. This is done by calculating time taken for one rotation.
FEATURES
It can measure RPM over 20k
Sensor range extends upto 7~8 cm
Displays Maximum RPM

[via]

Measure RPM – DIY portable digital tachometer - [Link]

Sep
08

A bike tachometer measuring more than just speed

arduino, diy, Featured, leonardo, Tachometer Comments Off on A bike tachometer measuring more than just speed 

diytachometer

Nikodem is a young maker  based in Poland and shared with us his latest project based on Arduino Leonardo. It’s a DIY bike tachometer providing you with a set of additional information:

It shows your speed, the average speed, the temperature, the trip time and the total distance. You can change it using the button. Additionally, the speed is shown on a tachometer. I built it because I like building new things, I have not found anything like this on the internet so I want to show you how to build a good speedometer as the one on my bike is not as cool as I want :) .

You can find all the steps to make one yourself on  his Instructable account, and in the meanwhile take a look at the two videos below.


Jul
17

The blueShift Custom Tachometer

3D printing, arduino, automobile, car, Electronics, General, Tachometer Comments Off on The blueShift Custom Tachometer 

tach1aNot satisfied with the stock tachometer on your car? You could buy an aftermarket kit, but for something truly unique, Pete Mills decided to design and build his own. He calls his creation “blueShift,” which, although possibly optimistic about the speed he will be able to achieve in his Ford […]

Read more on MAKE

Jul
09

DIY bike tachometer

arduino, bike, Tachometer Comments Off on DIY bike tachometer 

F9Z1SYQHX42QUO2.MEDIUM

Nikus @ instructables.com writes:

I will show you how to build a bike speedometer. It shows your speed, the average speed,the temperature, the trip time and the total distance. You can change it using the button. Additionally, the speed is shown on a tachometer. I built it because I like building new things, I have not found anything like this on the Internet so I want to show you how to build a good speedometer as the one on my bike is not as cool as I want :) . So let’s get started.

DIY bike tachometer - [Link]

tach[Pete Mills] recently bought the all-new Ford Fiesta, which offers impressive fuel economy over that of his Jeep. He soon figured out that he has real time access to a wealth of engine and chassis data through Ford’s OpenXC platform and used it to build blueShift, a neopixel tachometer. The car already has a tach, but this one is more visual, can be seen in periphery, and is just plain fun.

In case you hadn’t heard, the OpenXC platform is Ford’s consumer key to the kingdom of OBD2 treasures. It unlocks the magic through its Vehicle Interface, which plugs into the OBD2 port and translates the CAN bus messages to OpenXC format. These messages are packaged into JSON format and can be sent over Bluetooth or Ethernet/Wi-Fi to an Android, Python, or iOS device.

[Pete] went with Bluetooth and used a BlueSMiRF with an Arduino Pro Mini. He derives power from the car’s on-board USB port, but has future plans to use the OpenXC VI port. blueShift reads the RPM data and displays a green trail as the engine revs up. At the peak revolution, it shows a red LED. This one is sticky and will persist for the lesser of three seconds or the time elapsed to a new positive RPM. [Pete] is also reading the headlight status of the car. As soon as they come on, the RGB LEDs dim to avoid blinding him at night.

[Pete] wanted to make an enclosure more finished-looking than a Tupperware box. He nearly detoured into 3D-printer design, but ended up putting together a Prusa i3v and came up with this RAM mount-compatible enclosure. His fantastic write-up and code are on his blog, but you can make the jump to see a short demo and a full explanation video. You can also make smart brake lights or even create art with OpenXC.

Demo video of blueShift:

Full explanation:


Filed under: Arduino Hacks, car hacks


  • Newsletter

    Sign up for the PlanetArduino Newsletter, which delivers the most popular articles via e-mail to your inbox every week. Just fill in the information below and submit.

  • Like Us on Facebook