Posts | Comments

Planet Arduino

Archive for the ‘wireless’ Category

We’ve seen [Johan]’s AA-battery-sized Arduino/battery crossover before, but soon (we hope!) there will be a new version with more MIPS in the same unique form factor! The original Aarduino adhered to classic Arduino part choices and was designed to run as the third “cell” in a 3 cell battery holder to relay temperature readings via a HopeRF RFM69CW. But as [Johan] noticed, it turns out that ARM development tools are cheap now. In some cases very cheap and very open source. So why not update an outstanding design to something with a little more horsepower?

The Aarduino Zero uses the same big PTH battery terminals and follows the same pattern as the original design; the user sticks it in a battery holder for power and it uses an RFM69CW for wireless communication. But now the core is an STM32L052, a neat low power Cortex-M0+ with a little EEPROM onboard. [Johan] has also added a medium size serial flash to facilitate offline data logging or OTA firmware update. Plus there’s a slick new test fixture to go along with it all.

So how do you get one? Well… that’s the rub. It looks like when this was originally posted at the end of 2017 [Johan] was planning to launch a Crowd Supply campaign that hasn’t quite materialized yet. Until that launches the software sources for the Zero are available, and there are always the sources from the original Aarduino to check out.

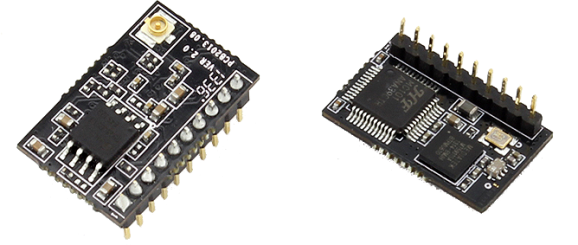
If you want to wirelessly communicate between devices, WiFi and Bluetooth are obvious choices. But there’s also the ISM (industrial, scientific, and medical) band that you use. There are inexpensive modules like the SX1278 that can handle this for you using LoRa modulation, but they haven’t been handy to use with an Arduino. [Jan] noticed the same thing and set out to build a shield that allowed an Arduino to communicate using LoRa. You can find the design data on GitHub. [Jan] calls it the LoRenz shield.

According to [Jan], the boards cost about $20 to $30 each to make, and most of that cost was in having PC boards shipped. LoRa lets you trade data rate for bandwidth, but typical data rates are fairly modest. As for range, that depends on a lot of factors, too, but we’ve seen ranges quoted in terms of miles.

Depending on where you live, there may be legal restrictions on how you use a radio like the SX1278. You should understand your local laws before you buy into using the ISM bands. We aren’t sure it would be wise, but the board can coexist with three other similar shields. So you could get 4 radios going on one Arduino if you had too and could manage the power, RF, and other issues involved. The breakout board the module uses has an antenna connector, so depending on your local laws, you could get a good bit of range out of one of these.

[Jan] promises a post on the library that makes it all work shortly, but you can find the code on GitHub now. If you look at the code in the examples directory, it seems pretty easy. You’d have to sling some software, but the SX1278 can support other modes in addition to LoRA including FSK and other data modulation techniques.

We’ve seen other LoRa shields, but not many. If you are interested in other wireless technologies, we’ve talked about them quite a bit. If you want a basic introduction to LoRa, [Andreas Spiess’] video below is a good place to start.


Filed under: Arduino Hacks, wireless hacks

A good robot is always welcome around here at Hackaday, and Hackaday.io user [igorfonseca83]’browser-controlled ‘bot s is no exception. Felines beware.

[igorfonseca83] — building on another project he’s involved in — used simple materials for the robot itself, but you could use just about anything. His goal for this build was to maximize accessibility in terms of components and construction using common tools.

An Arduino Uno gets two D/C motors a-driving using an H-bridge circuit — granting independent control the wheels — an ESP8266 enabling WiFi access, with power provided by a simple 5V USB power bank. [igorfonseca83] is using an Android smartphone to transmit audio and video data; though this was mostly for convenience on his part, a Raspberry Pi and camera module combo as another great option!

A few workarounds notwithstanding — considering some components in this particular configuration do not directly connect to each other — a bunch of code, set up of a website to act as a controller that accesses the IP address of the ESP8266, and an app installed on the audio/video streaming smartphone later, and you have a cat-stalking robot ready to rock. There are, of course, other uses for fpv robots, but with arguably less entertaining results.

[via Hackaday.io and Instructables]


Filed under: Android Hacks, Arduino Hacks, robots hacks

thumbnail

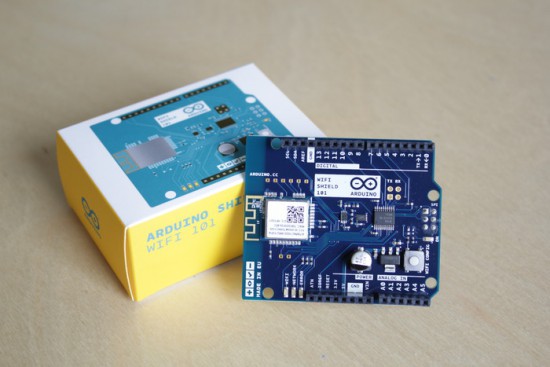
We are excited to announce Arduino Wifi Shield 101 developed with Atmel is now available for purchase on the Arduino Store US (49.90$).

Arduino WiFi Shield 101 is a powerful IoT shield with crypto-authentication that connects your Arduino or Genuino board to the internet wirelessly. Connecting it to a WiFi network is simple, no further configuration in addition to the SSID and the password are required. The WiFI library allows you to write sketches which connect to the internet using the shield.

The shield is based on the Atmel SmartConnect-WINC1500 module, compliant with the IEEE 802.11 b/g/n standard. The WINC1500 module provided is a network controller capable of both TCP and UDP protocols.  The main feature is an hardware encryption/decryption security protocol provided by the ATECC508A CryptoAuthentication chip that is an ultra secure method to provide key agreement for encryption/decryption, specifically designed for the IoT market.

Last year, Massimo Banzi introduced the shield:

“In this increasingly connected world, the Arduino Wi-Fi Shield 101 will help drive more inventions in the IoT market. Expanding our portfolio of Arduino extensions, this new shield can flawlessly connect to any modern Arduino board giving our community more options for connectivity, along with added security elements to their creative projects.”

The WiFi Shield 101 is the first Arduino product fully supporting SSL and all the communication between your board and our secured server. With the power of the Arduino Zero and the WiFi Shield 101 it is possible to make secure IoT applications simply and just using the Arduino Language.

A working example and instructions on how to get started are available on Arduino Cloud, a work-in-progress project that gives you access to a pre-configured MQTT server for your IoT sketches using only your Arduino account. More examples and features will be available in the next months.

Feel like knowing more about the shield? Explore the  Getting Started guide.

[Yveaux] had a problem. The transmitter on his outdoor weather station had broken, rendering the inside display useless. He didn’t want to buy a new one, so, like the freelance embedded software designer that he is, he decided to reverse engineer the protocol that the transmitter uses and build his own. He didn’t just replace the transmitter module, though, he decided to create an entire system that integrated the weather system into a sensor network controlled by a Raspberry Pi. That’s a far more substantial project, but it gave him the ability to customize the display and add more features, such as synching the timer in the display with a network clock and storing the data in an online database.

Fortunately for [Yveaux], the transmitter itself was fairly easy to replace. The weather station he had, like most, transmitted on the 868MHz frequency, which is a license-free ISM (Industrial, Scientific and Monitoring) spot on the spectrum. After some poking around, he was able to figure out the protocol and teach the Pi to speak it. He then added a Moteino and an nRF2401+ transmitter to the weather station, so it can send data to the Pi, which then sends it to the display. It is a more complicated setup, but it is also much more flexible. He’s had it running for a couple of years now and has collected more than a million sensor readings.


Filed under: Arduino Hacks, wireless hacks
May
27

Simple, easy and cheap wireless presenter

arduino, IR, IrDA, presenter, wireless Comments Off on Simple, easy and cheap wireless presenter 

FFFVCV4IA5IT9QT.MEDIUM

by Dimitris Platis @ instructables.com:

During presentations, I avoid being stationary and generally like to walk around in order to increase the interaction between me and the audience. However, I am constantly being faced with the burden of having to go back to the laptop, in order to change a slide or tell a person sitting by the laptop to do that. Not cool!

This problem is usually solved by devices, called remote clickers or wireless presenters, which consist of a handheld controller with buttons that sends signals to a USB dongle plugged in the computer. After looking around to buy one, I could not find any decent option costing less than 10$. So why not make one?

Simple, easy and cheap wireless presenter – [Link]

May
23

Mini weather station

arduino, Humidity, temperature, weather, wireless Comments Off on Mini weather station 

FDVH1IXI9YBYAL5.MEDIUM

by indigod0g @ instructables.com:

In this project, we will be making a mini weather station that measures temperature and humidity and transmits them wirelessly to a ground station, which displays the readings on an LCD display!

It’s a fairly easy project and can be used either on its own or part of something bigger.

Mini weather station – [Link]

Nov
07

module

8-bit AVRs and 32-bit ARMs do one thing, and one thing well: controlling other electronics and sensors while sipping power. The Internet of Things is upon us and with that comes the need for connecting to WiFi networks. Already, a lot of chips are using repackaged System on Chips to provide an easy way to connect to WiFi, and the USR-WIFI232-T is the latest of the bunch. It’s yet another UART to WiFi bridge, and as [2XOD], it’s pretty easy to connect to an AVR.

The module in question can be had through the usual channels for about $11, shipped straight from China, and the only purpose of this device is to provide a bridge between a serial port and a wireless network. They’re not that powerful, and are only meant for simple tasks,

[2XOD] got his hands on one of these modules and tested them out. They’re actually somewhat interesting, with all the configuration happening over a webpage served from the device. Of course the standard AT commands are available for setting everything up, just like the ESP8266.

With a month of testing, [2XOD] has found this to be a very reliable device, logging temperatures every minute for two weeks. There’s also a breakout board available to make connection easy, and depending on what project you’re building, these could be a reasonable stand-in for some other popular UART -> WiFi chips.


Filed under: Arduino Hacks, Microcontrollers, wireless hacks
Oct
30

Wireless Warning Sign

[A Raymond] had some free time at work, and decided to spend it on creating a wireless warning sign. According to his blog profile, he is a PhD student in Applied Physics. His lab utilizes a high-powered laser system. His job is to use said system, but only after it’s brought online by faculty scientists. The status of the laser system is changed by a manual switchbox that controls the warning signs wired around the lab entrances. Unfortunately, if you were in the upstairs office, you only knew this after running downstairs to check. [A Raymond's] admitted laziness finally got the better of him – he wanted a sign that displayed the laser’s status from the comfort of the office. He had an old sign he could use, but he wanted a way for it to communicate with the switchbox downstairs. After some thought, he decided Bluetooth was the way to go, using a pair of BlueSMiRF Bluetooth modules from Sparkfun and Arduino Uno R3’s.

He constructed a metal box that intercepted the cable from the main switchbox, mounting one BlueSMiRF and Uno into it. Upon learning that the switchbox sends 12V AC signals over three individual status wires, he half-wave rectified the wires and divided their voltages so that the Uno wouldn’t fry. Instead, it determined which status wire that had active voltage. and sent a “g(reen)”, “y(ellow)”, or “r(ed)” signal continuously via Bluetooth. On the receiving end, [A Raymond] gutted the sign and mounted the other BlueSMiRF and Uno into it along with some green, yellow, and red LEDs. The LEDs light up in response to the corresponding Bluetooth signal.

The result is a warning sign that is always up-to-date with the switchbox’s status. We’ve covered projects using Bluetooth before, from plush birds to cameras- [A Raymond's] wireless sign is in good company. He notes that it’s “missing” a high pitched whining noise when the “Danger” lights are on. If he decides to add an accompanying (annoying) sound, he couldn’t go wrong with something like this. Regardless, we’re sure [A Raymond] is happy that he no longer has to go back and forth between floors before he can use the laser.


Filed under: Arduino Hacks, wireless hacks
Aug
01

mysensors.org – Learn how to create your own low cost wireless sensors

arduino, graph, Sensor, sensors, wireless Comments Off on mysensors.org – Learn how to create your own low cost wireless sensors 

mysensors]

Learn how to create your own low cost wireless sensors and connect them to the world.

Store your sensor data at home or in our cloud. We provide fancy graphs and other great online tools to help you manage and analyze your sensor data!

mysensors.org – Learn how to create your own low cost wireless sensors - [Link]


  • Newsletter

    Sign up for the PlanetArduino Newsletter, which delivers the most popular articles via e-mail to your inbox every week. Just fill in the information below and submit.

  • Like Us on Facebook