21
Use the Texas Instruments TLC5940 16-Channel LED Driver IC with Arduino in Chapter 57 of our Arduino Tutorials. The first chapter is here, the complete series is detailed here.
Introduction
Today we are going to examine the Texas Instruments TLC5940 16-channel LED driver IC. Our reason for doing this is to demonstrate another, easier way of driving many LEDs – and also servos. First up, here is a few examples of the TLC5940

The TLC5940 is available in the DIP version above, and also surface-mount. It really is a convenient part, allowing you to adjust the brightness of sixteen individual LEDs via PWM (pulse-width modulation) – and you can also daisy-chain more than one TLC5940 to control even more.
During this tutorial we’ll explain how to control one or more TLC5940 ICs with LEDs and also look at controlling servos. At this point, please download a copy of the TLC5940_data_sheet (.pdf) as you will refer to it through this process. Furthermore, please download and install the TLC5940 Arduino library by Alex Leone which can be found here. If you’re not sure how to install a library, click here.
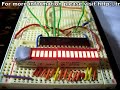
Build a TLC5940 demonstration circuit
The following circuit is the minimum required to control sixteen LEDs from your Arduino or compatible. You can use it to experiment with various functions and get an idea of what is possible. You will need:
- An Arduino Uno or compatible board
- 16 normal, everyday LEDs that can have a forward current of up to 20 mA
- a 2 kΩ resistor (give or take 10%)
- a 0.1uF ceramic and a 4.7uF electrolytic capacitor
Take note of the LED orientation – and remember the TLC5940 is a common-anode LED driver – so all the LED anodes are connected together and then to 5V:

For this particular circuit, you won’t need an external 5V power supply – however you may need one in the future. The purpose of the resistor is to control the amount of current that can flow through the LEDs. The required resistor value is calculated with the following formula:
R = 39.06 / Imax
where R (in Ohms) is the resistor value and Imax (in Amps) is the maximum amount of current you want to flow through the LEDs. For example, if you have LEDs with a 20 mA forward current – the resistor calculation would be:
R = 39.06 / 0.02 = 1803 Ohms.
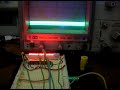
Once you have the circuit assembled – open up the Arduino IDE and upload the sketch BasicUse.pde which is in the example folder for the TLC5940 library. You should be presented with output similar to what is shown in the following video:
Controlling the TLC5940
Now that the circuit works, how do we control the TLC5940? First, the mandatory functions – include the library at the start of the sketch with:
#include "Tlc5940.h"
and then initialise the library by placing the following into void setup():
Tlc.init(x);
x is an optional parameter – if you want to set all the channels to a certain brightness as soon as the sketch starts, you can insert a value between 0 and 4095 for x in the Tlc.init() function.
Now to turn a channel/LED on or off. Each channel is numbered from 0 to 15, and each channel’s brightness can be adjusted between 0 and 4095.
This is a two-part process…
First – use one or more of the following functions to set up the required channels and respective brightness (PWM level):
Tlc.set(channel, brightness);
For example, if you wanted to have the first three channels on at full brightness, use:
Tlc.set(0, 4095);
Tlc.set(1, 4095);
Tlc.set(2, 4095);
The second part is to use the following to update the TLC5940 with the required instructions from part one:
Tlc.update();
If you want to turn off all channels at once, simply use:
Tlc.clear();
You don’t need to call a TLC.update() after the clear function. The following is a quick example sketch that sets the brightness/PWM values of all the channels to different levels:
#include "Tlc5940.h"
void setup()
{
  Tlc.init(0); // initialise TLC5940 and set all channels off
}

void loop()
{
  for (int i = 0; i < 16; i++)
  {
    Tlc.set(i, 1023);
  }
  Tlc.update();
  delay(1000);
  for (int i = 0; i < 16; i++)
  {
    Tlc.set(i, 2046);
  }
  Tlc.update();
  delay(1000);
  for (int i = 0; i < 16; i++)
  {
    Tlc.set(i, 3069);
  }
  Tlc.update();
  delay(1000);
  for (int i = 0; i < 16; i++)
  {
    Tlc.set(i, 4095);
  }
  Tlc.update();
  delay(1000);
}
and the sketch in action:
The ability to control individual brightness for each channel/LED can also be useful when controlling RGB LEDs – you can then easily select required colours via different brightness levels for each element.
Using two or more TLC5940s
You can daisy-chain quite a few TLC5940s together to control more LEDs. First – wire up the next TLC5940 to the Arduino as shown in the demonstration circuit – except connect the SOUT pin (17) of the first TLC5940 to the SIN pin (26) of the second TLC5940 – as the data travels from the Arduino, through the first TLC5940 to the second and so on. Then repeat the process if you have a third, etc. Don’t forget the resisotr that sets the current!
Next, open the file tlc_config.h located in the TLC5940 library folder. Change the value of NUM_TLCS to the number of TLC5940s you have connected together, then save the file and also delete the file Tlc5940.o also located in the same folder. Finally restart the IDE. You can then refer to the channels of the second and further TLC5940 sequentially from the first. That is, the first is 0~15, the second is 16~29, and so on.
Controlling servos with the TLC5940
As the TLC5940 generates PWM (pulse-width modulation) output, it’s great for driving servos as well. Just like LEDs – you can control up to sixteen at once. Ideal for creating spider-like robots, strange clocks or making some noise. When choosing your servo, ensure that it doesn’t draw more than 120 mA when operating (the maximum current per channel) and also heed the “Managing current and heat” section at the end of this tutorial. And use external power with servos, don’t rely on the Arduino’s 5V line.
To connect a servo is simple – the GND line connects to GND, the 5V (or supply voltage lead) connects to your 5v (or other suitable supply) and the servo control pin connects to one of the TLC5940′s outputs. Finally – and this is important – connect a 2.2kΩ resistor between the TLC5940 output pin(s) being used and 5V.
Controlling a servo isn’t that different to an LED. You need the first two lines at the start of the sketch:
#include "Tlc5940.h"
#include "tlc_servos.h"
then the following in void setup():
tlc_initServos();
Next, use the following function to select which servo (channel) to operate and the required angle (angle):
tlc_setServo(channel, angle);
Just like the LEDs you can bunch a few of these together, and then execute the command with:
Tlc.update();
So let’s see all that in action. The following example sketch sweeps four servos across 90 degrees:
#include "Tlc5940.h"
#include "tlc_servos.h"

void setup()
{
  tlc_initServos();  // Note: this will drop the PWM freqency down to 50Hz.
}

void loop()
{
  for (int angle = 0; angle < 90; angle++) {
    tlc_setServo(0, angle);
    tlc_setServo(1, angle);
    tlc_setServo(2, angle);
    tlc_setServo(3, angle);
    Tlc.update();
    delay(5);
  }
  for (int angle = 90; angle >= 0; angle--) {
    tlc_setServo(0, angle);
    tlc_setServo(1, angle);
    tlc_setServo(2, angle);
    tlc_setServo(3, angle);
    Tlc.update();
    delay(5);
  }
}
And the following video captures those four servos in action:
If you servos are not rotating to the correct angle – for example you ask for 180 degrees and they only rotate to 90 or thereabouts, a little extra work is required. You need to open the tlc_servos.h file located in the TLC5940 Arduino library folder and experiment with the values for SERVO_MIN_WIDTH and SERVO_MAX_WIDTH. For example change SERVO_MIN_WIDTH from 200 to 203 and SERVO_MAX_WIDTH from 400 to 560.
Managing current and heat
As mentioned earlier, the TLC5940 can handle a maximum of 120 mA per channel. After some experimenting you may notice that the TLC5940 does get warm – and that’s ok. However there is a maximum limit to the amount of power that can be dissipated before destroying the part. If you are just using normal garden-variety LEDs or smaller servos, power won’t be a problem. However if you’re planning on using the TLC5940 to the max – please review the notes provided by the library authors.
Conclusion
Once again you’re on your way to controlling an incredibly useful part with your Arduino. Now with some imagination you can create all sorts of visual displays or have fun with many servos. And if you enjoyed the tutorial, or want to introduce someone else to the interesting world of Arduino – check out my book (now in a third printing!) “Arduino Workshop” from No Starch Press.

In the meanwhile have fun and keep checking into tronixstuff.com. Why not follow things on twitter, Google+, subscribe for email updates or RSS using the links on the right-hand column? And join our friendly Google Group – dedicated to the projects and related items on this website. Sign up – it’s free, helpful to each other – and we can all learn something.
The post Tutorial – Arduino and the TLC5940 PWM LED Driver IC appeared first on tronixstuff.