Posts | Comments

Planet Arduino

Archive for the ‘pen plotter’ Category

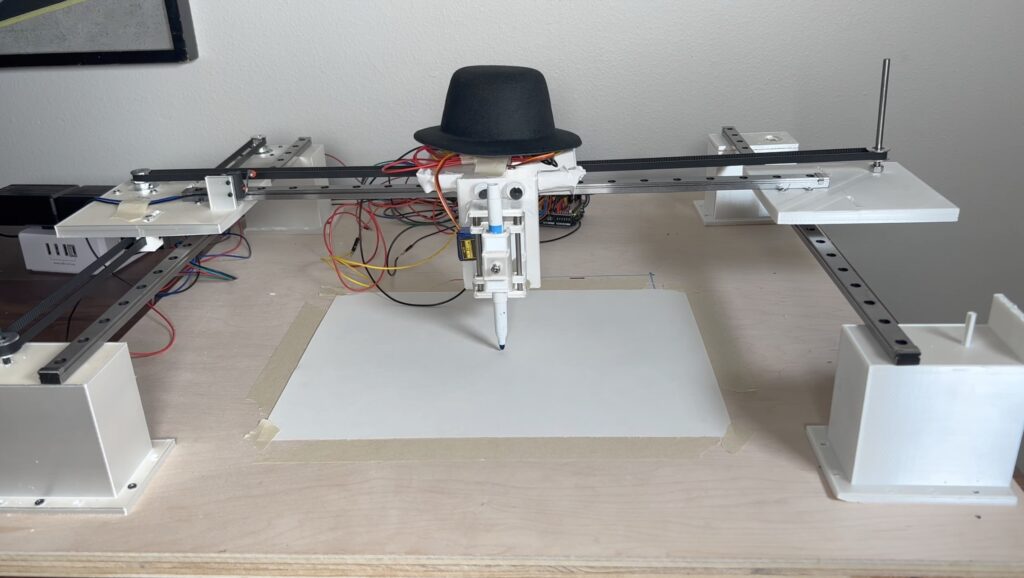
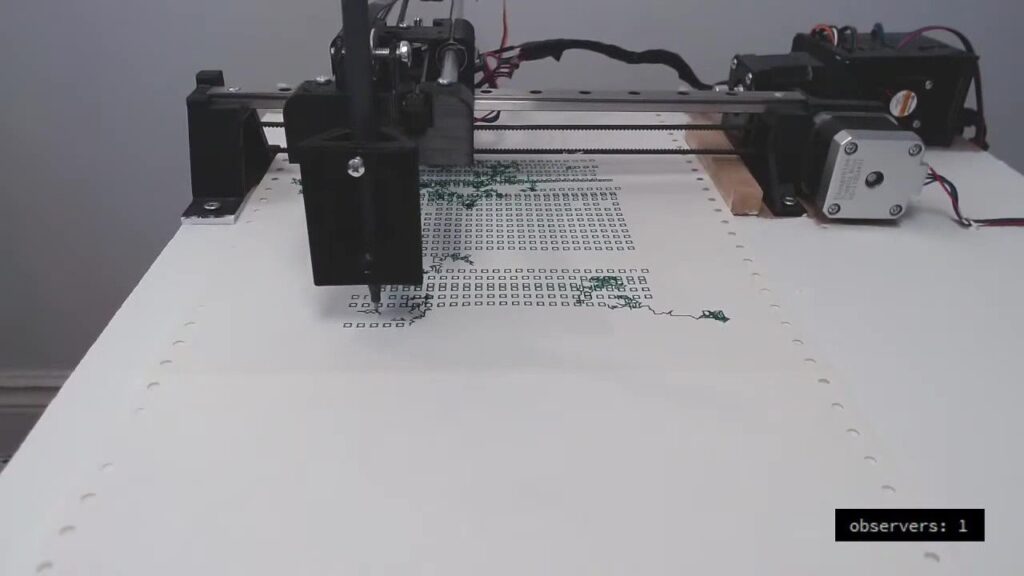
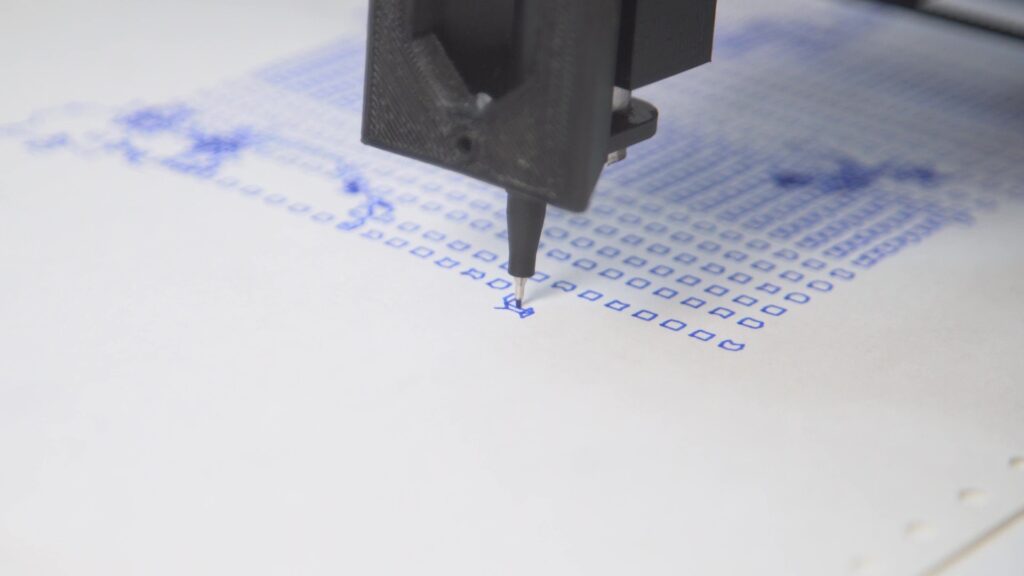
AI-generated art is all the rage right now, thanks to widespread sharing on social media. The appeal is obvious: anyone can utilize an online service to create a unique (and often hilarious) piece of art based on a simple prompt. To display that art, one can utilize a high-quality printer or a digital photo frame. Or they can follow the lead of Eric Oaks, who built this pen plotter named “Drew” that draws AI-generated art onto paper.

This pen plotter works with DALL-E 2, which is a popular AI art generator model from OpenAI. Like most AI art models, DALL-E 2 costs money to use. But OpenAI gives users 50 free credits to start and another 15 free credits each month. Oaks utilizes the DALL-E 2 API to generate a new piece of art using the credits he has available, then plots that image onto paper.

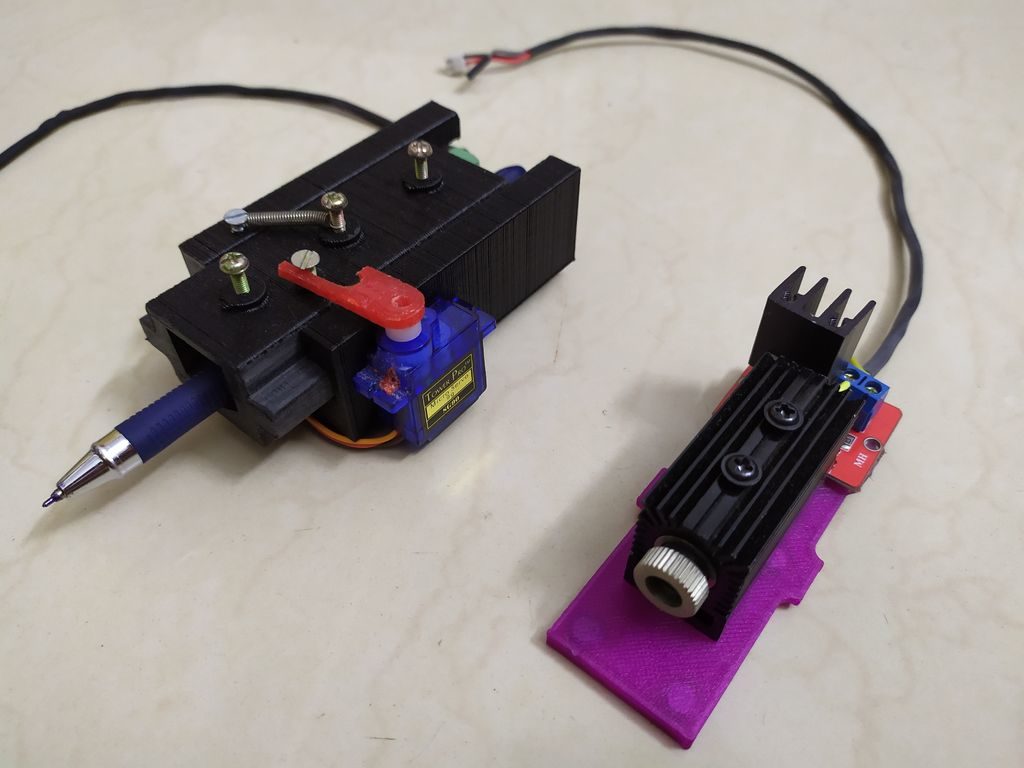
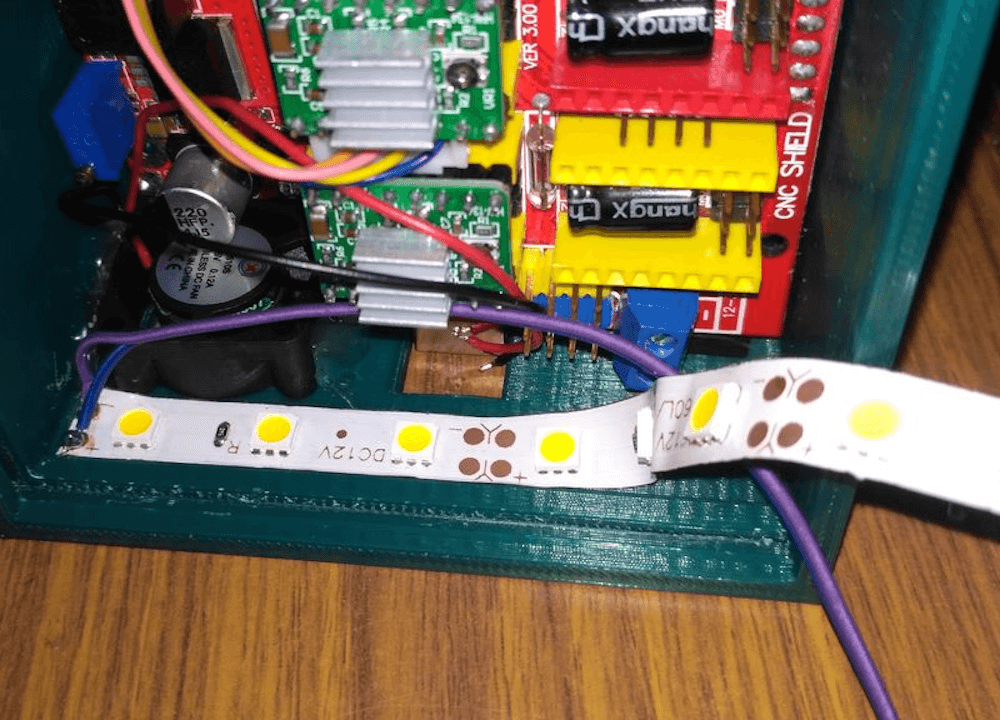
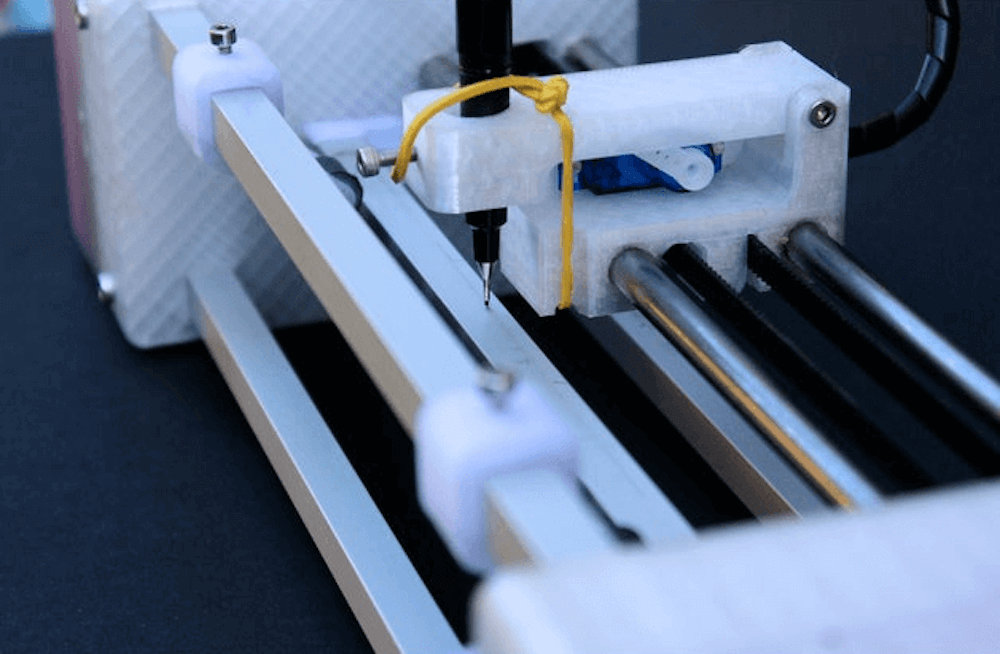
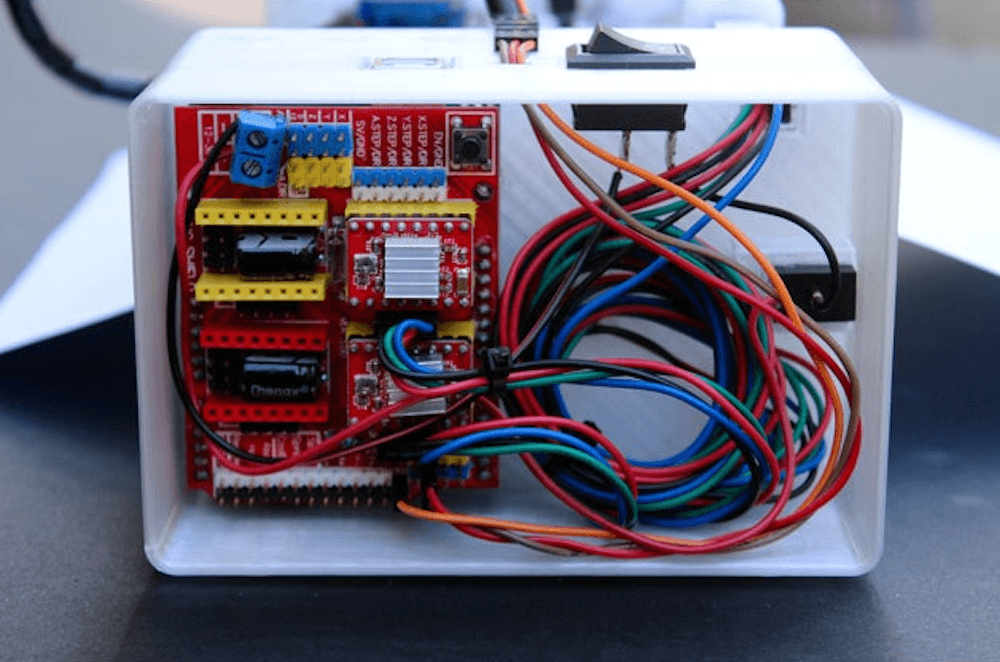
The pen plotter in question is a DIY machine that Oaks constructed using linear rails, stepper motors, and an Arduino Uno board with a CNC Shield that runs Grbl firmware. The computer connected to the Arduino takes the DALL-E 2-generated art in bitmap format and converts it to vector art, which contains line paths. It then translates those line paths into g-code that the Grbl firmware can understand, so the plotter can draw the lines.

This works really well for art pieces that look good as line art. Oaks even created a one-player Pictionary mode, in which the player can try to guess the randomly chosen prompt used to generate a piece of art.

The post Plotting AI-generated art onto paper appeared first on Arduino Blog.

The whole purpose of machine automation is to eliminate human needs and errors. A CNC machine doesn’t get tired, doesn’t need breaks, and performs a task exactly the same way every time. But what if that weren’t true? What if machines experienced human emotions and let it affect their work like we do? That’s the idea behind Devlin Macpherson’s Nervous Drawing Machine.

By all outward appearances, this is just a standard two-axis pen plotter. Like many laser cutters and 3D printers, it has a stepper motors controlled by an Arduino board that follows g-code commands. A command might be something like “move the X axis 2mm to the right.” By chaining hundreds or thousands of those commands together, the machine can follow complex toolpaths that form letters, symbols, pictures, or anything else. Macpherson equipped the pen plotter with a continuously fed roll of paper so it can draw indefinitely.

Under normal conditions, the machine plots row after row of little squares. A video camera points at the plotter as it works and the video feed streams through a website. And this is where things get interesting. If someone visits the website and watches the stream, the pen plotter becomes nervous about being observed. It will then start to make mistakes, like drawing scribbles instead of squares. Once the visitor leaves the website and the machine is unobserved once again, it will return to drawing perfect rows of squares.

Macpherson built the Nervous Drawing Machine for his thesis project titled ICFWYWM (I Can’t Focus When You’re Watching Me). Like all good interactive art installations, it reflects the human condition.

The post This pen plotter gets nervous when observed appeared first on Arduino Blog.

Around these parts, we see plenty of plotter builds. They’re a great way to learn about CNC machines and you get to have fun making pictures along the way. [Ben Lucy] was undertaking just such a build of his own, but wanted to do something standalone that served a purpose. The result is the impressive Portable Portrait Painter.

What sets [Ben]’s project apart is how complete it is. Unlike other plotters that simply follow G-code instructions or process external images, the Portable Portrait Painter is a completely standalone machine. Fitted out with an OV7670 camera, hooked up to an Arduino, it’s capable of taking its own photos and then drawing them out as well.

Through some clever code from [Indrek Luuk], the Arduino Mega2560 is able to display a 20fps video preview on a color LCD screen. When the user presses a button, the current frame is captured and sent to the pen plotter. The plotting algorithm is particularly impressive, with images first processed with histogram compensation to maximise contrast. The pen is then drawn across the page line by line, and pressed into the page by varying amounts depending on the color value of each pixel. The darker the pixel, the thicker the stroke made by the pen. This more analog approach produces a much more detailed image than more basic plotters which either leave a mark or don’t.

The portraits produced by the plotter are impressive, and we like the edge-of-page artifacts, which add a little style to the final results. The Portrait Painter would make a great conversation piece at any Maker Faire or hackerspace night.

It’s a project that reminds us of some of the painting robots we’ve seen over the years. Video after the break.

If you find yourself debating between a pen plotter or laser engraver, this project by Patrick Panikulam lets you have the best of both worlds in style. The DIY device pulls a writing instrument in the X-axis using a belt-driven overhead system, while the base itself moves in the Y direction.

Motion is handled by an Arduino Uno, along with a CNC shield and two A4988 drivers that actuate modified 28BYJ-48 steppers. The shield also outputs laser control signals, which are converted into PWM signals for the lifting servo when in pen mode. 

It’s an extremely clean build, and even features a Bluetooth module for wireless communication with your computer. Panikulam provides more details here if you’d like to create your own!

A couple of months back while checking out a few laser engravers on aliexpress, I came across some USB powered laser engravers. It was awesome that these could engrave on a variety of materials and also cut out shapes and designs from sticker sheets and paper and doing all this powered by a 5V USB supply. But the downside of these engravers was that they had a small work area, in most cases just 40mm X 40mm which is definitely way too small for my needs.

So I thought why not design and 3D print my own laser engraver from scratch. I started the designing process in Fusion 360 while keeping in mind all the 3D printing tolerances. And finally came up with something really cool. Along the way, I decided to make the laser holder modular so that I can easily replace the laser with a pen or marker for pen plotting. I also added a Bluetooth connectivity feature so that wired connection between your PC and the engraver can be eliminated while transmitting G-codes.

While computer printers are readily available, if you’d like a plotting device that drags a pen, marker, or whatever you need across paper to create images, your options are more limited. To fill this gap, studioprogettiperduti has come up with the d.i.d, or Deep Ink Diver.

This scalable pen plotter uses a frame made out of 3D-printed parts, as well as aluminum extrusion, which could be lengthened to support the size of paper that you need. A timing belt pulls the writing carriage back and forth, while a roller advances the paper. 

Control is handled by an Arduino Uno and a CNC shield, with a version of grbl that accommodates a servo used to lift the pen.

The materials and electronics used for the plotter are all standard and easy to source. The main frame is made of aluminum extrusion and 3D-printed connections. The motors are all standard NEMA 17 stepper motors and a single SG-90 servo motor. Everything is driven by a cheap Arduino Uno control board that handles the transition from g-code to movement. Furthermore, the software used to create G-code, Inkscape, is open source as well.

There’s nothing quite like building something to your own personal specifications. It’s why desktop 3D printers are such a powerful tool, and why this scalable plotter from the [Lost Projects Office] is so appealing. You just print out the end pieces and then pair it with rods of your desired length. If you’ve got some unusually large computer-controlled scribbling in mind, this is the project for you.

The design, which the team calls the Deep Ink Diver (d.i.d) is inspired by another plotter that [JuanGg] created. While the fundamentals are the same, d.i.d admittedly looks quite a bit more polished. In fact, if your 3D printed parts look good enough, this could probably pass for a commercial product.

For the electronics, the plotter uses an Arduino Uno and a matching CNC Shield. Two NEMA 17 stepper motors are used for motion: one to spin the rod that advances the paper, and the other connected to a standard GT2 belt and pulley to move the pen back and forth.

We particularly like the way [Lost Projects Office] handled lifting the pen off the paper. In the original design a solenoid was used, which took a bit of extra circuitry to drive from the CNC Shield. But for the d.i.d, a standard SG90 servo is used to lift up the arm that the pen is attached to. A small piece of elastic puts tension on the assembly so it will drop back down when the servo releases.

If this plotter isn’t quite what you’re after, don’t worry. There’s more where that came from. We’ve seen a number of very interesting 3D printed plotters that are just begging for a spot in your OctoPrint queue.

In this three part video series we watch [Dirk Herrendoerfer] go from scraps to a nice 3D printed assembly as he iterates through the design of a pen plotter for making circuit boards.

[dana] mentioned [Dirk]’s work in the comments of this post which describes a different process. Many permanent markers stick to copper well enough to last through the chemical etching process. While hand drawing definitely produces some cool, organic-looking boards, for sharp lines and SMDs it gets a bit harder; to the point where it becomes advisable to just let a robot do it.

Of course, [Dirk] was aware of this fact of life. He just didn’t have a robot on hand. He did have some electronic detritus, fishing line, an Arduino, scrap wood, brass tubes, and determination.  The first version‘s frame consisted of wooden blocks set on their ends with holes drilled to accept brass rods. The carriage was protoboard and hot glue. Slightly larger brass tubing served as bushings and guide. As primitive as it was the plotter performed admirably, albeit slowly.

The second version was a mechanical improvement over the first, but largely the same. The software got a nice improvement. It worked better and had some speed to it.

The latest version has some fancy software upgrades; such as acceleration. The frame has gone from random bits of shop trash to a nicely refined 3D printed assembly. Even the steppers have been changed to the popular 28BYJ-48 series. All the files, software and hardware, are available on GitHub. The three videos are viewable after the break. It’s a great example of what a good hacker can put together for practically no money.


Filed under: Arduino Hacks, cnc hacks

As someone who started using computers in the last century, I find the current resurgence of pen plotters somewhat nostalgic. The difference, of course, is that this century it is easier to make your own, which is what [Miguel Sanchez] is doing.

Inspired by the Axidraw, he is making his own pen plotter. He’s made great progress so far, creating a design that looks quite simple to build. His design is driven by an Arduino Uno with a stepper shield, a couple of NEMA 17 stepper motors and a servo to raise and lower the pen. Throw in a few rods, a belt or two and a number of 3D printed parts, and you’ve got a decent looking pen plotter.

He originally started with laser cut components, but shifted over to 3D printing as the design evolved. It’s not as fancy as the HP pen plotter I used to print out rude words in giant letters with in my youth (a HP7475, I think), but it is a neat build. Check it in action in the video below.


Filed under: Arduino Hacks


  • Newsletter

    Sign up for the PlanetArduino Newsletter, which delivers the most popular articles via e-mail to your inbox every week. Just fill in the information below and submit.

  • Like Us on Facebook