Posts | Comments

Planet Arduino

Archive for the ‘of’ Category

Introduction

It’s 2014 and the Internet-of-Things is flying along at a rapid rate with all sorts of services and devices that share data and allow control via the Internet. In the spirit of this we look a new service called plotly.

This is a “collaborative data analysis and graphing tool” which allows you to upload your own data to be analysed in many ways, and then graph the results using all sorts of plot types.

With plotly you can run your own mathematical functions over your data, run intense statistical analysis and use or edit one of the many APIs (PythonMATLABRJuliaRESTArduino, or Perl) to increase the level of customisation. Plotly works in conjunction with Google Drive to store your data, however this can be exported and imported without any issues. Futhermore plotly works best in Google Chrome.

For our review we’ll look at using plotly to quickly display and analyse data received from an Internet-connected Arduino – our EtherTen, or you can use almost any Arduino and Ethernet shield. The system isn’t completely documented however by revieiwng our example sketch and some experimenting with the interface plotly is very much usable, even in its current beta format.

Getting started with plotly

You will need to setup a plotly account, and this is simply accomplished from their main site. Some of you may be wondering what plotly costs – at the time of writing plotly is free for unlimited public use (that is – anyone can see your data with the right URL), but requires a subscription for extended private use. You can find the costs at the plans page.

Once you have a plotly account, visit your plotly home page, whose URL is https://plot.ly/~yourusername/# – then click “edit profile”. Another window will appear which amongst other things contains your plotly API key – make a note of this as you will need it and your username for the Arduino sketch.

Next, you’ll need some Arduino or compatible hardware to capture the data to log and analyse. An Arduino with an Ethernet or WiFi connection, and appropriate sensors for your application. We have our EtherTen that takes readings from a temperature/humidity sensor and a light level sensor:

Freetronics EtherTen Arduino Plotly

Now you need a new Arduino library, which is available from the plotly API page. Lots of APIs there… Anyhow, click “Arduino” and you will arrive at the github page. Download the entire .zip file, and extract the plotly_ethernet folder into Arduino libraries folder which in most installations can be found at ..Arduino-1.0.xlibraries. 

plotly arduino library folder

Finally we’ll use a demonstration sketch provided by plotly and modify this to our needs, which can be downloaded from github. We’ll go through this sketch and show you what to update – so have a quick look and then at out example sketch at the end of this section.

First, insert any code required to get data from your sensors and store the data in a variable – do this so the values can be used in void loop. Next, update the MAC address and the IP address of your Ethernet-enabled Arduino with the following lines:

byte mac[] = { 0xDE, 0xAD, 0xBE, 0xEF, 0xFE, 0xED };
byte my_ip[] = { 192,168,0,77 };

and change the MAC and IP if necessary. If Arduino and Ethernet is new to you, check out the tutorial. Now look for the following two lines and enter your plotly username and API key:

plotly.username = "yourplotlyusername";
plotly.api_key = "yourplotlyAPIkey";

Next – it’s a good idea to set your time zone, so the time in plots makes sense. Add the following two lines in void setup():

plotly.timestamp = true; 
plotly.timezone = "Australia/Melbourne";

You can find a list of time zones available for use with plotly here. Now you need to determine how many traces and points to use. A trace is one source of data, for example temperature. For now you will have one point, so set these parameters using the following lines:

int nTraces=x; // x = number of traces
int nPoints=1;

For example, we will plot temperature, humidity and light level – so this requires three traces. The next step is to set the filename for the plot, using the following line:

char filename[] = "simple_example";

This will be sent to plotly and your data will be saved under that name. At the point in your sketch where you want to send some data back to plotly, use:

plotly.open_stream(nPoints, nTraces, filename, layout);

… then the following for each trace:

plotly.post(millis(),data);

where data is the variable to send back to plotly. We use millis() as our example is logging data against time.

To put all that together, consider our example sketch with the hardware mentioned earlier:

// Code modified from example provied by plot.ly

#include <SPI.h>
#include <Ethernet.h>
#include "plotly_ethernet.h"
#include "DHT.h"

// DHT Sensor Setup
#define DHTPIN 2               // We have connected the DHT to Digital Pin 2
#define DHTTYPE DHT22          // This is the type of DHT Sensor (Change it to DHT11 if you're using that model)
DHT dht(DHTPIN, DHTTYPE);      // Initialize DHT object
plotly plotly;                 // initialize a plotly object, named plotly

//initialize plotly global variables
char layout[]="{}";
char filename[] = "Office Weather and Light"; // name of the plot that will be saved in your plotly account -- resaving to the same filename will simply extend the existing traces with new data

float h, t, ll;
int lightLevel;

// Ethernet Setup
byte mac[] = { 0xDE, 0xAD, 0xBE, 0xEF, 0xFE, 0xED }; // doesn't really matter
byte my_ip[] = { 192, 168, 1, 77 }; // google will tell you: "public ip address"

void startEthernet(){
  Serial.println("Initializing ethernet");
  if(Ethernet.begin(mac) == 0){
    Serial.println("Failed to configure Ethernet using DHCP");
    // no point in carrying on, so do nothing forevermore:
    // try to congifure using IP address instead of DHCP:
    Ethernet.begin(mac, my_ip);
  }
  Serial.println("Done initializing ethernet");
  delay(1000);
}

void setup() {
  // Open serial communications and wait for port to open:
  Serial.begin(9600);
  while (!Serial) {
    ; // wait for serial port to connect. Needed for Leonardo only
  }

  dht.begin(); // initialize dht sensor reading
  startEthernet();    // initialize ethernet

    // Initialize plotly settings
  plotly.VERBOSE = true; // turn to false to suppress printing over serial
  plotly.DRY_RUN = false; // turn to false when you want to connect to plotly's servers 
  plotly.username = "yourplotlyusername"; // your plotly username -- sign up at https://plot.ly/ssu or feel free to use this public account. password of the account is "password"
  plotly.api_key = "yourplotlyapikey"; // "public_arduino"'s api_key -- char api_key[10]
  plotly.timestamp = true; // tell plotly that you're stamping your data with a millisecond counter and that you want plotly to convert it into a date-formatted graph
  plotly.timezone = "Australia/Melbourne"; // full list of timezones is here:https://github.com/plotly/arduino-api/blob/master/Accepted%20Timezone%20Strings.txt
}

void loop() 
{
  // gather data to plot
  h = dht.readHumidity(); // read humitidy from DHT pin
  t = dht.readTemperature();
  lightLevel = analogRead(A5);
  ll = lightLevel / 100; // reduce the value from the light sensor

  // Open the Stream
  plotly.open_stream(1, 3, filename, layout); // plotlystream(number_of_points, number_of_traces, filename, layout)

  plotly.post(millis(),t); // post temperature to plotly (trace 1)
  delay(150);
  plotly.post(millis(),h); // post humidity to plotly (trace 2)
  delay(150);
  plotly.post(millis(),lightLevel); // post light sensor readout to plotly (trace 3)

  for(int i=0; i<300; i++)
  { // (once every five minutes)
    delay(1000);
  }
}

After wiring up the hardware and uploading the sketch, the data will be sent until the power is removed from the Arduino.

Monitoring sensor data

Now that your hardware is sending the data off to plotly, you can check it out in real time. Log into plotly and visit the data home page – https://plot.ly/plot – for example:

plotly home data page

Your data file will be listed – so just click on the file name to be presented with a very basic graph. Over time you will see it develop as the data is received, however you may want to alter the display, headings, labels and so on. Generally you can click on trace labels, titles and so on to change them, the interface is pretty intuitive after a few moments. A quick screencast of this is shown in this video.

To view and analyse the raw data – and create all sorts of custom plots, graphs and other analysis – click the “view data in grid” icon which is the second from the left along the bar:

view data grid button

At which point your data will be displayed in a new tab:

plotly arduino data grid

From this point you can experiment to your heart’s content – just don’t forget to save your work. In a short amount of time your data can be presented visually and analysed with ease:

plotly arduino data graph

Conclusion

Although plotly is still in beta form, it works well and the developers are responsive to any questions – so there isn’t much more to say but give it a try yourself, doing so won’t cost you anything and you can see how useful plotly is for yourself. And if you enjoyed this article, or want to introduce someone else to the interesting world of Arduino – check out my book (now in a third printing!) “Arduino Workshop”.

visit tronixlabs.com

Have fun and keep checking into tronixstuff.com. Why not follow things on twitterGoogle+, subscribe  for email updates or RSS using the links on the right-hand column, or join our forum – dedicated to the projects and related items on this website. Sign up – it’s free, helpful to each other –  and we can all learn something.

Introduction

If you’re awake and an Internet user, sooner or later  you’ll come across the concept of the “Internet of Things”. It is the goal of many people and organisations to have everything connected to everything for the exchange of data and the ability to control things. And as time marches on, more systems (or “platforms”) are appearing on the market. Some can be quite complex, and some are very easy to use – and this is where our interests lay. In the past we’ve examined the teleduino system, watched the rise of Ninja Blocks, and other connected devices like the lifx bulb and more.

However the purpose of this article is to demonstrate a new platform – XOBXOB (pronounced “zob-zob”) that gives users (and Arduino users in particular) a method of having remote devices connect with each other and be controlled over the Internet. At the time of writing XOBXOB is still in alpha stage, however you’re free to give it a go. So let’s do that now with Arduino.

Getting Started

You’ll need an Arduino and Ethernet shield – or a combination board such as a Freetronics EtherTen, or a WiFly board from Sparkfun. If you don’t have any Ethernet hardware there is a small application you can download that gives your USB-connected Arduino a link to the XOBXOB service. However before that, visit the XOBXOB homepage and register for an account. From there you can visit the dashboard which has your unique API key and a few controls:

XOBXOB dashboard

Now download the Arduino libraries and copy them into the usual location. If you don’t have an Ethernet shield, also get the “connector” application (available for all three OSs). The connector application is used after uploading the XOBXOB-enabled sketches to your Arduino and links it to the XOBXOB service.

Testing with exanples

Moving on, we’ve started with the basic LED control Ethernet sketch which is included in the XOBXOB library. It’s a fast way to check the system is working and your Internet connection is suitable. When using the examples for the first time (or any other XOBXOB sketch, don’t forget to enter your API key and Ethernet MAC address, for example:

byte mac[] = { 0xDE, 0xAD, 0xBE, 0xEF, 0x12, 0x01 };
String APIKey = "cc6zzzzz-0494-4cd7-98a6-62cf21aqqqqq";

We have the EtherTen connected to the ADSL and control via a cellular phone. It’s set to control digital pin 8 so after inserting an LED it worked first time:

The LED is simply turned on and off by using the ON/OFF panel on the XOBXOB dashboard, and then clicking “SET”. You can also click “GET” to retrieve the status of the digital output. The GET function is useful if more than one person is logged into the dashboard controlling what’s at the other end.

Now for some more fun with the other included example, which controls a MAX7219 LED display driver IC. We used one of the boards from the MAX7219 test a while back, which worked fine with the XOBXOB example in the Arduino library:

If this example doesn’t compile for you, remove the line:

#include <"avr/pgmspace.h">

Once operating, this example is surprisingly fun, and could be built into a small enclosure for a simple remote-messaging system.

Controlling your own projects

The functions are explained in the Arduino library guide, which you should download and review. Going back to the LED blink example, you can see how the sketch gets and checks for a new on/off message in the following code:

if (!lastResponseReceived && XOB.loadStreamedResponse()) {

    lastResponseReceived = true;

    String LED = XOB.getMessage("switch");
    if (LED == "\"ON\"") {
      digitalWrite (8, HIGH);
    } 
    else {
      digitalWrite (8, LOW);
    }

So instead of the digitalWrite() functions, you can insert whatever you want to happen when the ON/OFF button is used on the XOBXOB dashboard.  For example with the use of a Powerswitch Tail you could control a house light or other device from afar.

If you want to control more than one device from the dashboard, you need to create another XOB. This is done by entering the “advanced” dashboard and clicking “New”. After entering a name for the new XOB it will then appear in the drop-down list in either dashboard page. To then assign that XOB to a new device, it needs to be told to request that XOB by name in the Arduino sketch.

For example, if you created a new XOB called “garagelight” you need to insert the XOB name in the XOB.requestXOB() function in the sketch:

XOB.requestXOB("garagelight");

and then it will respond to the dashboard when required. Later on we’ll return to XOBXOB and examine how to upload information from a device to the dashboard, to allow remote monitoring of temperature and other data.

Conclusion

Experimenting with XOBXOB was a lot of fun, and much easier than originally planned. Although only in the beginning stages, I’m sure it can find a use with your hardware and a little imagination. Note that XOBXOB is still in alpha stage and not a finished product. For more information, visit hte XOBXOB website. And if you made it this far – check out my new book “Arduino Workshop” from No Starch Press.

In the meanwhile have fun and keep checking into tronixstuff.com. Why not follow things on twitterGoogle+, subscribe  for email updates or RSS using the links on the right-hand column? And join our friendly Google Group – dedicated to the projects and related items on this website. Sign up – it’s free, helpful to each other –  and we can all learn something.

The post Arduino and the XOBXOB IoT Platform appeared first on tronixstuff.

Sep
05

Adventures with SMT and a POV SMT Kit

and, blinky, device, kit, kit review, layne, LED, mount, of, persistence, pov, review, SMT, soldering, surface, technology, vision, wayne Comments Off on Adventures with SMT and a POV SMT Kit 

Introduction

There’s a lot of acronyms in the title for this article – what I wanted to say was “Adventures with surface-mount technology soldering with the Wayne & Layne Blinky Persistence-of-vision surface-mount technology reprogrammable light emitting diode kit…” No, seriously. Anyhow – after my last attempt at working with hand soldering surface-mount components couldn’t really be called a success, I was looking for something to start again with. After a little searching around I found the subject for today’s review and ordered it post-haste. Delivery from the US to Australia was twelve calendar days – which is pretty good, so you know the organisation is shipping quickly once you paid.

The kit is by “Wayne and Layne” which was founded by two computer engineering graduates. They have a range of open-source electronics kits that look like fun and a lot of “blinkyness”. Our POV kit is a simple persistence-of-vision display. By using eight LEDs in a row you can display words and basic characters by waving the thing through the air at speed, giving the illusion of a larger display. An analogy to this would be a dot-matrix printer that prints with ink which only lasts a fraction of a second. More on that later, first – putting it together.

Assembly

Like most other kits it arrived in an anti-static bag, with a label clearly telling you where the instructions are:

Upon opening the amount of items included seemed a little light:

However the instructions are detailed:

… and upon opening, reveal the rest of the components:

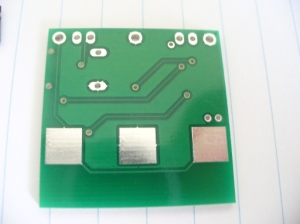
… which are taped down to their matching description on the cardboard. When cutting the tape to access the parts, do it slowly otherwise you might send them flying off somewhere on the bench and spend ten minutes looking for it. Finally, the PCB in more detail:

After reviewing the instructions, it was time to fire up my trusty Hakko and get started. At this point a few tools will come in handy, including SMT tweezers, some solder wick and a piece of blu-tac:

Following the instructions, and taking your time are the key to success. When mounting the two-pad components – put a blob of solder on one pad, then use tweezers to move the component in whilst keeping that pad of solder molten, remove the iron, then let go with the tweezers. Then the results should resemble capacitor C1 on the board as shown below:

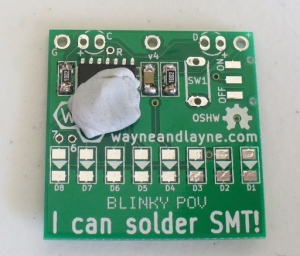
Then a quick blob at the other end seals it in. This was easily repeated for the resistors. The next step was the pre-programmed PIC microcontroller. It is in the form of a SOIC package type, and required some delicate work. The first step was to stick it down with some blu-tac:

… then solder down one pin at each end. Doing so holds it in place and you can remove the blu-tac and solder the rest of the pins in. I couldn’t solder each pin individually, so dragged solder across the pins then tried to soak up the excess with solder wick. I didn’t find this too successful, so instead used the solder sucker to mop up the excess:

If you solder, you should get one of these – they’re indispensable. Moving forward, the PIC finally sat well and looked OK:

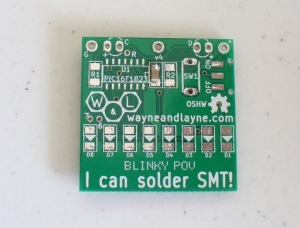
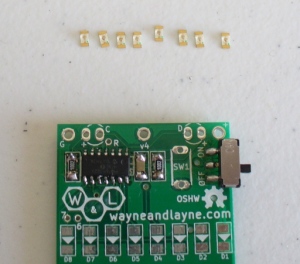
Next was the power-switch. It clicks neatly into the PCB making soldering very easy. Then the LEDs. They’re tiny and some may find it difficult to identify the anode and cathode. If you look at the top, there is a tiny dot closer to one end – that end is the cathode. For example, in the lineup:

Soldering in the LEDs wasn’t too bad – however to save time do all the anodes first, then the cathodes:

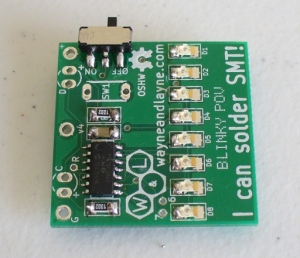
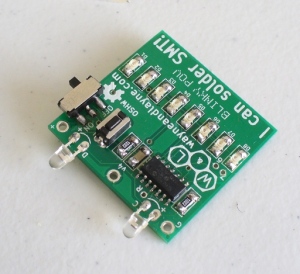
At this point all the tricky work is over. There are the light-sensor LEDs and the reset button for the top:

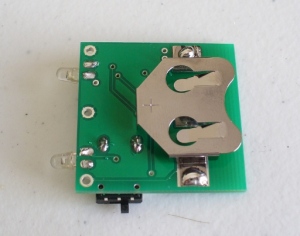
And the coin-cell battery holder for the bottom. The battery is also included with the kit:

Operation

Once you’ve put the battery in, turn it on and wave it about in front of yourself. There are some pre-programmed messages and symbols already loaded, which you can change with the button. However you’ll want to put your own messages into the POV – and the process for doing so is very clever. Visit the programming page, and follow the instructions. Basically you enter the text into the form, set the POV to programming mode – and hold it up against two squares on your monitor. The website will then blink the data which is received by the light-sensitive LEDs. Once completed, the POV will inform you of success or failure. This method of programming is much simpler than having to flash the microcontroller every time – well done Wayne and Layne. A pin and connector is also included which allows you to wear the blinky as a badge. Maybe at a hackerspace, but not in public.

Once programmed some fun can be had trying out various speeds of waving the blinky. For example, here it is with the speed not fast enough at all:

… and a little bit faster:

And finally with me running past the camera:

Furthermore, there is an ‘easter egg’ in the software, which is shown below:

Conclusion

We had a lot of fun with this simple little kit, and learned a thing or two about hand-soldering SMT. It can be done with components that aren’t too small – however doing so was an interesting challenge and the results were quite fun. So it met our needs very well. Anyone can do it with some patience and a clean soldering iron. You can order the Blinky POV SMT kit directly from Wayne & Layne. Full-sized images available on flickr. This kit was purchased without notifying the supplier.

In the meanwhile have fun and keep checking into tronixstuff.com. Why not follow things on twitterGoogle+, subscribe  for email updates or RSS using the links on the right-hand column? And join our friendly Google Group – dedicated to the projects and related items on this website. Sign up – it’s free, helpful to each other –  and we can all learn something.


Introduction

There’s a lot of acronyms in the title for this article – what I wanted to say was “Adventures with surface-mount technology soldering with the Wayne & Layne Blinky Persistence-of-vision surface-mount technology reprogrammable light emitting diode kit…” No, seriously. Anyhow – after my last attempt at working with hand soldering surface-mount components couldn’t really be called a success, I was looking for something to start again with. After a little searching around I found the subject for today’s review and ordered it post-haste. Delivery from the US to Australia was twelve calendar days – which is pretty good, so you know the organisation is shipping quickly once you paid.

The kit is by “Wayne and Layne” which was founded by two computer engineering graduates. They have a range of open-source electronics kits that look like fun and a lot of “blinkyness”. Our POV kit is a simple persistence-of-vision display. By using eight LEDs in a row you can display words and basic characters by waving the thing through the air at speed, giving the illusion of a larger display. An analogy to this would be a dot-matrix printer that prints with ink which only lasts a fraction of a second. More on that later, first – putting it together.

Assembly

Like most other kits it arrived in an anti-static bag, with a label clearly telling you where the instructions are:

Upon opening the amount of items included seemed a little light:

However the instructions are detailed:

… and upon opening, reveal the rest of the components:

… which are taped down to their matching description on the cardboard. When cutting the tape to access the parts, do it slowly otherwise you might send them flying off somewhere on the bench and spend ten minutes looking for it. Finally, the PCB in more detail:

After reviewing the instructions, it was time to fire up my trusty Hakko and get started. At this point a few tools will come in handy, including SMT tweezers, some solder wick and a piece of blu-tac:

Following the instructions, and taking your time are the key to success. When mounting the two-pad components – put a blob of solder on one pad, then use tweezers to move the component in whilst keeping that pad of solder molten, remove the iron, then let go with the tweezers. Then the results should resemble capacitor C1 on the board as shown below:

Then a quick blob at the other end seals it in. This was easily repeated for the resistors. The next step was the pre-programmed PIC microcontroller. It is in the form of a SOIC package type, and required some delicate work. The first step was to stick it down with some blu-tac:

… then solder down one pin at each end. Doing so holds it in place and you can remove the blu-tac and solder the rest of the pins in. I couldn’t solder each pin individually, so dragged solder across the pins then tried to soak up the excess with solder wick. I didn’t find this too successful, so instead used the solder sucker to mop up the excess:

suckersmall

If you solder, you should get one of these – they’re indispensable. Moving forward, the PIC finally sat well and looked OK:

Next was the power-switch. It clicks neatly into the PCB making soldering very easy. Then the LEDs. They’re tiny and some may find it difficult to identify the anode and cathode. If you look at the top, there is a tiny dot closer to one end – that end is the cathode. For example, in the lineup:

Soldering in the LEDs wasn’t too bad – however to save time do all the anodes first, then the cathodes:

At this point all the tricky work is over. There are the light-sensor LEDs and the reset button for the top:

And the coin-cell battery holder for the bottom. The battery is also included with the kit:

Operation

Once you’ve put the battery in, turn it on and wave it about in front of yourself. There are some pre-programmed messages and symbols already loaded, which you can change with the button. However you’ll want to put your own messages into the POV – and the process for doing so is very clever. Visit the programming page, and follow the instructions. Basically you enter the text into the form, set the POV to programming mode – and hold it up against two squares on your monitor. The website will then blink the data which is received by the light-sensitive LEDs. Once completed, the POV will inform you of success or failure. This method of programming is much simpler than having to flash the microcontroller every time – well done Wayne and Layne. A pin and connector is also included which allows you to wear the blinky as a badge. Maybe at a hackerspace, but not in public.

Once programmed some fun can be had trying out various speeds of waving the blinky. For example, here it is with the speed not fast enough at all:

… and a little bit faster:

And finally with me running past the camera:

Furthermore, there is an ‘easter egg’ in the software, which is shown below:

Conclusion

We had a lot of fun with this simple little kit, and learned a thing or two about hand-soldering SMT. It can be done with components that aren’t too small – however doing so was an interesting challenge and the results were quite fun. So it met our needs very well. Anyone can do it with some patience and a clean soldering iron. You can order the Blinky POV SMT kit directly from Wayne & Layne. Full-sized images available on flickr. This kit was purchased without notifying the supplier.

In the meanwhile have fun and keep checking into tronixstuff.com. Why not follow things on twitterGoogle+, subscribe  for email updates or RSS using the links on the right-hand column? And join our friendly Google Group – dedicated to the projects and related items on this website. Sign up – it’s free, helpful to each other –  and we can all learn something.

The post Adventures with SMT and a POV SMT Kit appeared first on tronixstuff.


  • Newsletter

    Sign up for the PlanetArduino Newsletter, which delivers the most popular articles via e-mail to your inbox every week. Just fill in the information below and submit.

  • Like Us on Facebook