Posts | Comments

Planet Arduino

Archive for the ‘leonardo’ Category

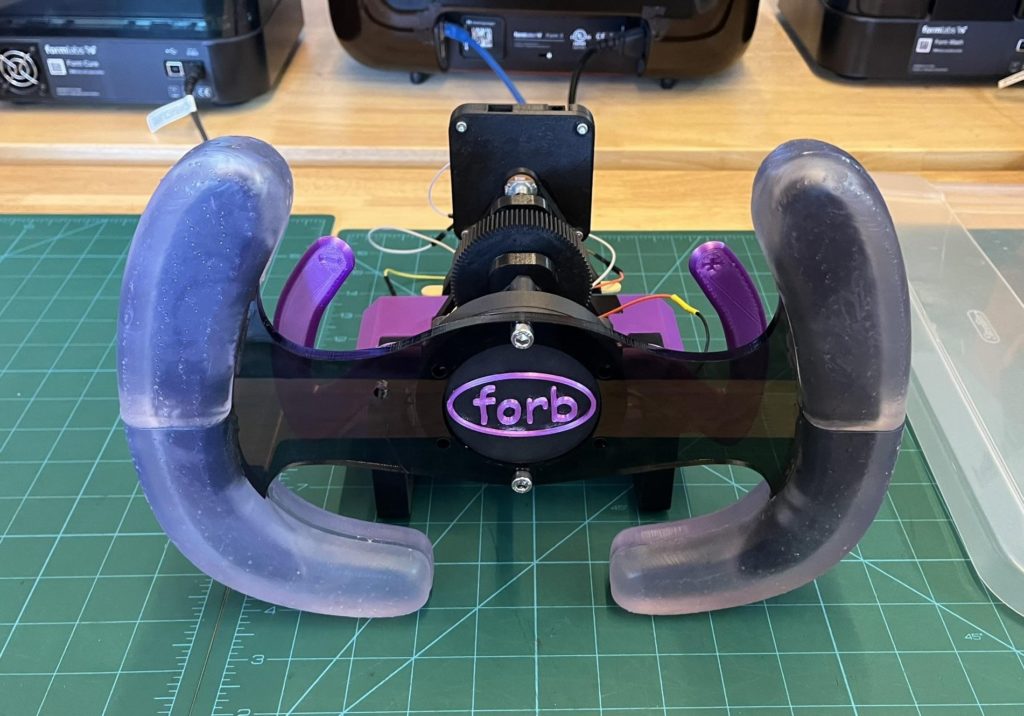
Racing “video games” can be incredibly realistic these days, with every facet of the car’s physics and their interaction with the asphalt programmed in. Those racing sims could provide a completely immersive experience—if the player wasn’t sitting on a motionless couch using a controller that doesn’t resemble a car’s steering wheel in the slightest. To rectify that issue, high school student Pranshu Agnihotri built his dream racing wheel.

Agnihotri tackled this project for a senior project in his Principles of Engineering class at Irvington High School. Its purpose is to provide a more realistic interface for racing games and sims. It doesn’t have any force feedback capabilities, but it will work with any PC game thanks to the Arduino that lets the user easily rebind controls. Those can even emulate keyboard and mouse inputs for games that weren’t designed for use with steering wheels.
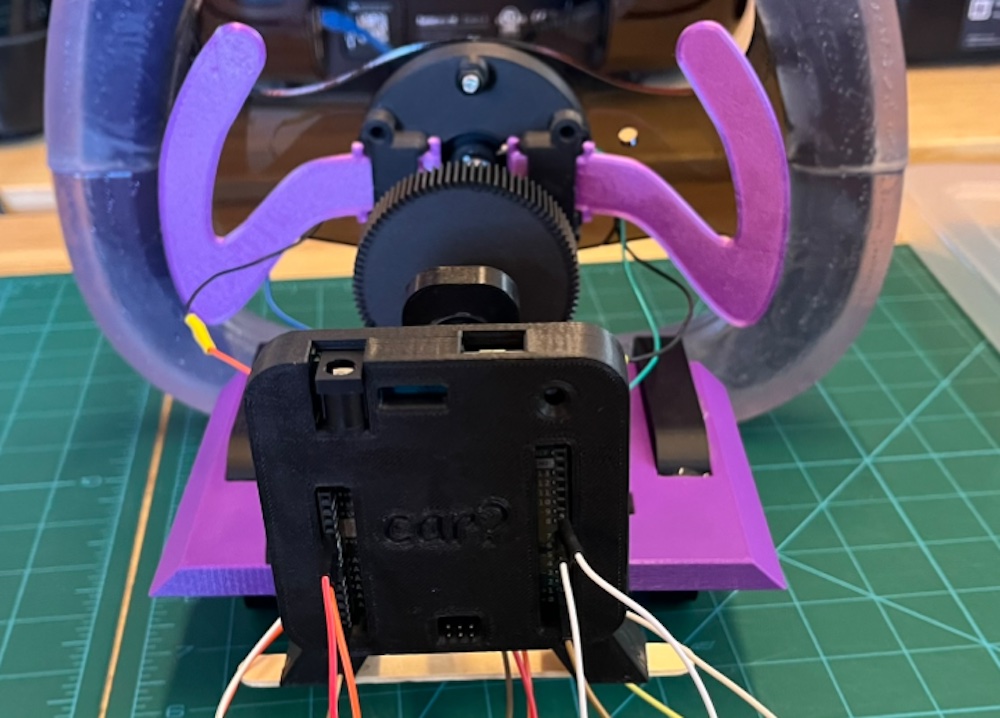
The brain is an Arduino Leonardo, which Agnihotri chose for its Microchip ATmega32u4 microcontroller. That is configurable as a standard USB HID, so any computer will recognize its inputs without any special drivers or software. The steering wheel and electronics enclosure were 3D-printed in exactly the shape Agnihotri wanted. An M8 threaded shaft acts as the steering column. A potentiometer provides steering angle input, while limit switches detect when the player presses the paddle shifters. The Arduino reads those inputs, then sends out the corresponding gamepad, keyboard, or mouse commands via USB.

We have to assume that Agnihotri aced this assignment, and now he has an awesome steering wheel to race with. 

The post High school student builds his dream racing wheel appeared first on Arduino Blog.

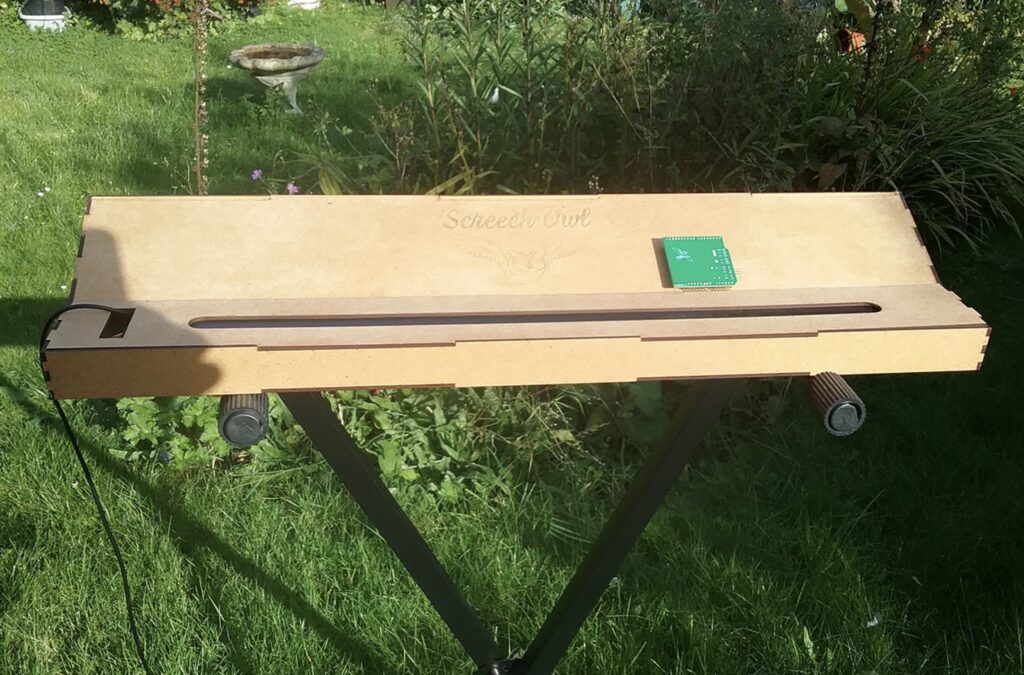
The Eowave Persephone was an interesting ribbon synthesizer that let musicians control frequency by moving their fingers across a long touch sensor. Ben Glover used to own one, but sold it. During shipping to the buyer, it got lost in the mail and so Glover can’t even buy it back. He regretted losing his Eowave Persephone, so he decided to create his own ribbon synthesizer called the Screech Owl.

If you could even find one, buying a used Eowave Persephone today would likely set you back at least a thousand dollars. But the Screech Owl is affordable to build, operates in the same manner, and sounds very similar. Glover is a novice maker and was able to pull of this project by outsourcing much of the work to ChatGPT and vendors on Fiverr.

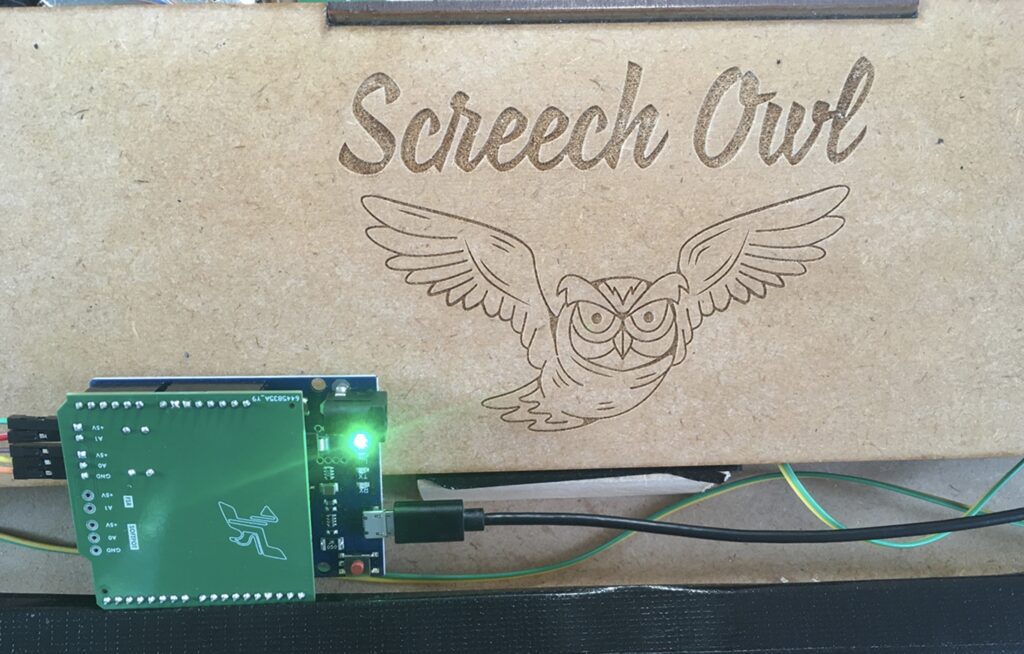
One part that Glover designed himself was the custom PCB that acts as a shield for an Arduino Leonardo board. The Arduino handles the synthesis according to the input coming from the ribbon. That ribbon is actually two sensors: a SoftPot 500mm-long membrane potentiometer for position and thin film pressure sensor to measure force for aftertouch. Those components fit into a simple but attractive, laser-cut MDF enclosure.

Now Glover can relive the experience of playing the Eowave Persephone without the immense cost.

The post Unique synthesizer screeches like an owl appeared first on Arduino Blog.
Racing simulators these days are very good, thanks to incredibly realistic graphics and physics. Developers have recreated the effects of everything from tire composition to asphalt temperature. But a lot of that effort goes to waste when you’re playing with a standard gamepad, because that can’t probably any feedback other than some vibration. To make the most of racing sims, Jason Winfield built a DIY force feedback steering wheel using the motor from an old power drill.

Force feedback steering wheels act as both input devices and output devices. As input devices, they monitor the angle of the wheel to provide a steering value to the game. As output devices, a motor forces the steering wheel to rotate based on what occurs within the simulation. In a hard turn, it might provide resistance. If you spin out of control, the wheel might move around wildly. Because that has to overcome the player’s own grip on the wheel, the force feedback motor needs a lot of torque and that’s why Winfield chose to scavenge the motor from a power drill.

This motor, like any you’d find in a decent drill, is powerful. It also includes a planetary gearbox to increase torque at the expense of speed — a worthwhile compromise for an application like this. Winfield also scavenged the motor’s high-current driver, which can be an expensive component. An Arduino Leonardo board controls the motor’s operation according to values coming from the racing sim and also sends steering commands to the sim.

As Winfield states, this prototype has some issues and the strength of the parts isn’t enough for long term use. But with a little more development, he should have a pretty nifty force feedback steering wheel to race with!

The post DIY force feedback steering wheel receives motor from an old power drill appeared first on Arduino Blog.

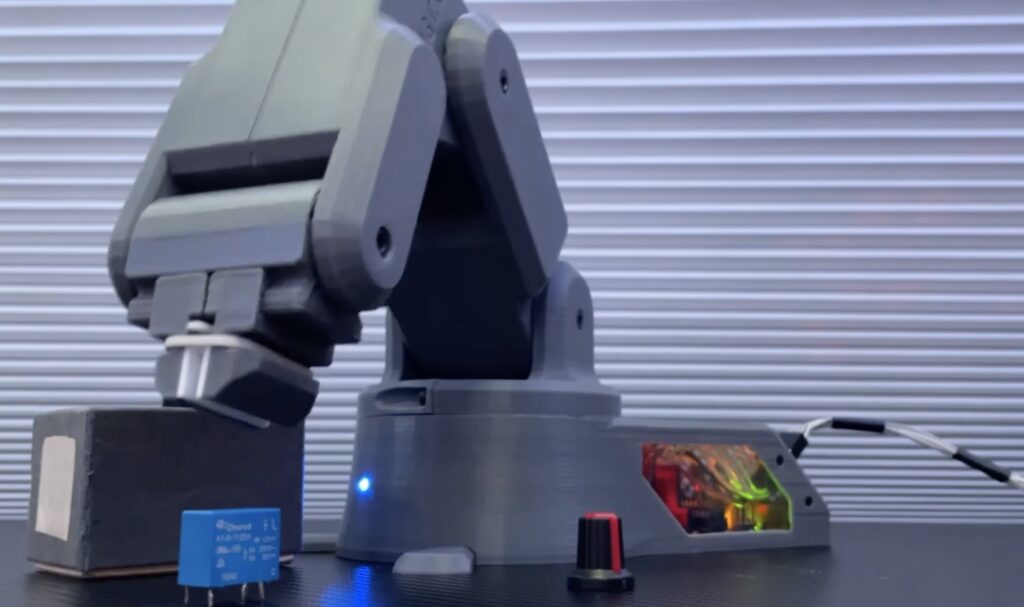
Getting started in the world of robotics can be a very challenging task, even for more experienced hobbyists, due to how difficult it can be to achieve smooth and precise motion through programming. Frustrated by the lack of accessible options, the YouTuber known as “Build Some Stuff” decided to not only design his own, but to do it using as few prefabricated parts as possible and while keeping the total cost under $60.

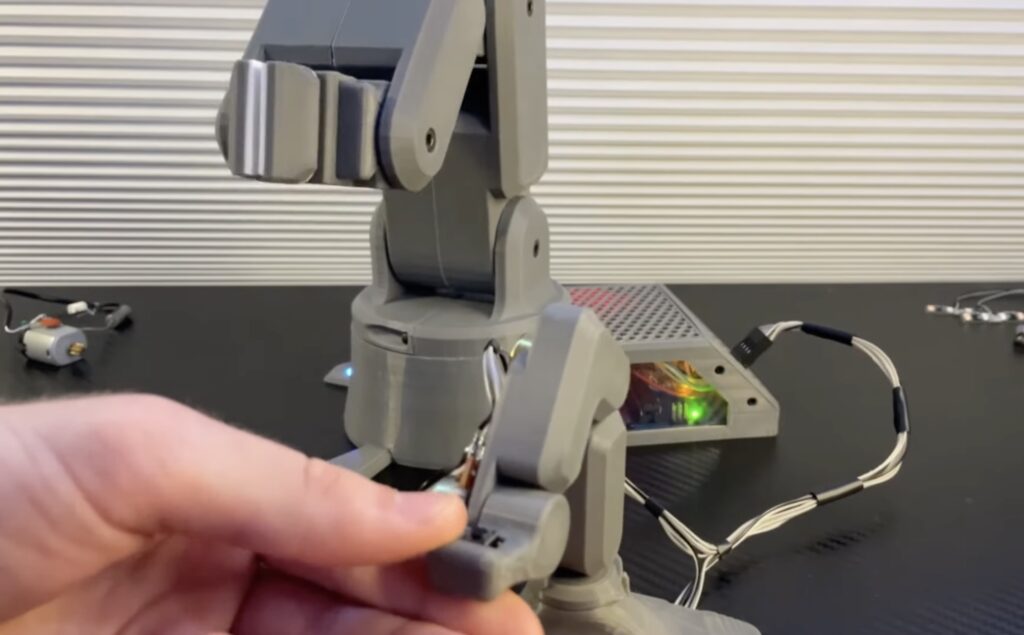
The premise of the arm project was to utilize a total of five servo motors for manipulating each degree of freedom, as well as an Arduino Leonardo and a PCA9685 driver for controlling them. Once the components had been selected, Build Some Stuff then moved onto the next step of creating 3D models of each of the robot arm’s joints in Fusion 360 before 3D printing them. He also made a scaled-down version of the larger arm assembly and replaced the servo motors with potentiometers, therefore allowing him to translate the model’s position into degrees for the motors.

Although simple, the code running on the Leonardo was still responsive enough to move the servos in nearly perfect synchronization compared to the model. To see more about how Build Some Stuff was able to make this robotic system from scratch and some of the problems he ran into, watch the video below!

The post An Arduino Leonardo-powered, 3D-printed robotic arm designed from scratch appeared first on Arduino Blog.
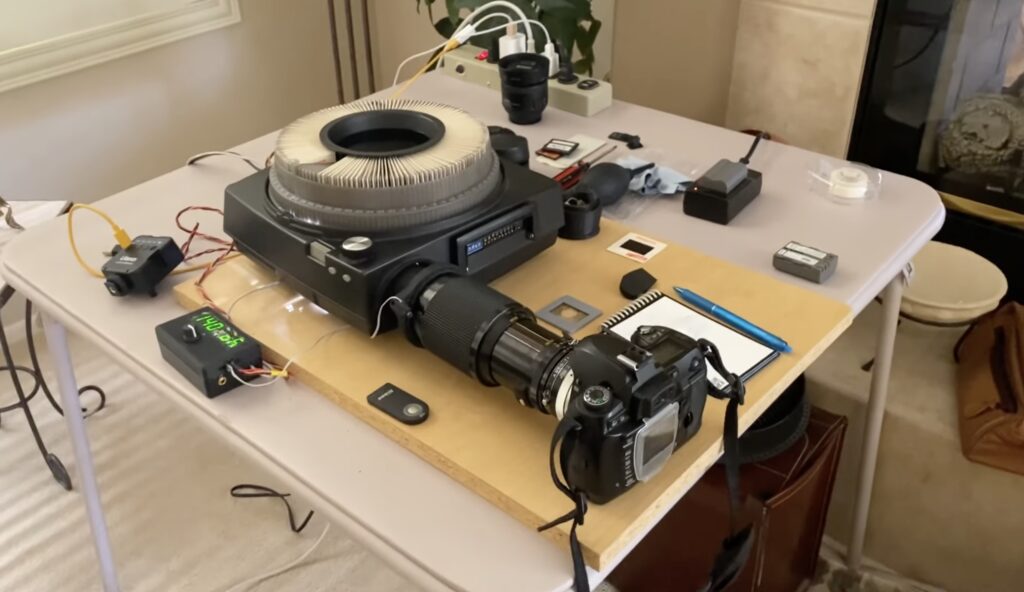
Until the proliferation of digital photography, film slides were a common way to share photos. After a nice vacation in the ‘70s, you might take your film rolls for development and would have the option to receive a set of slides. You could then gather all of your friends in your living room, pop those slides into a projector carousel, and force everyone to look at unfocused pictures of palm trees projected onto the wall. If you still have a collection of slides (or inherited your parents’ collection), this video from Scott Lawrence demonstrates one method for converting them to digital photos.

This approach might seem rudimentary, but it is quite effective. If you look at it from a high level, it is essentially just snapping photos of the slides with a modern DSLR camera. But those cameras are capable of capturing very high-quality pictures and this process is easy to automate. The key to that automation is the use of a vintage slide carousel. They are affordable and easy to control with a microcontroller, which makes them perfect for this application.

In this case, Lawrence used an Arduino Leonardo board. It controls two things: the slide carousel and the camera’s shutter. The user interface, made with a six-digit seven-segment display and a rotary encoder, lets the operator setup the number of slides to capture, the pause between slides, backlight brightness, and so on. When activated, the controller tells the carousel to load a slide, triggers the camera’s shutter, and then repeats with the next slide. Each slide only takes a few seconds to load and capture, which means this can digitize more than a thousand slides per hour.

The post Digitize your old slides with a modern DSLR camera appeared first on Arduino Blog.
Inspired by a recent project involving Disney’s MagicBand technology, William Wimberly and Anthony Pallitta created an Arduboy-compatible RFID scanner they call the Ardumiibo, along with a DIY rumble pack. The Ardumiibo got its name from Nintendo’s Amiibo system, which allows players to tap NFC-equipped figurines and see them within a game. In a similar manner, the Ardumiibo enables users to scan their NFC tags on a device built from an Arduino Leonardo board and PN532 RFID module. 

The NFC scanning system is contained within a small 3D-printed enclosure that also has a NeoPixel ring around the top for some added flair. It connects to the host Arduboy device via a serial cable, which allows for programs on the gaming system to simply implement the protocol for communicating with the Ardumiibo. As for the rumble pack that is integrated into the scanner, it is attached to the Arduboy over pin 2 that lets the game send pulses with the Tone commands for haptic feedback or playing small songs. 

The Ardumiibo is a great little gadget that lets Arduboy game designers easily add both rumble and NFC capabilities to their systems. You can read more about the duo’s work in their Hackster write-up here and find their design files and code here on GitHub.

The post Scan items from the real world into your Arduboy games with the Ardumiibo appeared first on Arduino Blog.
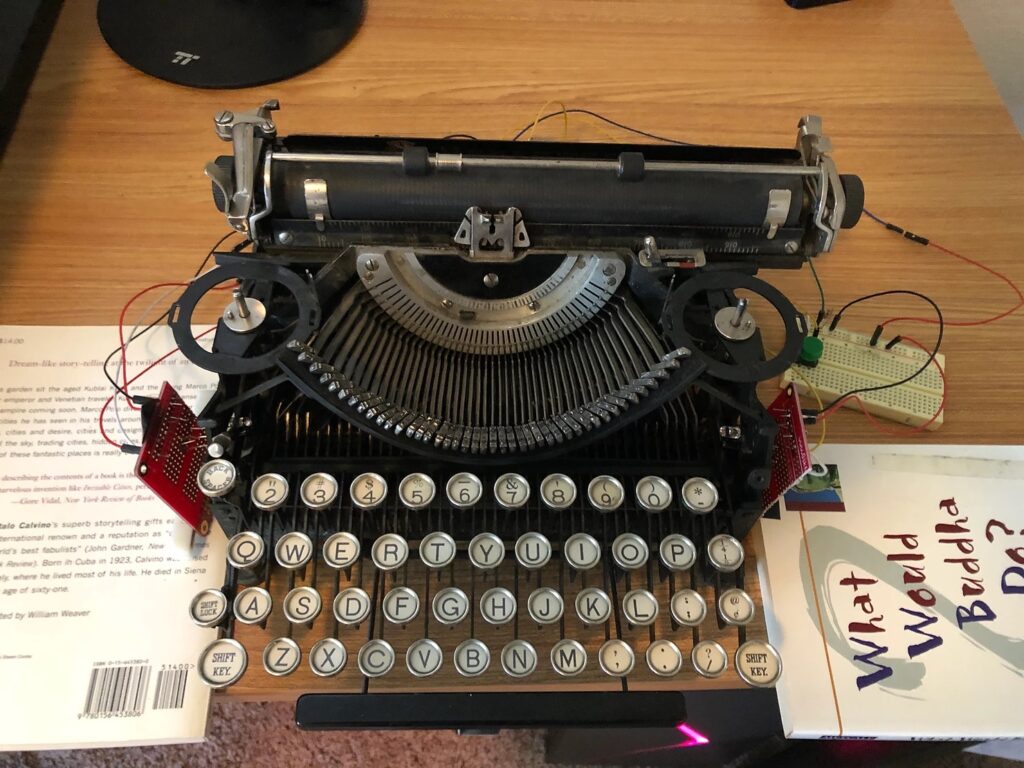
Although mechanical keyboards are more popular than ever in gaming communities, getting that perfect “click” when you press down on the key is still being chased. That’s why maker Jason Ron wanted to convert an old typewriter into the perfect gaming controller. It works by using some tape wrapped around several of the typebars that either reflects more light when held up or none when it’s lowered. A pair of IR emitters and receivers were used to detect these changes in light levels, where their values were then read by an Arduino Leonardo

The code Ron wrote takes advantage of the Leonardo’s native USB peripheral, letting it act as a keyboard for a host device. When the light level falls between certain predetermined values a key is pressed virtually and then sent to the computer, although this functionality can be toggled on or off to prevent unwanted keypresses. 

If you want to see more about how this project was built along with some footage of Ron playing Red Dead Redemption 2, be sure to check out the video below and associated write-up on his blog.

The post Typewriter turned into mechanical keyboard for gaming appeared first on Arduino Blog.
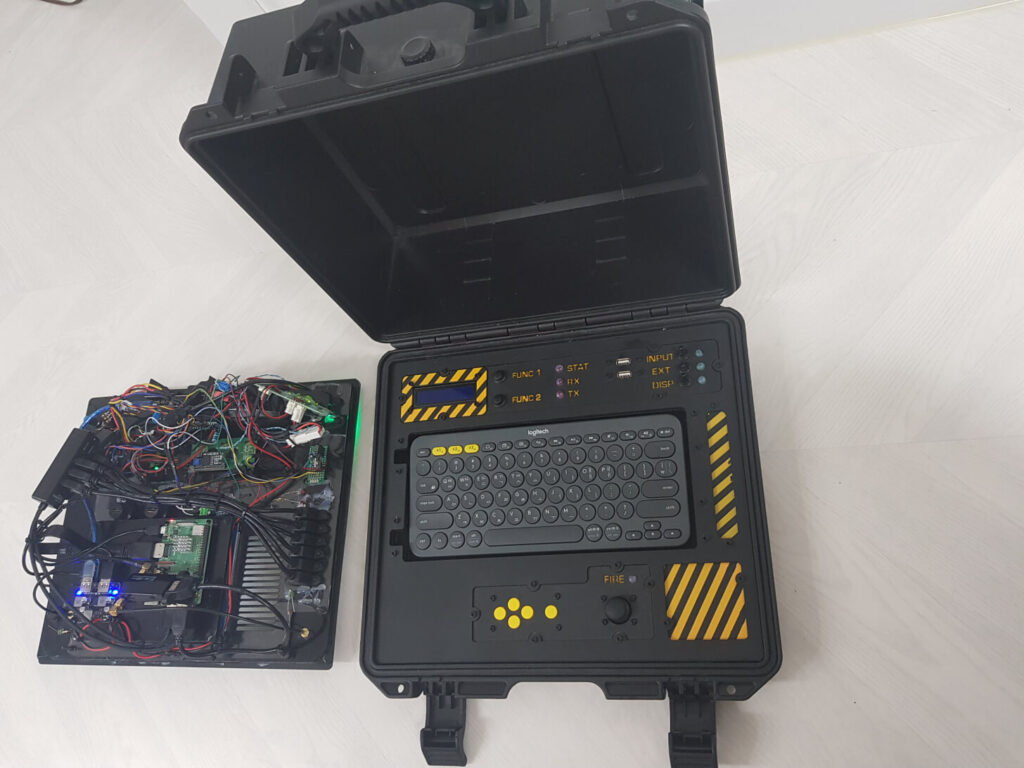
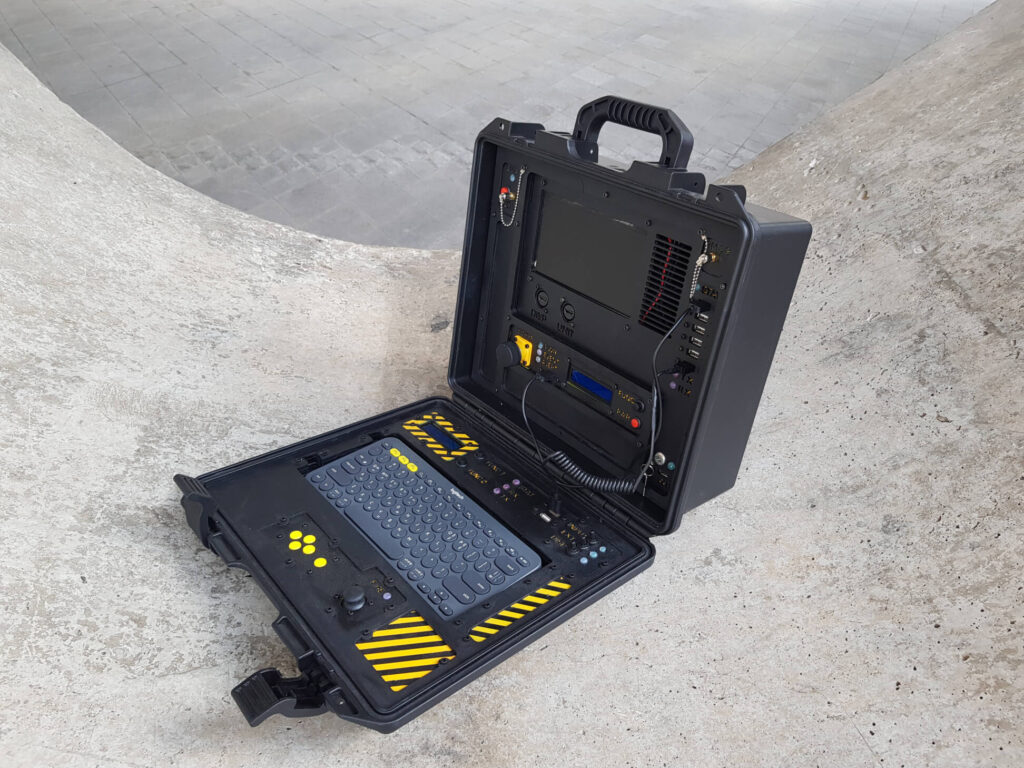
Combining cosplay and actual science, as well as a backstory that entails the two, this R.A.T.I.S. (Remote Assault and Tactical Intelligence System) cyberdeck by Paul Hoets is a true retrofuturistic work of art.

The build supposedly has its roots in the 1970s South African nuclear program, where it was used for radiation measurement and encrypted satellite data transfer. Given the luggable cyberdeck’s superb quality, one could almost believe it was military equipment.

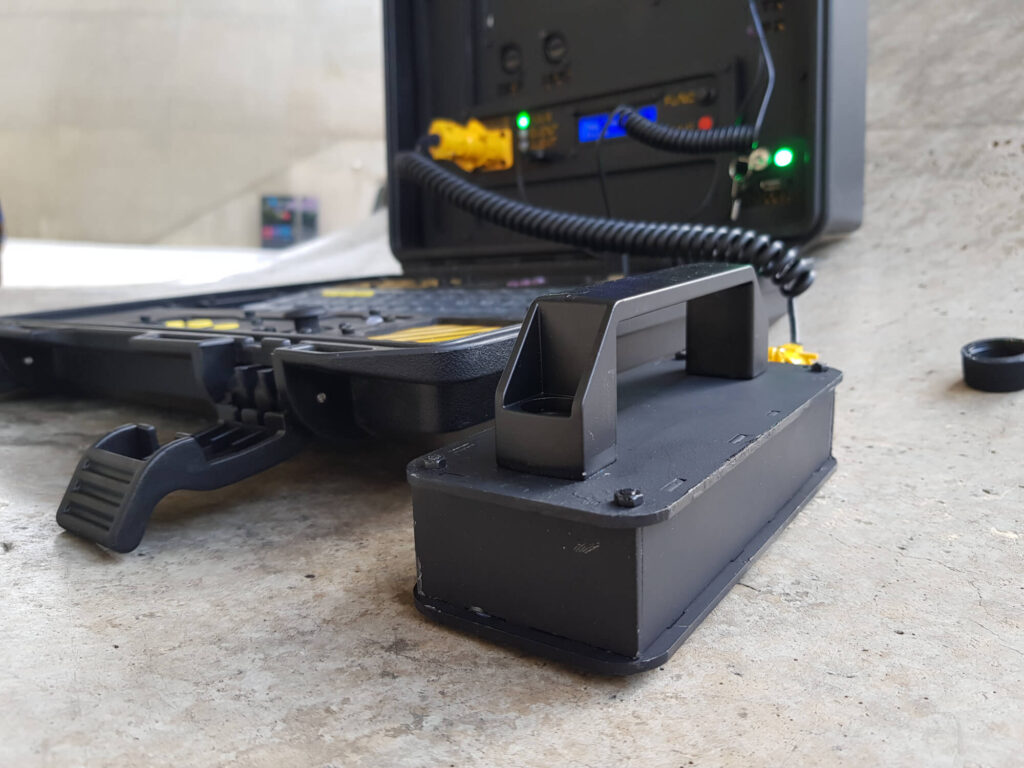
Looking inside the rugged case reveals a Raspberry Pi 3 that provides computing power along with an Arduino Leonardo for a custom joystick input, indicating civilian origins. While there’s no satellite uplink (at least not without WiFi), it does feature a functional Geiger counter, which allows one to monitor local conditions for dangerous radiation levels.

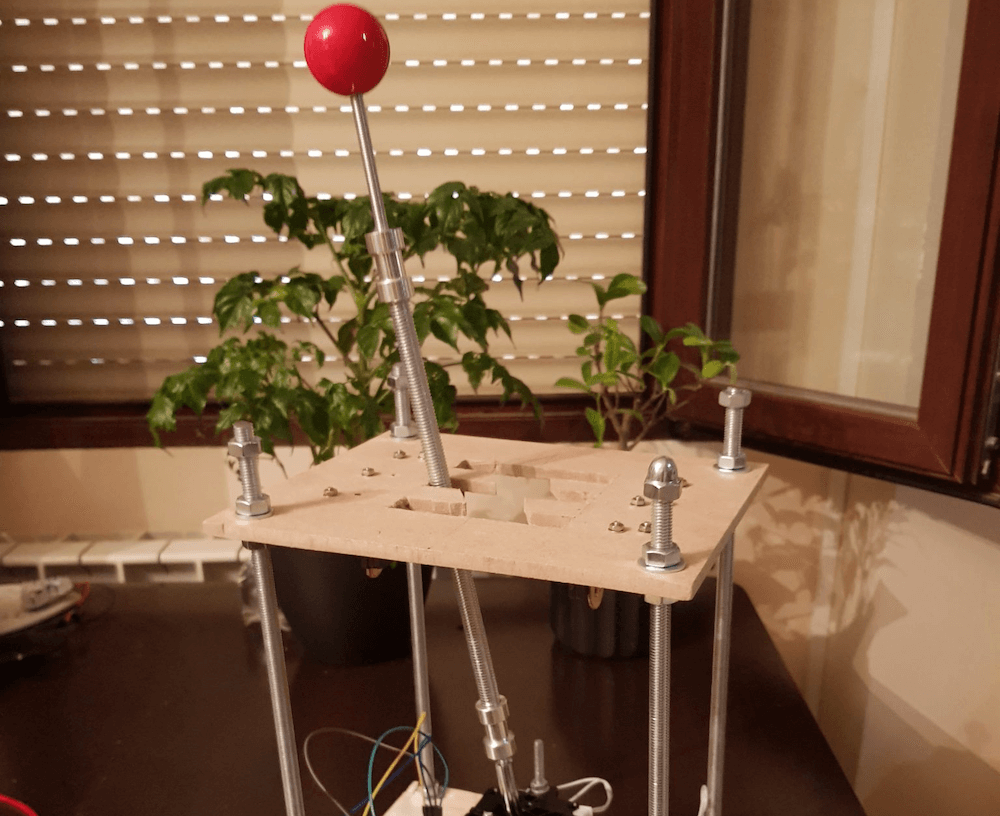
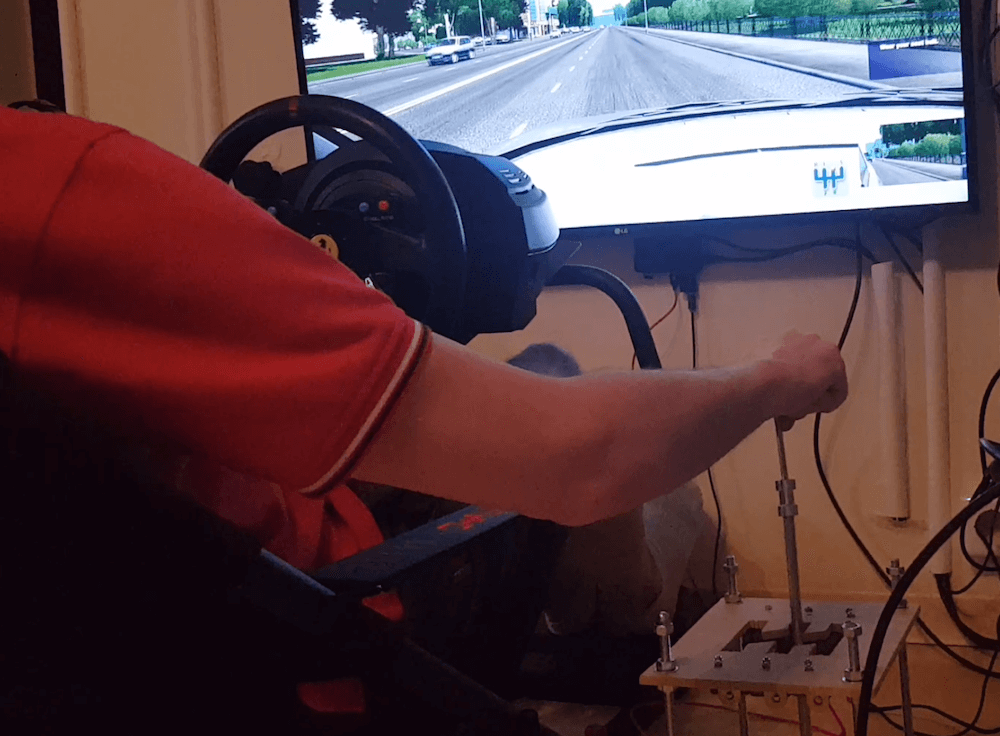
If you’d like to add a gear stick to your virtual race car, then Oli Norwell has just the project for you.

His USB device extends a joystick with a length of threaded rod through a custom-cut wooden plate, restricting movements to a 1-5/reverse/neutral layout. The shifter is held in different gear positions using magnets, in order keep it from automatically springing back to center.

An Arduino Leonardo reads the switch states, and passes along the shift positions as a simulated joystick in HID mode. Possible future improvements include extra buttons, mode selection switches, and even an LCD screen for feedback.

Check it out sim-driving in the video below!

There was a time when building realistic simulations of vehicles was the stuff of NASA and big corporations. Today, many people have sophisticated virtual cockpits or race cars that they use with high-resolution screens or even virtual reality gear. If you think about it, a virtual car isn’t that hard to pull off. All you really need is a steering wheel, a few pedals, and a gear shifter. Sure, you can build fans to simulate the wind and put haptics in your seat, but really the input devices alone get you most of the way there. [Oli] decided he wanted a quick and easy USB gear shifter so he took a trip to the hardware store, picked up an arcade joystick, and tied it all together with an Arduino Leonardo. The finished product that you can see in the video below cost about $30 and took less than six hours to build.

The Leonardo, of course, has the ability to act like a USB human interface device (HID) so it can emulate a mouse or a keyboard or a joystick. That comes in handy for this project, as you would expect. The computer simply has to read the four joystick buttons and then decide which gear matches which buttons. For example up and to the left is first gear, while 4th gear is only the down button depressed. A custom-cut wooden shifter plate gives you the typical H pattern you expect from a stick shift.

Of course, the joystick doesn’t have a long handle like a true stick shift, so [Oli] added some extensions. In addition, a real shifter doesn’t require you to hold it in position as a joystick would. To rectify this, the shifter plate has magnets that grab the stick and hold it. They aren’t strong enough that you can’t move the stick, but they are strong enough to keep it from moving on its own.

We noticed that the design doesn’t allow for a clutch, so it isn’t quite the same as driving a real stick. However, [Oli] mentions several upgrades he has in mind and a clutch is one of them. Some haptics would be a cool addition so could feel the gears grind if you didn’t do the shift correctly.

The last shifter we saw like this was 3D printed. It is getting harder to find a car in the US with a manual transmission, but [Kristina Panos] is definitely a fan.


  • Newsletter

    Sign up for the PlanetArduino Newsletter, which delivers the most popular articles via e-mail to your inbox every week. Just fill in the information below and submit.

  • Like Us on Facebook