Posts | Comments

Planet Arduino

Archive for the ‘vending machine’ Category

Coin-operated machines have a longer history than you might think. Ancient temples used them to dispense, for example, holy water to the faithful in return for their coins. Old payphones rang a bell when you inserted a coin so the operator knew you paid. Old pinball machines had a wire to catch things with holes in the middle so you couldn’t play with washers. But like everything else, coin acceptors have advanced quite a bit. [Electronoobs] shows a unit that can accept coins from different countries and it is surprisingly complex inside. He used what he learned from the teardown to build his own Arduino-based version.

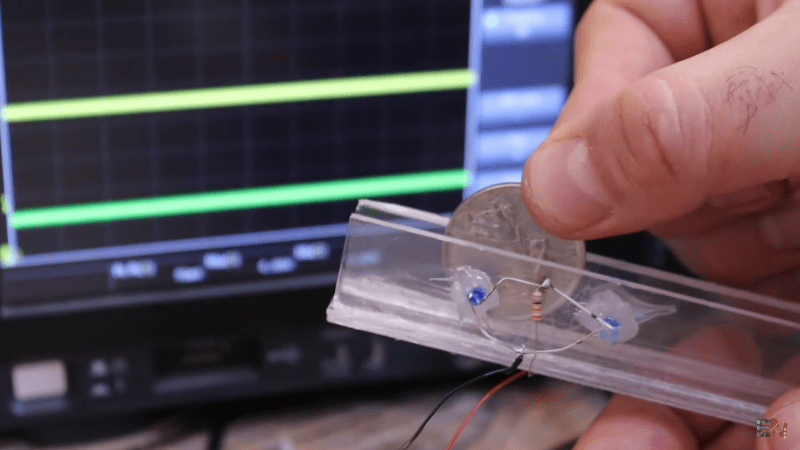
For scale, there is the obligatory banana. Inside the box there are several induction coils and some photo electronics. In particular, there are two optical sensors that watch the coin roll down a ramp. This produces two pulses. The width of the pulse indicates the diameter of the coin, and the time between the pulses tells its speed.
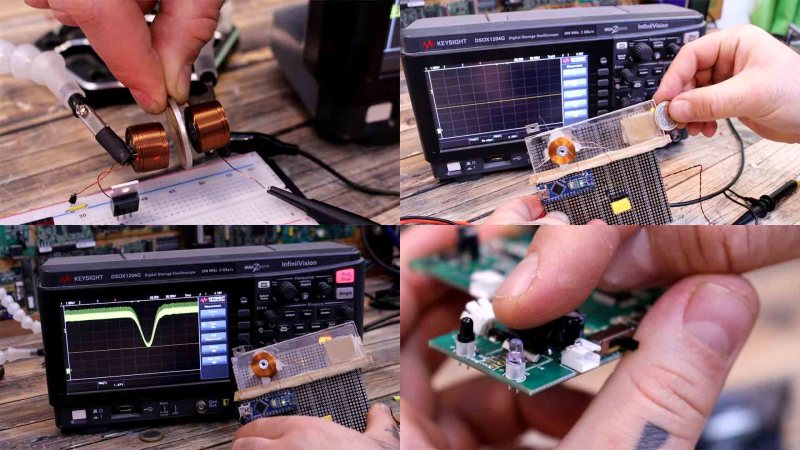
So what are the two coils for? They form a transformer, and the coin moving between the coils changes the coupling in a way that depends on the material. By knowing the diameter, the transit speed of the coin, and the material, you can identify the coin. A little solenoid-driven flap moves out of the way to store a recognized coin. If it doesn’t move out of the way, the coin goes out of the coin return slot.

We wondered how the machine knows about local currency and what happens if the composition of a coin changes. The video shows how you teach the device about a coin by inserting a sample coin multiple times and letting the device measure. So even if you had some custom token, it should work.

The homebrew solution is pretty easy, especially the optical part. The coils are a bit more work since you need a big coil along with the associated driver and sense electronics. Then, of course, there is also the mechanics, which he did not build, since the commercial product was only $20.

We always enjoy teardowns, but this one was especially informative, and we enjoyed the reproduction of the operating principles. Hero was a Greek who lived a long time ago and would have really been interested in this teardown. We couldn’t help but think, too, of [Peter’s] coin-operated calculator.

There are some debates that split the world down the middle. Serious stuff: M&Ms, or Smarties*? Yes, the two chocolate beans may bear a superficial resemblance to each other, but you’re either a Smartie lover, or an M&M lover. No compromises.

[Maximusvo] has sensibly dodged all questions of brand loyalty in his text if not in his images even though it’s obvious what kind of confectionery he’s working with in his candy vending machine. The hard-shell chocolates are loaded into a hopper, from which a colourful cascade is released onto a scale. When the desired weight has been accumulated, it is tipped into a drawer for the hungry recipient.

Behind it all is an Arduino with a motor to release the beans, a load cell to weigh them, and an LCD display to give a status report. A motor vibrates the chute to ensure they move down it, but as can be seen in the video demo below the break it’s not doing an entirely successful job. There is an external buzzer to indicate delivery, and aside from the wooden construction of the machine there are 3D printed parts in the scale.

Most of the vending machines we’ve shown you have involved not Smarties or M&Ms, but cans of soda. Perhaps your high school locker can house one, or failing that you’d like to raid someone else’s machine.

*European chocolate Smarties, that is, not American candy sweets.


Filed under: Arduino Hacks

Nothing says ‘I Love You’ like an old vending machine, and if it is a restored and working vintage Vendo V-80 cola dispenser then you have yourself a winner. [Jan Cumps] from Belgium was assigned the repair of the device in question by a friend. He started off with just a working refrigerator and no electronics. In a series of repairs, he began with replacing the mechanical coin detector’s switches with optical and magnetic sensors to detect the movement of the coin. These sensors are in turn connected to an Arduino which drives the dispensing motor. The motor itself had to be rewound as part of the repair. Since the project is on a deadline, the whole thing is finished using protoboards and through-hole parts. The final system works by dispensing one frosty bottle every time a coin is inserted.

In contrast to most vending machine repairs, this project was a simple one. Instead of using an off-the-shelf coin detector, a simple LED and photodiode pair brought the hack to life. This could easily be adapted to any machine and even be used to create a DIY vending machine on the cheap. 

In his blog, [Jan Cumps] demonstrates each working step in a video and share the Arduino code and schematic as well as other interesting details. You can see the final working version in the video below.

It has been a long time since a Vending Machine Prototyping project was commissioned and we would love to see what this project inspires.


Filed under: Arduino Hacks

With the rising popularity of electronic textbooks and laptops being used for schoolwork, the ubiquitous high school locker is becoming less and less necessary. So, students are left with a private storage space that they don’t really need. Why let it go to waste when you’re an enterprising young man with budding electronics and fabrication skills?

[Mistablik] is one such high school student who decided to take advantage of his unused locker. After a “wouldn’t it be cool if…” discussion with his friends, [Mistablik] decided to use his summer break to construct a soda vending machine that fit entirely within his school locker. Quite an ambitious project for a high school student, but the result speaks for itself.

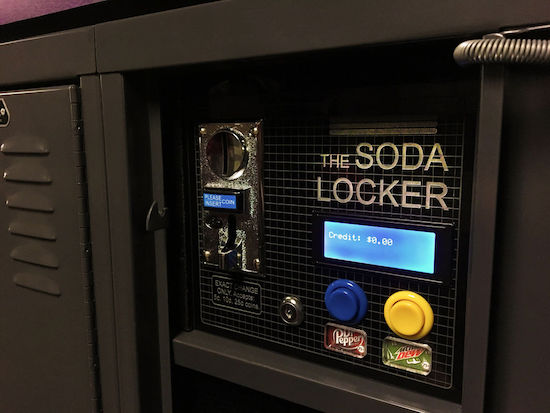
Using an Arduino, coin acceptor, LCD screen, and a handful of other components, [Mistablik] started by prototyping the electronics in a shoebox. After his prototype was proven, he used his school’s laser cutter to fabricate an acrylic control panel and enclosure. Other than a couple of hurdles involving false coin triggers caused by static electricity, the process went smoothly and he was able to move onto the soda dispensing part of the build.

Because [Mistablik] was building this in his school locker, it was important that the build was entirely self-contained and that it wouldn’t require any modification to the locker itself. Once again he turned to the laser cutter to build a two-chute system for dispensing two varieties of soda. Using Fusion 360, he designed and 3D printed the dispenser mechanism.

The finished product fits nicely into his locker, and quickly became a source of chatter around the school. [Mistablik] even used the vending machine to ask his girlfriend to prom, a technique sure to win any geek lover’s heart. Vending machines are popular builds for hobbyists, as they are a fun way to combine electronics, mechanics, and programming. But, this project stands out for its unique requirements and inspiring story.

[thanks to Slartibartfast for the tip!]


Filed under: Arduino Hacks

With books being replaced by electronic alternatives and sugary drinks in short supply, this custom locker has come to the rescue.

After a conversation with a few friends about an idea he had for a vending machine that fit entirely inside of a locker, high school student Blake Hawkins decided to actually make it a reality. His setup crams dispensing hardware for two types of highly-caffeinated soda, including an Arduino-connected coin acceptor and a spring to keep the locker closed between sales. The C-shaped cylindrical device that physically doles out the cans is quite clever too. 

No word on how school staff have reacted to his new in-school business, but the students have naturally been quite entertained and pleased about the new locker hardware. Hawkins even got to ask his girlfriend to the prom using the contraption with a custom can for her!

You can check out more of this build on its page. You may also enjoy these two DIY vending machines as well, which can be found here and here.


  • Newsletter

    Sign up for the PlanetArduino Newsletter, which delivers the most popular articles via e-mail to your inbox every week. Just fill in the information below and submit.

  • Like Us on Facebook