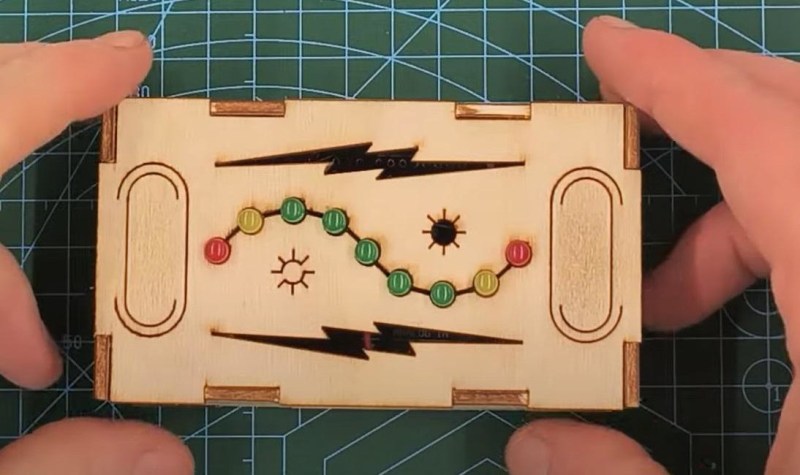
The Buzz Wire Game is a timeless amusement that challenges players to navigate a twisted wire maze without letting the wire touch the sides. It’s not just a game; it’s a test of dexterity and focus. With this step-by-step guide, you’ll learn how to construct the game board, wire up the circuit, and customize the design to make it uniquely yours.
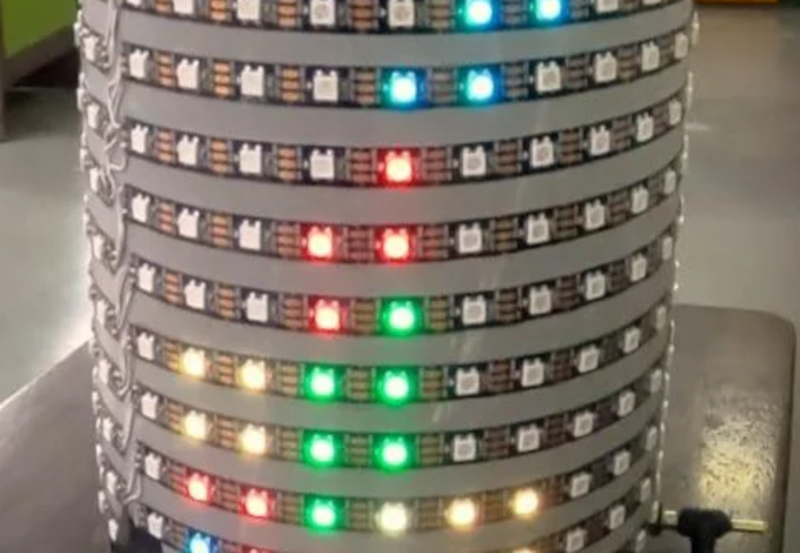
You’ve probably played some version of Tetris, but [the Center for Creative Learning] has a different take on it. Their latest version features a cylindrical playing field. While it wouldn’t be simple to wire up all those LEDs, it is a little easier, thanks to LED strips. You can find the code for the game on GitHub.
In all, there are 5 LED strips for a display and 13 strips for the playing area, although you can adjust this as long as there are at least 10 rows. The exact number of LEDs will depend on the diameter of the PVC pipe you build it on.
Using a PS2 controller, the games allow you to play a full-cylinder or in a half-cylinder mode. We were hoping they’d have put up a video showing the gameplay, but we couldn’t find it.
We couldn’t help but think that this would make an excellent display for many purposes. You might even be able to design different games for it.
Peter started making an alarm clock during the pandemic with Adafruit Feather components. Things took off from there:
My next step was to make a “talking” clock which, at the push of a button, announces the time. This was a gift for my 91 year old mother-in-law who has almost completely lost her sight.
Recently I decided that I wanted some way in which the date and time parameters could be set without attaching the clock to a computer.
Using Adafruit’s open source designs, Peter modified the display to use 4 character 14 segment LED displays from China including integrated colons for the clocks.
All the code, in Arduino, has been made available.
You can see testing the displays in the video (below) and read it all in the post here.
It works like you’d probably expect — the light moves back and forth between the two players. Keep it in the green and you have a nice, gentle volley going. Let it hit your red LED and you’ve lost a point. But if you can push your button while your yellow LED is lit, the light speeds up tremendously until the next button press in the green.
Our only wish is that subsequent yellow-light button presses would make it speed up even more. But there are really just the two speeds with the current programming.
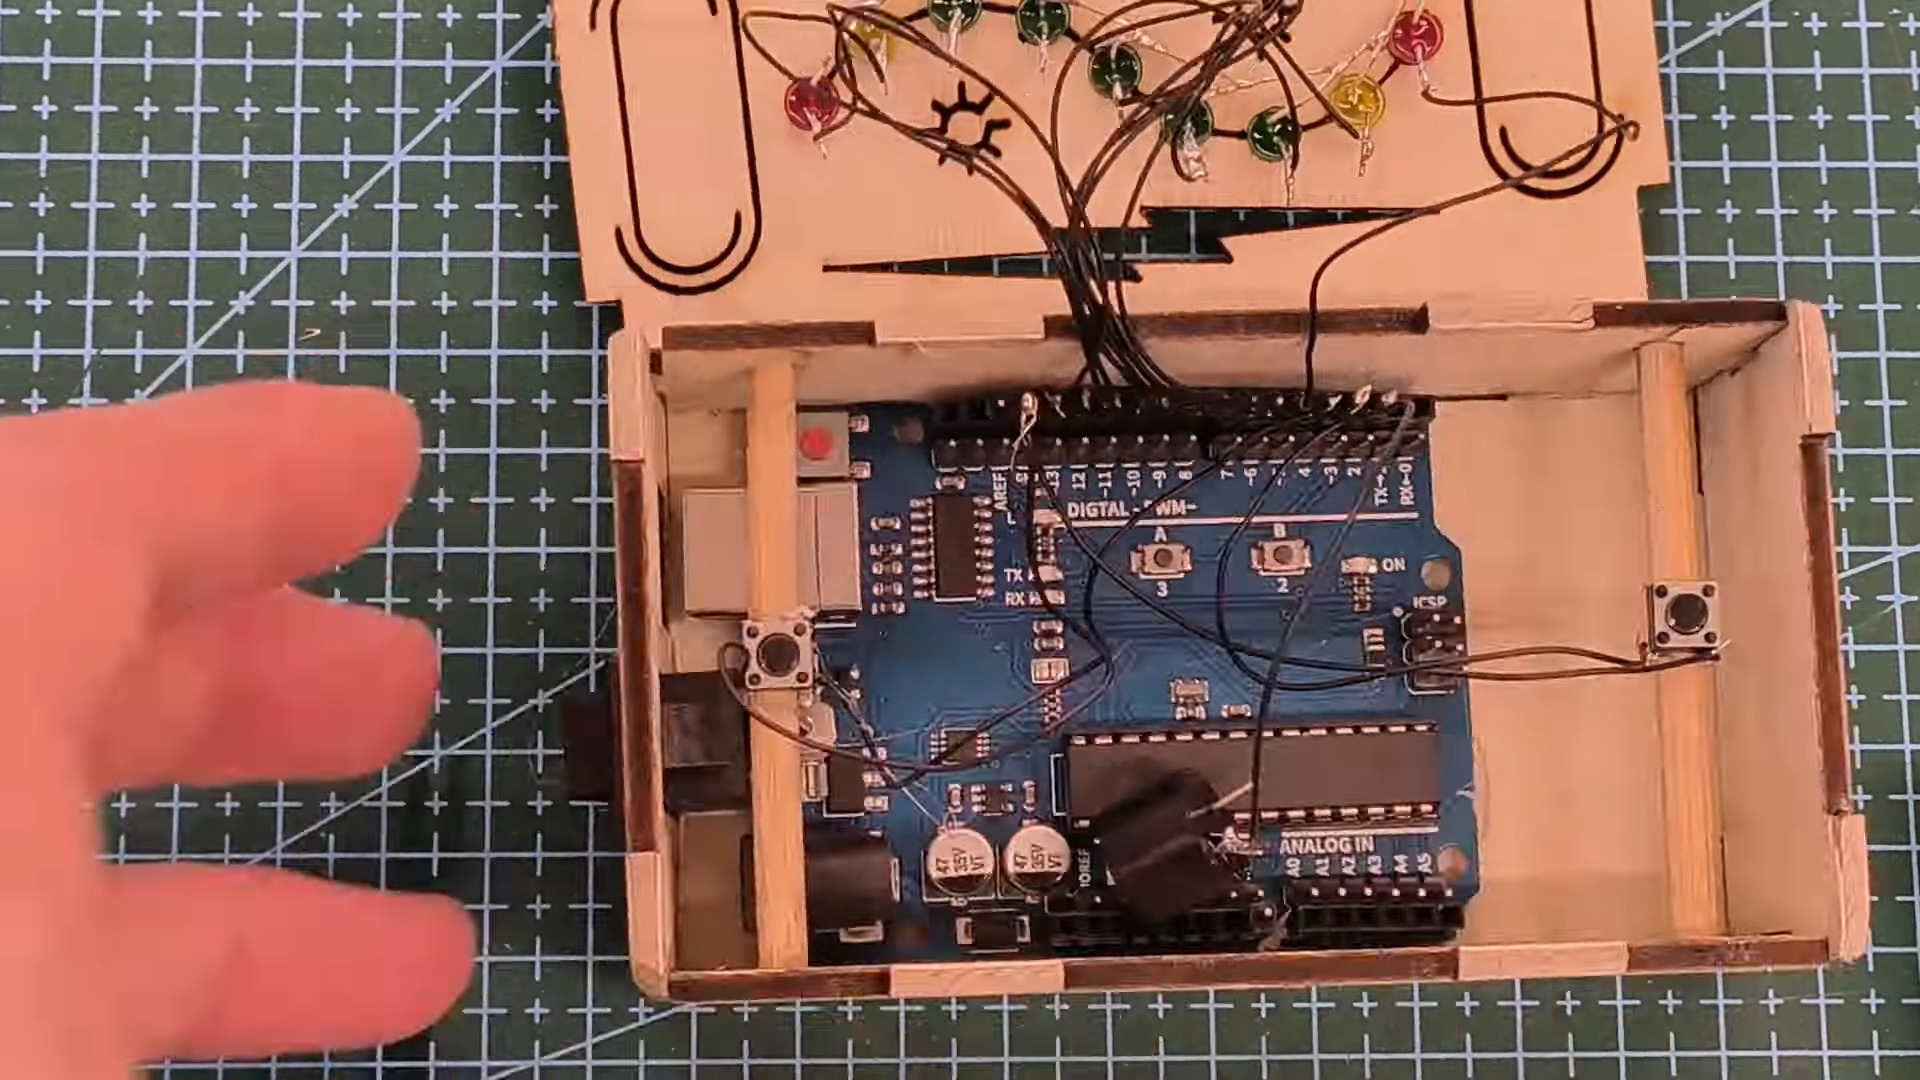
Inside the cool laser-cut box is an Arduino Uno and a 9V battery, plus a current-limiting resistor and the all-important buzzer. We like how [newsonator] wired up the LEDs to the Arduino by soldering them to a row of header pins and sticking that into the Arduino so it can be used in other projects down the line. We also like how [newsonator] shoved a couple of dowels through the box to ultimately support the two buttons.
Check out the intro video after the break for the overall details. The build is done over a few different short videos which follow.
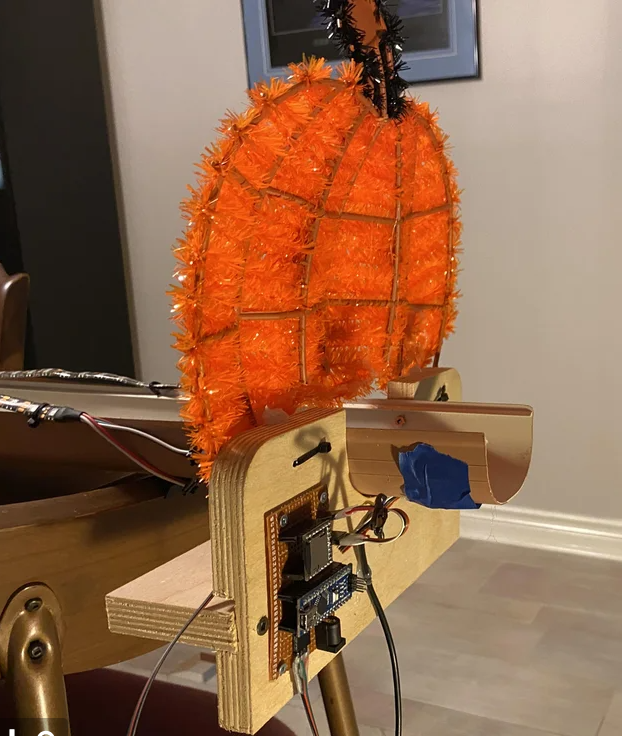
Even though it seems the worst of COVID has passed, October generally kicks off cold and flu season, so why not continue to pass out Halloween treats in a socially-distanced fashion?
That is, of course the idea behind [Gord Payne]’s Halloween Treat Trough of Terror. Lay a treat at the top of the trough and it will activate the LED strips that follow the treat down to the end, as well as some spooky sounds. The treat in question is detected by an SR-04 ultrasonic distance sensor connected to an Arduino Nano.
All in all this was a highly successful build as far as neighborhood entertainment value goes. Toddlers stared in awe at the blinkenlights, teenagers proclaimed it ‘sick’, and we can only assume that the adults were likely happy to see something aimed at kids that’s not scary.
[Gord] has a nice how-to if you want to build your own, and of course, the Arduino sketch is available. Be sure to check it out in action after the break.
When receiving a notification on your phone, it can be a tedious process to take the device out of a pocket, unlock the screen, and then read the message. In order to make viewing simple information much faster, University of Waterloo researchers developed a small pocketable display that can shine images and text through fabric. This means seeing the current time or directions can be done far more quickly since all the user has to do is look down.
The technology driving this system consists of an Arduino Pro Mini board, an HC-05 Bluetooth module for receiving data from a host phone, an 8×8 RGBW NeoPixel matrix, and a single 420mAh LiPo battery cell for power. All of these components were assembled into a single unit and placed within a 3D-printed enclosure that can easily fit into the user’s pocket.
After studying how LEDs interact with various types of fabrics by using an Arduino Mega, the team gathered 12 participants to see how effective their smart display, called the PocketView, was at showing important information. Once several tasks had been performed by the group, they consistently rated the LEDs to be a better viewing experience compared to looking at a phone.
To read more information about the PocketView and the plans the team has for it, you can view their paper here.
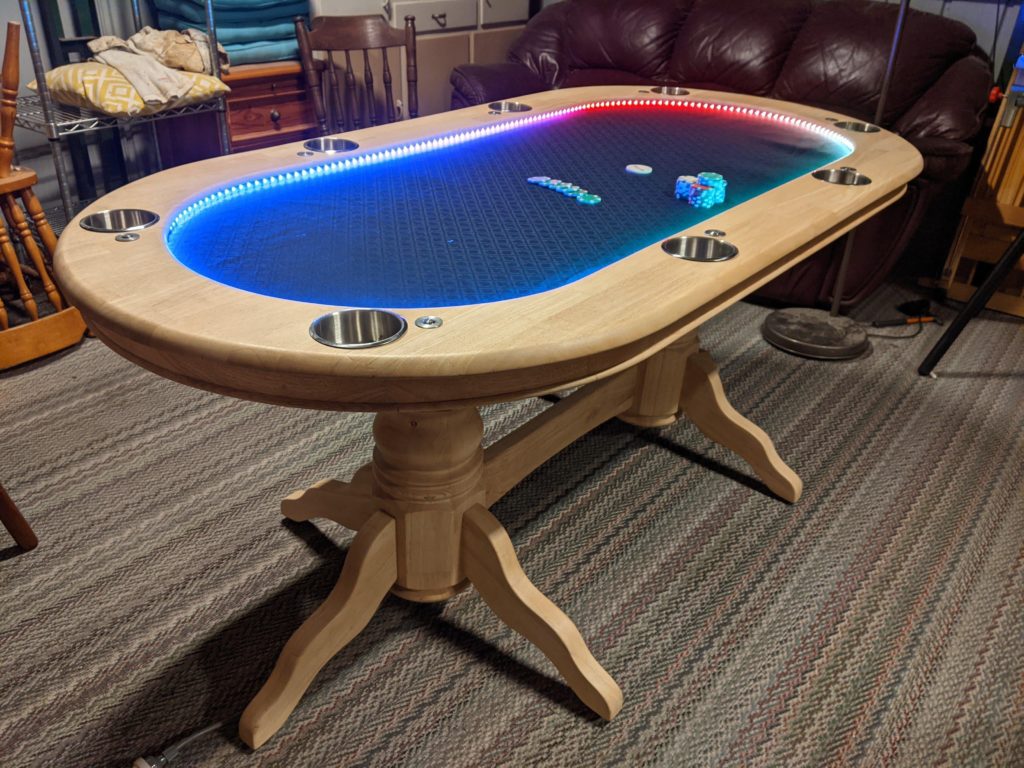
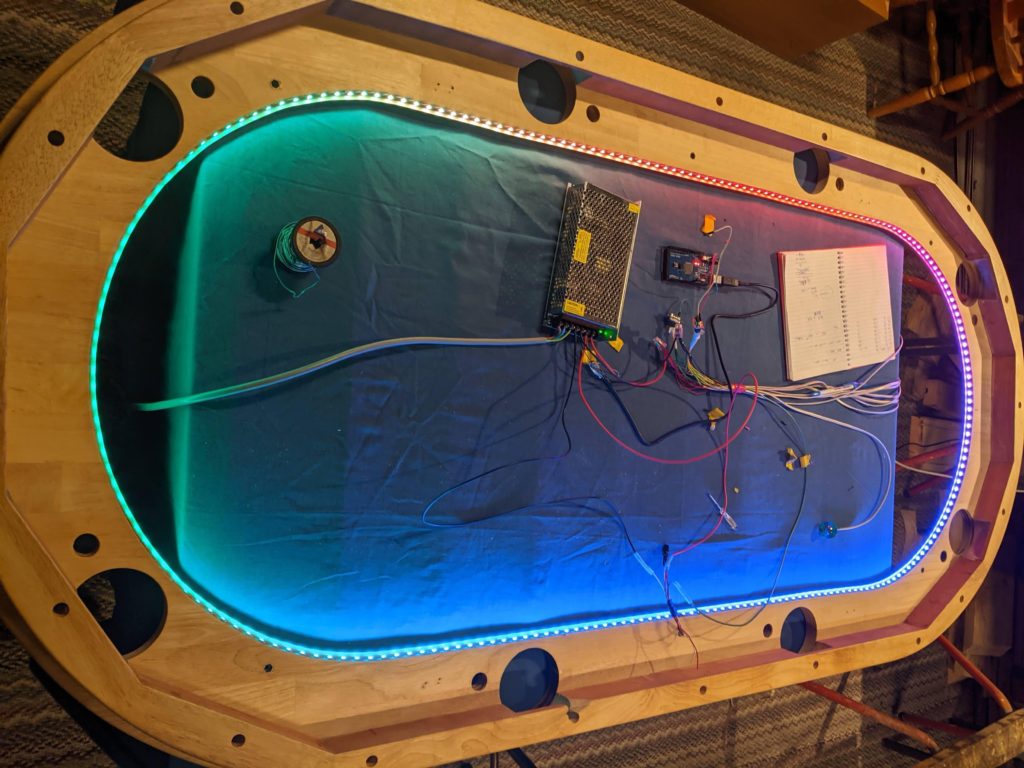
Poker is a fun game to play with a group of friends or as part of a league, and manually having to keep track of turns by passing a dealer chip around can get tiresome… quickly. Redditor tatey13 had the idea to build a custom poker table with some extra features that makes playing easier and more fun.
The table started off as an old dining room table, which was promptly sanded and had a large oval cut from its center to make room for the lighting and a soft play surface. Additionally, eight spaces were created around the table at even intervals that each have a metal container and a light-up pushbutton for getting user inputs. A long LED strip was also glued to the inner edge of the table to provide information about the current turn and timing.
In order to control everything, an Arduino Mega was selected due to its large amount of flash storage and GPIO pins. It begins by waiting for players to join, and after 20 seconds have elapsed from the first button press, the game starts. The dealer is chosen randomly, and the two spots to their immediate left are designated as the small and large blinds. If a player is taking too long, another player and the dealer can start a timer to move things along. Once everyone except a single player is remaining, the game is over, and the winner is shown with green LEDs.
You can see the table in action by watching tatey13’s video below!
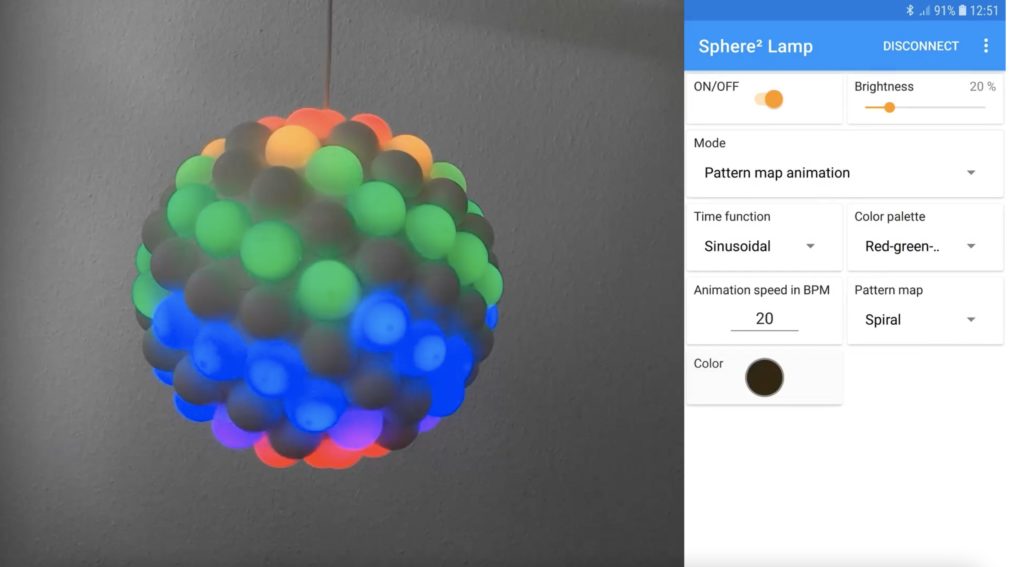
There are already countless projects that utilize individually addressable RGB LED strips in some way or another, except most of them lack a “wow” factor. This is one problem that Philipp Niedermayer’s Sphere2 Lamp does not suffer from, as it is a giant sphere comprised of 122 smaller domes that are each lit by their own LED. The project uses an Arduino Nano running code with the FastLED library to output signals via its GPIO pins to the LEDs. It is controlled over its serial interface by a Nano 33 BLE Sense since the latter has integrated BLE functionality.
Niedermayer also wrote a dedicated app for starting and stopping animations on the Sphere2 Lamp. The Android application features an interface that lets users control not only the selected color or colors, but the brightness and the speed at which the animation plays as well. Currently, the app has a set of around both ten animations and color palettes each, although this number can certainly be increased in the future.
The Sphere2 Lamp is an extremely unique-looking showcase of what is capable with just a couple of Arduino boards, some LED strips, and innovative programming. You can view the project’s write-up here on Hackster.io and see its code on GitHub.
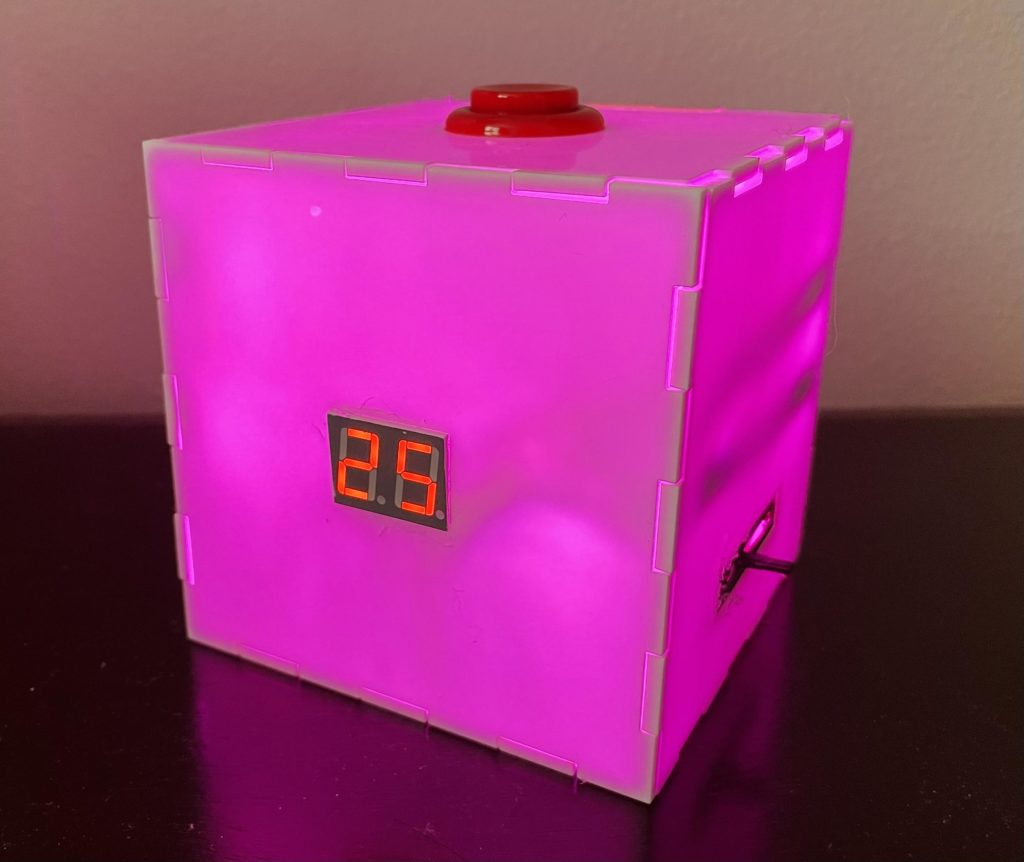
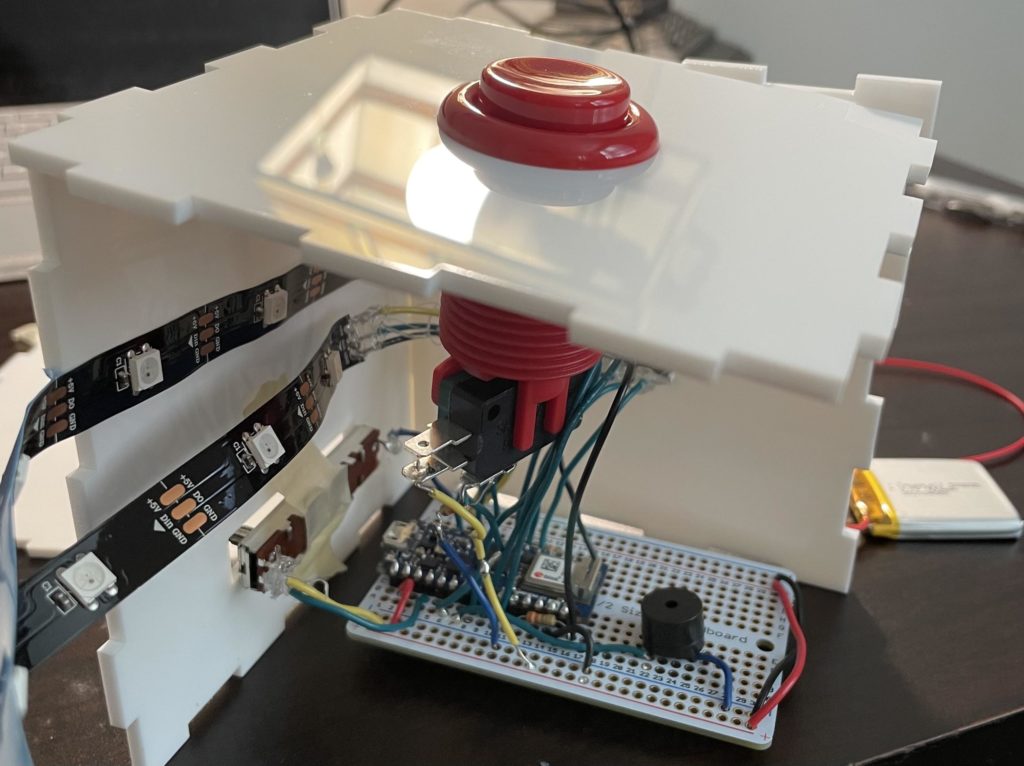
Studying without getting distracted can pose a significant challenge to students, which is why having small productivity hacks could be beneficial. Alexandra Charland — who goes by alch_emist on Instructables — wanted to try out the popular Pomodoro technique, which involves working for 25 minutes uninterrupted and then taking a break for five minutes after. To make this approach a bit more appealing, Charland created a countdown box that can light up in different colors.
Charland’s device is comprised of an Arduino Nano 33 IoT that runs a timer for the 25- and five-minute intervals. On the front of the enclosure is a pair of seven-segment displays that show the time remaining on the main timer, and even though these require 10 pins, a shift register can easily be added in the future. The side of the box has a large red arcade pushbutton that when pressed starts or stops the timer.
The timer is not the only thing that’s cool about the study box. The entire thing has a string of NeoPixels in the bottom that change color when the slider is moved. There’s also a buzzer that begins to sound when the timer expires to notify the user when it is time for a break.
Planet Arduino is, or at the moment is wishing to become, an aggregation of public weblogs from around the world written by people who develop, play, think on Arduino platform and his son. The opinions expressed in those weblogs and hence this aggregation are those of the original authors. Entries on this page are owned by their authors. We do not edit, endorse or vouch for the contents of individual posts. For more information about Arduino please visit www.arduino.cc
You are currently browsing the archives for the leds category.