Posts | Comments

Planet Arduino

Archive for the ‘Raspberry Pi’ Category

Hey there, DIY IoT enthusiasts! Ever build a cool gadget with your Raspberry Pi, only to get stuck figuring out how to show off its data? Don’t worry, you’re not alone. Lots of makers like you face the same challenge: turning that awesome sensor data into something easy to see and interact with on your phone or laptop. 

The good news is, there are simple and reliable ways to bridge that gap and shed light on your data without losing time.

Visualize your Raspberry Pi data: Get started

Raspberry Pi and other Linux-based platforms have become popular in the IoT space due to their versatility and ease of use. However, a common issue is finding an effective way to visualize their data and connect them to visualization platforms.

At the end of the day, what do you want? You have your code which is producing data and you want to have a dashboard to visualize it both in real time and its historical evolution. Furthermore, you would like to interact directly with your application from that dashboard too!

Let’s explore what kind of solutions you have at your disposal.

Choosing a visualization platform for your Raspberry Pi

You can visualize your device’s data by installing a visualization platform on your device or sending data to an external platform, self- or cloud-hosted. Each has its pros and cons, and the choice depends on your skills, time, and the complexity of the solution.

Installing a visualization platform on your device also implies setting up local data storage, like a database. This process along with the platform installation and maintenance can be complex and time-consuming, especially for beginners.

Transferring data to an external platform is typically easier as they usually offer a simple API to interact with them, but the type of solution can add complexity:

  • If you opt to establish your own platform and infrastructure, it may seem like you have more control over the solution. However, it can quickly become an overwhelming task for beginners, and ongoing maintenance can be even more challenging.
  • Choosing a cloud-hosted solution often seems like the most balanced option. However, it can also be complicated due to the wide range of alternatives, varying levels of complexity, and pricing models that can be difficult to understand.

Some of these alternatives were also described in a previous article, where we explored several ways to visualize data coming from Arduino or ESP32 based boards. 

Choosing the right programming language for your Raspberry Pi

But now, what? You have to program your application to collect data. Selecting the right programming language can depend on many different factors. Knowledge of the environment or simply your preference can be a deciding factor. But sometimes the decision is not so simple. Here we have some insights about some popular IoT programming languages

  • Python: Python is a top choice for IoT development due to its simplicity, rich library ecosystem, and active community. Its dominance in AI allows seamless integration of machine learning models.
  • JavaScript: JavaScript, with Node.js as a server-side runtime environment, is also a go-to language for IoT device development. It’s versatile and its event-driven nature aligns seamlessly with IoT requirements.  It’s particularly popular for applications that interact with web pages, thanks to the potential for significant code reuse.
  • Node-RED: Lastly, low-code programming environments like Node-RED have become very popular for IoT. It allows you to create your applications with an intuitive drag-and-drop interface, connecting hardware and platforms, and controlling anything from tiny sensors to the cloud.

Note: While other languages like C/C++ and Rust are also relevant, this blog post focuses on Python, JavaScript, and Node-RED due to their popularity and relative ease of use. 

Creating IoT monitoring dashboards with Arduino Cloud 

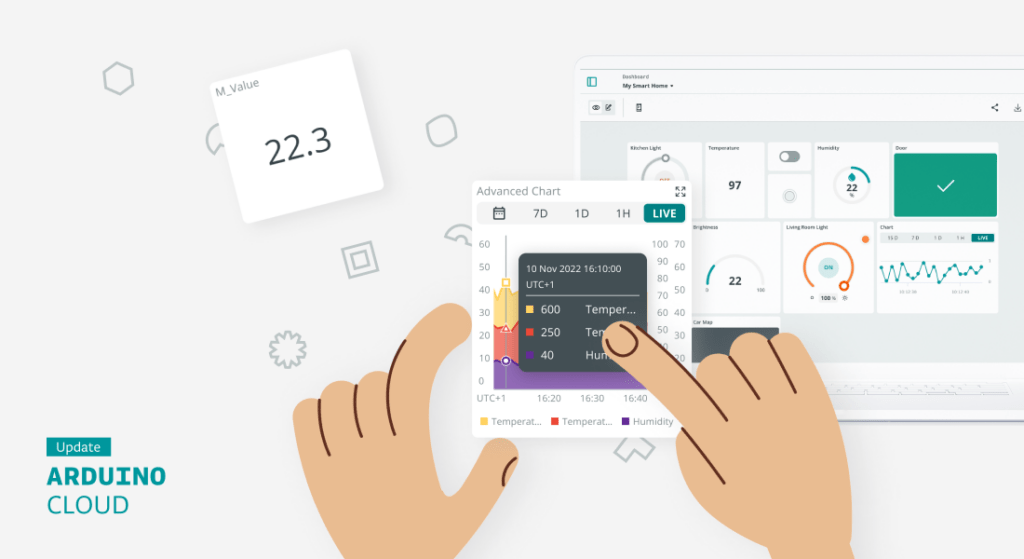
The Arduino Cloud is a cloud-hosted platform that provides a user-friendly environment to create customizable insightful dashboards used to monitor and control your IoT devices.

We recently announced that you can now seamlessly connect Python, MicroPython and JavaScript applications with the Arduino Cloud.  

The main benefit is its ease of use. You get rid of installation or maintenance headaches, while you connect your devices in minutes and visualize the data in your dashboards either from your browser or your mobile phone. You can create and customize your dashboards with an intuitive interface using drag-and-drop widgets. These dashboards provide real time interaction with your IoT devices and insightful historical information that can be additionally downloaded for offline analysis.

But there are many other cool features:

  • Real time alerts: You can receive notifications based on criteria configured in the Cloud. Learn more in this post.
  • Mobile phone app: You can access your dashboards using the IoT Remote app. 
  • Work collaboratively: You can share your code and dashboards with others.
  • Out-of-the box integrations: You have seamless integration with popular platforms like IFTTT, Zapier, Google Services, Alexa or Google Home.

Want to learn more? Check out this recent article announcing four new IoT monitoring dashboard features that may seem small, but pack a big punch for your connected projects. They include the ability to duplicate IoT Dashboards, IoT Value Widget customization, new data aggregation method and more.

How to connect your Raspberry Pi to Arduino Cloud

Connecting your Raspberry Pi to Arduino Cloud couldn’t be easier. You only have to follow these steps:

1. Set up an Arduino Cloud account.
2. Add your device to the Arduino Cloud as a Manual device.
3. Create your Thing and add your variables.
4. Create the code for your Raspberry Pi using your preferred development language and environment.
5. Create the dashboards for data visualization.

So, do you want to remotely monitor your Raspberry Pi creations and control them from anywhere? Stay tuned! Upcoming posts will showcase real-world examples of connecting your Raspberry Pi to the Arduino Cloud, enabling you to visualize sensor data and interact with your projects remotely. In the meantime, here’s a project from ProjectHub showing an integration with Raspberry PI using Python to show VCO2 data from a SGP30 sensor.

Start with Arduino Cloud for Free

Arduino Cloud is free to use. So, if you’re looking to streamline data visualization of your Raspberry Pi applications, consider giving the Arduino Cloud a try and leverage its full potential for your projects. You can explore the premium features for enhanced functionality.

The post A guide to visualize your Raspberry Pi data on Arduino Cloud appeared first on Arduino Blog.

Waveshare 240×280 , IPS, 1.69inch Round LCD Display Module with Touch Paneel

The Waveshare 1.69-inch IPS touch LCD is a 1.69-inch rounded display with 240×280 resolution and a 262K color range. The display driver (ST7789V2) and touch controller (CST816T) are integrated on-board and rely on SPI and I2C interfaces that make it compatible with popular platforms such as Raspberry Pi, Arduino, ESP32, STM32, and more. Previously we have covered many similar display modules like the MaTouch ESP32-S3, T-RGB ESP32-S3, and ESP32-S3 Round SPI TFT. Feel free to check these out if you are looking for a specific rounded display product. Waveshare 1.69-inch IPS touch LCD specifications Display 1.69-inch round LCD with 240×280 resolution and IPS panel. 262K color depth Display Driver –  ST7789V2 SPI display driver Touch Control – CST816T I2C capacitive touch controller for responsive input. Onboard Logic Level Converter  – Onboard voltage translator for 3.3V/5V power, works with Raspberry Pi, ESP32-S3, Raspberry Pi Pico, Arduino, STM32, and more. Dimensions – 41.13 x 33.13 [...]

The post $15 Waveshare 1.69-inch IPS touch LCD module works with Raspberry Pi, Arduino, ESP32, STM32, and other platforms appeared first on CNX Software - Embedded Systems News.

DigiKey shared this vide on Youtube!

Which should you use for your project, Arduino or Raspberry Pi? In this video, Becky Stern shows you the primary differences and explains why you would choose a microcontroller or single board computer (SBC) for your project.

See more!

Waveshare ESP32 C6 Pico Devlopment Board

Waveshare’s ESP32-C6-Pico and ESP32-C6-Pico-M development boards are equipped with the ESP32-C6-MINI-1 module supporting Wi-Fi 6(802.11ax), Bluetooth 5, Zigbee 3.0, and Thread 1.3, and inspired by the Raspberry Pi Pico form factor. They can be powered either through USB Type-C or an external 5V DC supply connected to the pins. Previously we have written about similar ESP32-C6-based boards like the SparkFun Thing Plus, ePulse Feather C6, and WeAct ESP32-C6 dev board. However, these boards are priced way over the $6.99 that Waveshare is offering. One exception is the DFRobot’s FireBeetle 2 ESP32-C6 board, which cuts costs by using the IC directly instead of the fully shielded ESP32-C6-MINI-1 module. Waveshare’s ESP32-C6-Pico board specifications: Wireless module – ESP32-C6-MINI-1 SoC – ESP32-C6H4 32-bit RISC-V microprocessor up to 160 MHz with 320KB ROM, 512KB HP SRAM, 16KB LP SRAM, 4MB flash Wireless – 2.4 GHz WiFi 6 with Target Wake Time (TWT) support, Bluetooth 5.3 LE and [...]

The post $6.99 Waveshare’s ESP32-C6-Pico Board resembles Raspberry Pi Pico board appeared first on CNX Software - Embedded Systems News.

top angle view of the picowbell

The Adafruit Proto Doubler PiCowBell is intended to be treated like a mini solder-less proto plate to simplify programming and sensor connectivity for your Raspberry Pi Pico board. Reset button? Yes! STEMMA QT / Qwiic connector for fast I2C? Indeed. Battery with recharging and on/off switch? Affirmative. Plug-and-play so no soldering necessary when used with a Pico H or Pico WH? Here you go!

The Adafruit Proto Doubler PiCowbell guide has everything you need to get started with using this breakout. There’s pages for overview, pinouts, CircuitPython, Arduino and resources for download.

Read more at Adafruit Proto Doubler PiCowbell

top angle view of the picowbell

The Adafruit Proto Under Plate PiCowBell is intended to be treated like a mini solderless proto plate to simplify programming and sensor connectivity for your Raspberry Pi Pico board. Reset button? Yes! STEMMA QT / Qwiic connector for fast I2C? Indeed. Plug-and-play so no soldering necessary when used with a Pico H or Pico WH? Here you go!

The Adafruit Proto Under Plate PiCowBell guide has everything you need to get started with using this breakout. There’s pages for overview, pinouts and resources for download.

Read more at Adafruit Proto Under Plate PiCowBell

top angle view of the terminal picowbell

The Adafruit Terminal PiCowbell is ideal for when you want quick access to connect solid or stranded core wires to any of the GPIO pads on the Pico. We use four 10-pin 2.54″ pitch screw terminal blocks that can fit 18 to 26 AWG solid or stranded core wires. Note that we really connect every pin 1-to-1, so there will be plenty of ground connects!

The Adafruit Terminal PiCowbell for Pico guide has everything you need to get started with using this breakout. There’s pages for overview, pinouts and resources for download.

Read more at Adafruit Terminal PiCowbell for Pico

ilabs rp2040 connectivity board

iLABs (Invector Labs), a European embedded equipment manufacturer, has released a new device, the RP2040 Connectivity Board, an IoT development board that is based on Raspberry Pi’s signature microcontroller IC, the RP2040. The RP2040 Connectivity Board features key IoT connectivity options such as LTE, Wi-Fi, and BLE (Bluetooth Low Energy). It is compatible with both Arduino and PlatformIO and is designed for professional and hobbyist users with wide-ranging connectivity needs. The SARA-R412M series module from u-blox handles cellular communication (LTE) and can be configured to enable multi-regional coverage in both GSM and LTE-M/NB-IoT radio transmissions. It features a unique and immutable root of trust and supports IoT security as a service. The RP2040 Connectivity Board also includes an Espressif ESP32-C3FN4 chip for Wi-Fi/BLE communication based on a RISC-V microcontroller core and implementing a Wi-Fi subsystem that complies with the IEEE 802.11b/g/n standard and supports various operating modes. The Bluetooth Low [...]

The post The RP2040 Connectivity Board — An IoT solution combining LTE, Wi-Fi, and BLE into a single platform appeared first on CNX Software - Embedded Systems News.

Lark Weather Station Arduino ESP32 Raspberry Pi

The Lark Weather Station measures wind speed, wind direction, temperature, humidity, and air pressure through a range of sensors and connects to popular development boards such as Arduino UNO, ESP32, BBC micro:bit, Raspberry Pi, or DFRobot Unihiker through I2C or UART. We’ve seen several projects for Internet-connection weather stations that retrieve weather data from the web and display the results locally, but the Lark Weather Station allows the users to get atmospheric data right in his/her current location thanks to its built-in anemometer, wind vane, and built-in sensors, as well as expansion interfaces for additional sensors. Lark Weather Station specifications: Storage – 16MB flash good to store about 160 days of data (when data is recorded once per minute) Sensors Compass Anemometer Wind Speed: 0.5~12m/s Cover to protect the anemometer during storage/transport Wind vane and wind direction shaft to report the wind direction (eight directions) Temperature Range –20~60℃ ±0.2℃ Humidity [...]

The post The Lark Weather Station works with Arduino, ESP32, micro:bit, Raspberry Pi, and other boards appeared first on CNX Software - Embedded Systems News.

Check out this neat build from maker Gene up on Hackster.io:

Detect the food in the cat food bowl using machine vision without the need for any machine learning models.

See the full write-up here.


  • Newsletter

    Sign up for the PlanetArduino Newsletter, which delivers the most popular articles via e-mail to your inbox every week. Just fill in the information below and submit.

  • Like Us on Facebook