Posts | Comments

Planet Arduino

Archive for the ‘arduino hacks’ Category

If you’ve got a smart home, or you just want to know how soaked your garden is getting in the winter, you might want to measure rainfall. There are a bunch of ways to go about it, and this capacitive rainmeter solution from [Magnus Thome] might just be the perfect solution you’re looking for.

Like many who came before, [Magnus] had experimented with traditional resistive-based sensors using copper traces to measure water levels. As the soil moisture measuring set learned as well, corrosion tends to promise a pretty short life for these designs. Capacitive sensors, on the other hand, can be isolated from the water itself, and thus sense the levels without being subject to such degradation.

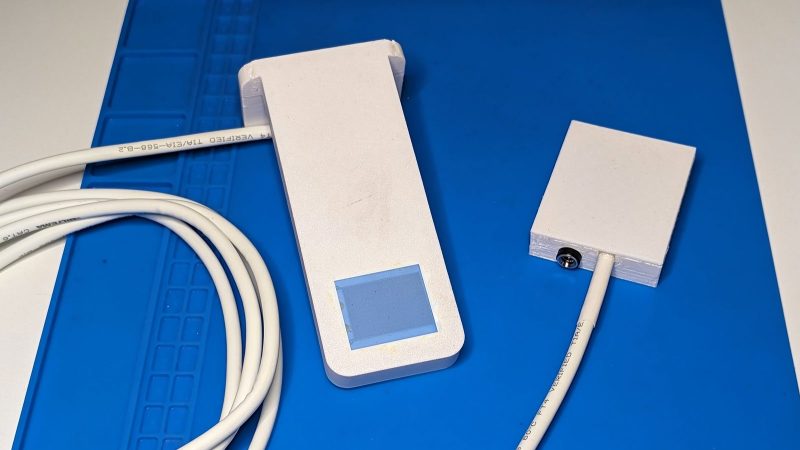
[Magnus] pairs the off-the-shelf capacitive sensor with an ESP32 charged with reading it and reporting back to Home Assistant. It’s also outfitted with a heater to keep it at a constant temperature to avoid it freezing over during those cold and snowy Swedish winters.

It’s a tidy way to integrate a quality commercial sensor with a DIY smart home setup. If you’ve been whipping up your own neat sensor networks for your smart home, don’t hesitate to let us know. Video after the break.

[Build Some Stuff] created an unusual spiral clock that’s almost entirely made from laser-cut wood, even the curved and bendy parts.

The living hinge is one thing, but getting the spacing, gearing, and numbers right also takes work.

The clock works by using a stepper motor and gear to rotate the clock’s face, which consists of a large dial with a spiral structure. Upon this spiral ramp rolls a ball, whose position relative to the printed numbers indicates the time. Each number is an hour, so if the ball is halfway between six and seven, it’s 6:30. At the center of the spiral is a hole, which drops the ball back down to the twelve at the beginning of the spiral so the cycle can repeat.

The video (embedded below) demonstrates the design elements and construction of the clock in greater detail, and of particular interest is how the curved wall of the spiral structure consists of a big living hinge, a way to allow mostly rigid materials to flex far beyond what they are used to. Laser cutting is well-suited to creating living hinges, but it’s a technique applicable to 3D printing, as well.

Thanks to [Kelton] for the tip!

What’s the worst part about packaging up a whole lot of the same basic thing? It might just be applying the various warning stickers to the outside of the shipping box. Luckily, [Mr Innovative] has built an open-source automatic sticker dispenser that does the peeling for you, while advancing the roll one at a time quite satisfyingly.

This tidy build is made primarily of 20×20 extruded aluminium and stainless steel smooth rod. All the yellow bits are 3D printed. The brains of this operation is an Arduino Nano, with an A4988 stepper motor driver controlling a NEMA17.

Our favorite part of this build is the IR sensor pair arranged below the ready sticker. It detects when a sticker is removed, then the stepper advances the roll by one sticker height. The waste is collected on a spool underneath.

Between the video and the instructions, [Mr Innovative] has made it quite simple to build one for yourself. Definitely check this one out after the break.

[Mr Innovative] may as well go by [Mr. Automation]. Check out this automated wire prep machine from a few years ago.

As fun as claw games are, the jaws are always disappointingly weak, and you usually end up with bupkis. What if the jaws were completely within your  control? That’s the idea behind [Upside Down Labs]’ muscle-controlled servo claw game.

While electromyography (EMG) is great for identifying neuro-muscular abnormalities and allows for amazing prosthetic limbs to work, it can also be used for fun. As you’ll see in the video after the break, accurate block-stacking (and possible candy-grabbing) depends on teamwork and tensed muscles.

Though the user provides the muscle, the brains behind this operation is an Arduino Uno with a Muscle BioAmp shield stacked on top, which [Upside Down Labs] also created. This shield makes it ridiculously easy to connect EMG sensors and other I²C devices like screens and, well, servo claws. From there, it’s really just a matter of printing the claw, connecting it to a 9g servo, and using an accompanying kit to prepare the skin and connect the muscles to the Arduino. Be sure to check it out in tense block-stacking action after the break.

If you want to listen in on your muscles, look no further than the BioAmp EMG Pill.

Real flowers do it, and even the Beatles did it. [Robo Hub] now has a plastic sunflower that tracks the sun using, of course, an Arduino. It may not qualify as a real robot, but it does mimic a real sunflower. The electronics aren’t earth-shattering, of course. An Arduino, a light sensor, and a servo motor are all you really need. But we enjoyed the whimsy and the artistic sensibility. This would be a great school project, for example. Interesting enough to get kids interested but not so hard as to be undoable. You can see a video of the ersatz flower below.

There are actually a pair of light sensors, as you might expect. That way you can determine which sensor is getting the most light. Obviously, these can’t be on-off sensors. They are, in fact, light-dependent resistors, so you get a nice analog reading.

Of course, you might not need an Arduino for this. A 555 driving a servo and a handful of discrete components could measure a bridge with the photoresistors and get the same effect. On the other hand, a microcontroller these days is inexpensive and versatile, so why not?

Usually, people tracking the sun are trying to get more energy. That doesn’t have to be any more complicated, though.

If you have an iota of musicality, you’ve no doubt noticed that you can play music using glass bottles, especially if you have several of different sizes and fill them with varying levels of water. But what if you wanted to accompany yourself on the bottles? Well, then you’d need to build a bottle-playing robot.

First, [Jens Maker Adventures] wrote a song and condensed it down to eight notes. With a whole lot of tinkling with a butter knife against their collection of wine and other bottles, [Jens] was able to figure out the lowest note for a given bottle by filing it with water, and the highest note by emptying it out.

With the bottle notes selected, the original plan was to strike the bottles with sticks. As it turned out, 9g servos weren’t up to the task, so he went with solenoids instead. Using Boxes.py, he was able to parameterize a just-right bottle holder to allow for arranging the bottles in a circle and striking them from the inside, all while hiding the Arduino and the solenoid driver board. Be sure to check it out after the break.

Don’t have a bunch of bottles lying around? You can use an Arduino to play the glasses.

Sometimes, projects start in somewhat unlikely places. This one began when [Istvan Raduly] scored a fake raven at a neighbor’s garage sale and decided to turn it into a thunder-and-lightning decoration that would frighten even the bravest trick-or-treater.

Get close enough to this raven and you’ll set off the PIR sensor, which triggers lighting and sound effects, including some spooky glowing and blinking red eyes, general cawing, and of course, thunder. The light comes from a whopping 10-watt, 12-volt power LED. This bird’s brain is an Arduino Nano, which is protected from the 12V supply with a boost converter. As you might expect, the sounds are on an SD card and played through a DF Player Mini.

Spookiness aside, our favorite part might be the absolutely lovely job that [Istvan] did decorating the raven’s base. Hiding electronics and hot glue is one thing, but this is above and beyond. Be sure to check it out after the break, both in the safety of the house, and outside in the scary darkness.

Hitag transponders have been used in a wide variety of car keys as a protective measure against hot-wiring and theft. They’re also a reason why it’s a lot more expensive to get car keys duplicated these days for many models that use this technology. However, there is now an open source programmer that works with these transponder keys, thanks to [Janne Kivijakola].

The hack uses an old reader device salvaged from a Renault in a scrapyard, hooked up to an Arduino Mega 2560 or Arduino Nano. With this setup, key transponders can be programmed via a tool called AESHitager, which runs on Windows. It’s compatible with a variety of Hitag transponders, including Hitag2, Hitag3, and Hitag AES, along with the VVDI Super Chip and certain types of BMW keys.

If you’ve been having issues with coded keys, this project might just be what you need to sort your car out. Everything you need is available on GitHub for those wishing to try this at home. We’ve seen some interesting hacks in this space before, too. Video after the break.

You never forget your first diorama, especially when it’s interactive. Although admittely a bit late to celebrate Erntedankfest (Germanic Thanksgiving), [Markus Bindhammer] is ahead of the curve when it comes to the American version.

This interactive diorama lamp features a cute chameleon that [Markus sculpted from a wire frame and a lump of clay]. In the chameleon’s midsection is a ping pong ball that does the work of diffusing an RGB LED. Wires run out the far side and through the bamboo stand and connect to a TCS34725 RGB color sensor and an Arduino Pro Micro.

The lamp does what you think — hold any colored object up to the color sensor, and the chameleon will change colors to match. When no one is interacting with the lamp, it slowly runs through a rainbow of colors. Be sure to check out the build video after the break.

Don’t have a color sensor? You can roll your own with an RGB LED, a photocell, and not much else. If you’re wondering how they work, we’ve seen the color sensor demystified.


  • Newsletter

    Sign up for the PlanetArduino Newsletter, which delivers the most popular articles via e-mail to your inbox every week. Just fill in the information below and submit.

  • Like Us on Facebook