Posts | Comments

Planet Arduino

Archive for the ‘digital audio hacks’ Category

DIY Hearing Aid

Hearing aids are expensive little devices, typically costing a few thousand dollars each. They need to be highly integrated to fit in the ear, while still providing signal processing to ensure good audio quality.

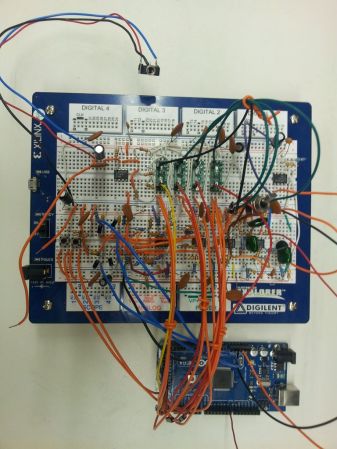
This DIY hearing aid does some intelligent signal processing. It uses an electret to capture audio, then uses a pre-amplifier to increase the gain 100 times. The next stage consists of four filters, dividing the input signal by frequency into four parts. These are passed into four LTC6910 programmable gain amplifiers, which allow an Arduino to control the gain of each channel. The LTC6910 takes 3 digital inputs that are used to set the gain value.

To determine which gain to use for each frequency band, the Arduino needs to know how much power is in each band. This could be done using a Fast Fourier Transform, but that would require quite a bit of processing power. Instead, an envelope detector averages the signal, which can be read by an analog input on the Arduino. Using this information, the hearing aid can boost specific frequencies when it detects conversation.

This hearing aid won’t quite fit in your ear, but there is a lot of interesting signal processing going on. The schematic, Arduino source code, and a MATLAB simulation are provided.


Filed under: Arduino Hacks, digital audio hacks

talkbotguts

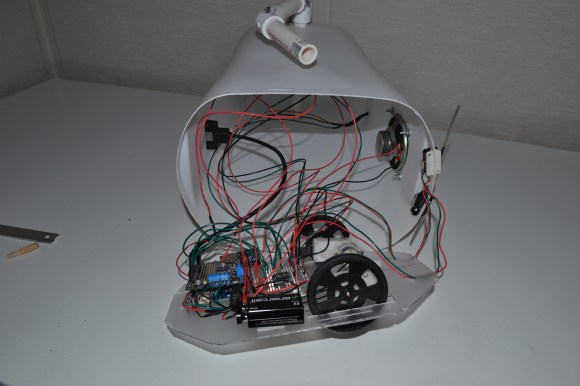
It isn’t exactly WALL-E, but [Bithead's] affordable introduction to robots – Talkbot – is made out of a trash can. This little guy runs off an Arduino and comes packed with features, including a voice chip, a motor shield, and a pair of bump sensors. Talkbot will cruise around until a bump sensor slams into an obstacle. One of his prerecorded messages will then play through the speaker while he backs up, turns, and tries to find a clearer path.

According to [Bithead's] build log, tracking down the right bargain voice chip was a bit of a hassle; he skipped over the text-to-speech options only to be stalled by vendor issues. He finally settled on a clone of Sparkfun’s WTV020SD chip sourced from eBay, which allows you to access pre-recorded WAV files stored on a Micro-SD card. The robot’s body comes straight off the hardware store shelf, with PVC pipe for arms and a polystyrene base to hold all the parts.  At the bargain price of $110, [Bithead's] students will have a true hacker experience cobbling the Talkbot together rather than using a prefab kit.

Be sure to see Talkbot  in a video below, performing either his green-eyed “friendly mode” or red-eyed “grumpy mode,” which dictates how pleasantly he responds to obstacles. Need something more advanced? Check out the tentacle robot, just in time for Halloween.


Filed under: Arduino Hacks, digital audio hacks, how-to, robots hacks
Aug
25

bit

If you look around a few electronic music forums, you’ll see a lot of confusion over the difference between a bitcrusher – a filter that reduces the bit depth of an audio signal – and a sample rate reducer – a filter that does exactly what its name implies. With the popularization of 8-bit and retro synth music, this difference is obviously of grave import of concern to saints and kings alike. [Michael] is more than happy to walk us through the difference with real-time sample and bit rate adjustment with his audio hacker board.

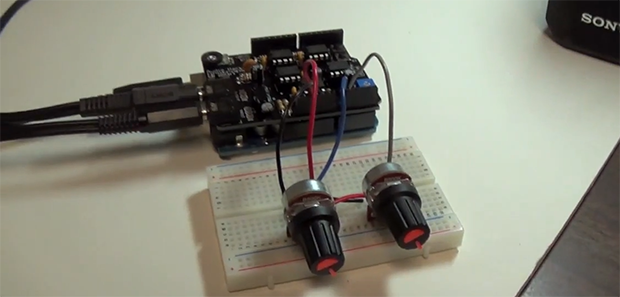
The audio hacker board is an Arduino shield with a 12-bit DAC and a 12-bit ADC. With two 1/8″ jacks and a pair of pots, [Michael] was easily able to whip up a sketch that is able to adjust the sample rate and bit depth of an audio signal in real-time.

Contrary to nearly everyone’s opinion of what ’8-bit’ music is, it’s actually the sample rate that makes music sound like a cassette deck jury rigged into a Nintendo Entertainment System. Reducing the bitrate just makes any audio source sound louder and worse.

Check out the excellent demo video of the effect of bitcrushers and sample rate reducers below.


Filed under: Arduino Hacks, digital audio hacks
echolocating-gunshots

[Kripthor] suspected that hunters were getting too near his house. When thinking of a way to quantify this belief he set out to build a triangulation system based on the sound of gunshots. The theory behind it is acoustic location, which is a specialized type echolocation.

The most common example of echolocation is in Bats, who emit ultrasonic noise and listen for its return (echo) to judge the location of objects. [Kripthor] doesn’t need to generate the sound himself, he just needs to pick it up at different points. The time difference from the three samples can be used to triangulate coordinates as seen in the image above.

He first tried using a PC sound card to collect the samples. The stereo input only provides two channels so he tinkered around with a 555-based multiplexing circuit to sample from three. The circuit noise created was just too great so he transitioned to using an Arduino. The ADC samples from each microphone via an NPN transistor which is used as a simple amplifier.

This brings to mind a homebrew sonar hack from way back.


Filed under: Arduino Hacks, digital audio hacks
Mar
13

no-touch-mp3-player

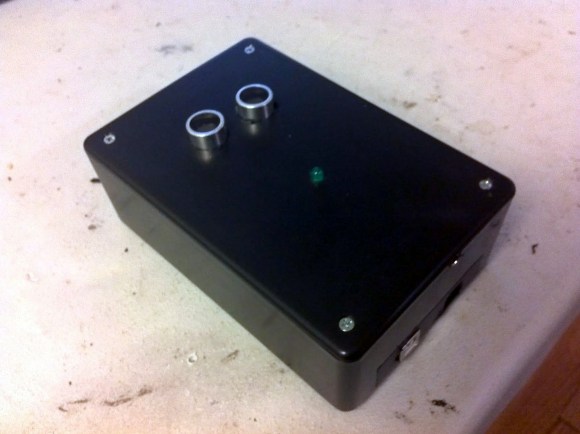
This little box not only plays tunes, but it lets you control several aspects of playback without touching a thing. [Thomas Clauser] calls it the LighTouch and we like it because it uses inaudible sound to control audible sound.

We think the pair of cylinders sticking up through the top of this project enclosure will be recognized by most readers as the business end of an ultrasonic rangefinder. This is the only control interface which [Thomas] chose to use. Although he didn’t write very extensively about the specific control scheme he implemented, the video embedded in his post shows some of the gestures that cause the Arduino inside to change its behavior. For instance, a swipe of the hand at higher level starts playback, swiping at a lower level pauses it. When adjusting the volume the box responds to how close his hand is to that sensor. With this control in place, the music side of these things is simply handled by a music shield he is using.


Filed under: Arduino Hacks, digital audio hacks
Nov
30

Color LED matrix VU meter shows how to use FFT with Arduino

arduino hacks, digital audio hacks, fft, Fourier, VU meter Comments Off on Color LED matrix VU meter shows how to use FFT with Arduino 

If you’ve ever wanted to make your own VU meter but were scared off by the signal process you need to study this tutorial.

Hackaday Alum [Phil Burgess] developed the device using an RGB LED matrix, microphone, and an Arduino. You’ll notice that is doesn’t include an MSGEQ7 chip which we see in most of these types of projects. We have seen a few that use the Fast Fourier Transform to map the audio signal on the display as this one does. But [Phil's] choice of an assembly language Library for ATmega chips makes this really simple to roll into your own projects.

The one drawback to the hardware choices made here is that there are only eight bits of vertical resolution. It takes a little creative interpretation to make this look good, but the use of color mixing really makes a difference. See for yourself in the demo after the break.

[Thanks PT]


Filed under: arduino hacks, digital audio hacks
Nov
08

Arduino MP3 Jukebox

arduino hacks, digital audio hacks, jukebox, mp3, sd, vs1002d Comments Off on Arduino MP3 Jukebox 

Here’s an inexpensive Arduino-based MP3 Jukebox (translated) which [Jose Daniel Herrera] put together.

He spent some time making sure that it looked great sitting on a shelf with his other audio equipment. This started with a wooden box which is some reused packaging. We’re not familiar with the ‘iNFUSiONES’ product; perhaps it’s tea or tobacco? At any rate, to this he added a custom face plate to host the character LCD, rotary encoder, two buttons, and to act as a grill for the two speakers.

The speakers and their accompanying amplifier circuitry were pulled from a portable speaker set. He combined them with a VS1002d MP3 decoder module, SD card breakout board, and the Arduino itself. In addition to the overview post linked above, there is also a collection of assembly photos, and a post discussing the way he arranged the code for the control systems (translated). See and hear the unit in action in the clip after the break.


Filed under: arduino hacks, digital audio hacks
Oct
25

LEDs fade to the music using a Python filter

arduino hacks, digital audio hacks, pulseaudio, pyaudio, python Comments Off on LEDs fade to the music using a Python filter 

This little LED rig fades in time to music. The hardware itself is quite simple, some LEDs connected to the PWM pins of an Arduino. But the signal processing is happening on a computer using a Python script.

Many of the projects we see which pulse lights to music use the MSGEQ7 chip to perform hardware processing on the audio signal. But since [Zolmeister] is using a computer to play his tunes he took a different route. His Linux box uses PulseAudio to handle sound. This allows him to record from the audio playback which provides an internal source for the pyAudio package. His Python script saves snippets of the streaming audio to .wav files. I then normalizes the volume level and uses the amplitude to set a PWM value before deleting the sample and moving onto the next. These values are pushed to the Arduino at 115200 baud to achieve the results seen in the video after the break.


Filed under: arduino hacks, digital audio hacks


  • Newsletter

    Sign up for the PlanetArduino Newsletter, which delivers the most popular articles via e-mail to your inbox every week. Just fill in the information below and submit.

  • Like Us on Facebook