25
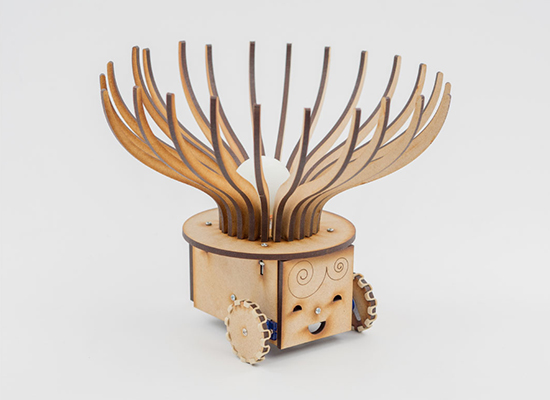
Play with the Basketball Robot running on Intel Edison
arduino, ArduinoCertified, edison, Featured, Intel Edison, node.js, Robot Comments Off on Play with the Basketball Robot running on Intel Edison
After you had an introduction to Intel Edison following the Getting Started guide, and our previous tutorial, the Intel Edison mini-breakout Getting Started Guide, it’s now time to work on something a bit more complex. You’ll be also able to play a bit with Node.js, a programming platform that runs on javascript and a good choice for building a web-based application. It is supported by the Intel® Edison standard system image so you can run node.js scripts directly on it.
He shoots! He scores! The crowd goes wild! Let’s build a robot that plays basketball with you. This tutorial is a step-by-step guide for a simple and small differential-drive robot that uses the Intel Edison. You’ll get to know a few more tricks on how to use Mini Breakout Kit and set up a node.js server for the communication.
Go and follow the steps to build it