Posts | Comments

Planet Arduino

Archive for the ‘ARM’ Category

We’ve noticed a rash of builds of [ FedorSosnin’s] do-it-yourself 3D-printed mechanical keyboard, SiCK-68 lately. The cost is pretty low — SiCK stands for Super, Inexpensive, Cheap, Keyboard. According to the bill of materials, the original cost about $50. Of course, that doesn’t include the cost of the 3D printer and soldering gear, but who doesn’t have all that already?

The brains behind this is a Teensy that scans the hand-wired key matrix. So the only electronics here are the switches, each with a companion diode, and the Teensy. The EasyAVR software does all the logical work both as firmware and a configuration GUI.

If you look at the many different builds, each has its own character. Yet they look overwhelmingly professional — like something you might buy at a store. This is the kind of project that would have been extremely difficult to pull off a decade ago. You could build the keyboard, of course, but making it look like a finished product was beyond most of us unless we were willing to make enough copies to justify having special tooling made to mold the cases.

PCBs are cheap now and we might be tempted to use one here. There are quite a few methods for using a 3D printer to create a board, so that would be another option. The hand wiring seems like it would be a drag, although manageable. If you need wiring inspiration, we can help.

For ultimate geek cred, combine this with Ploopy.

Go — a modern programming language with roots at Google — is one of the new generation languages that would like to unseat C (and C++) for what we think of as traditional programming. It is only for PCs, though, right? Not so fast! TinyGo provides a compiler that — in their words — is for small places. How small? They can target code for the Arduino Uno or the BBC micro:bit. It can also produce code for x86 or ARM Linux (both 32- and 64-bit) as well as WebAssembly. They claim that a recent project to add ESP8266 and EPS32 support to LLVM will eventually enable TinyGo to target those platforms, too.

As you would expect, there are some subtle differences between TinyGo and the full-blown version. The compiler handles the entire program at once which is slower but offers more for optimization. Certain optimizations for interface methods are not used in TinyGo, and global variable handling changes to accommodate moving data from flash to RAM efficiently. TinyGo passes parameters in registers.

Other changes are more profound. For example, there’s no garbage collection yet, so you are urged to not perform heap allocations after initialization. There are also a few other major features not supported. Concurrency in the form of goroutines and channels, cgo, reflection, and three index slices won’t work. Maps are available, but only with certain key types. Because of the missing pieces, many of the packages in the standard library won’t build.

Of course, the other modern language in the same position is Rust and if you were wondering why Go instead of Rust, there’s an FAQ for that. Do you need Go on the Arduino? Maybe not. However, if you are a Go programmer, maybe this opens up some possibilities for you.

We remember a hacker jukebox that used Go. We also remember someone using it on the ill-fated Intel Edison.

Sometimes it seems like Arduino is everywhere. However, with a new glut of IoT processors, it must be quite a task to keep the Arduino core on all of them. Writing on the Arduino blog, [Martino Facchin], Arduino’s chief of firmware development, talks about the problem they faced supporting two new boards from Nordic.

The boards, the Nano 33 BLE and Nano 33 BLE Sense are based on an ARM Cortex M4 CPU from Nordic. The obvious answer, of course, is to port the Arduino core over from scratch. However, the team didn’t want to spend the time for just a couple of boards. They considered using the Nordic libraries to interact with the hardware, but since that is closed source, it didn’t really fit with Arduino’s sensitivities. However, in the end, they took a third approach which could be a very interesting development: they ported the Arduino core to the Mbed OS. There’s even an example of loading a sketch on top of Mbed available from [Jan Jongboom].

On the one hand, this has two big advantages: in theory, Arduino can now run on anything that supports Mbed, which is quite a lot. Second, even though the system retains the simplicity of Arduino, the entire Mbed system is available to Arduino developers and vice versa.

On the other hand, you could argue that if you have Mbed, you don’t really need Arduino. While much is made about Arduino’s simplicity, it is really a C++ program with two predefined functions and an IDE that builds your code without as much explicit help as you’d expect. However, the wide variety of code that supports Arduino should be of interest since you could just use it from either an Arduino or Mbed program without much effort.

This might make some of our favorite Mbed labs projects more popular. If you want to see our take on an Mbed project, you can turn it into a signal generator.

Thanks [halherta] for the tip.

[W8BH] attended a talk by another ham, [W8TEE] that showed a microcontroller sending and receiving Morse code. He decided to build his own, and documented his results in an 8 part tutorial. He’s using the Blue Pill board and the resulting device sends code with paddles, sends canned text, provides an LCD with a rotary knob menu interface, and even has an SD card for data storage.

All the code is on GitHub. If you are interested in Morse code or in learning how to write a pretty substantial application using the Blue Pill and the Arduino IDE (or any other similar processor), this is a great exposition that is also a practical tool.

[W8BH] takes good advantage of breakout boards with things such as the displays and jacks on them. Of course, you don’t absolutely have to use those, but it does make life easier. You can see [W8TEE’s] version posted in an online forum.

The parts of the tutorial all build on each other, so you start out simple and get deeper and deeper. The tutorials are PDF files, but they are well organized and easy to read.

We’ve done our tutorials and videos on the Blue Pill. If you don’t want to rely on the Arduino IDE, there are ways around that, too.

Blue Pill header pic: Popolon [CC BY-SA 4.0]

We missed [iliasam’s] laser text projector when it first appeared, perhaps because the original article was in Russian. However, he recently reposted in English and it really caught our eye. You can see a short video of it in operation, below.

The projector uses raster scanning where the beam goes over each spot in a grid pattern. The design uses one laser from a cheap laser pointer and a salvaged mirror module from an old laser printer. The laser pointer diode turned out to be a bit weak, so a DVD laser was eventually put into service. A DVD motor also provides the vertical scan which is just a slight wobble of a mirror. A Blue Pill CPU provides all the smarts. You can find the code on GitHub.

The projector is fairly limited in size with a maximum resolution of 32×14. Some displays use a vector scheme that draws with the laser. This is brighter and more capable, but also more difficult to arrange since the laser has to move rapidly in a complex motion. The raster scanning is much easier to accomplish.

A light sensor tells the CPU when the laser is about to start hitting the vertical scan mirror. Obviously, there are other ways you could arrange for the mirrors to move, but the logic would be the same.

We’ve seen [illiasam] has a lot of interest in lasers. He’s hacked rangefinders and even 3D scanners that we’ve looked at before.

We always think that crossing the Atlantic in a blimp would be very serene — at least once they put heaters on board. The Hindenburg, the R-101, and the Shenandoah put an end to the age of the airship, at least for commercial passenger travel. But you can still fly your own with a helium balloon and some electronics. One notable project — the Blimpduino — has evolved into the Blimpduino 2. The open-source software is on GitHub. We couldn’t find the PCB layout, so we aren’t sure if it is or will be open. The 3D printed parts are available, though.

The PCB is the heart of the matter, a four-layer board with an ARM M0 processor, an ESP8266 WiFi module, four motor outputs, two motor outputs, a 9-axis inertial navigation system, an altimeter, and a forward object detection system. There’s also a battery charger onboard.

The standard set up uses three props: two for thrust and one for altitude. There’s a smartphone app and apparently, you can even have a copilot with a second phone. The lifting body is a mylar balloon with helium and they say the control is suitable even for a very large balloon. The altimeter data is from a time-of-flight sensor and there’s also a pressure transducer with temperature sensor if you want to measure higher altitudes.

We couldn’t embed the video, but there’s one of people flying the things through hoops on the website. You can, however, see a promotional video, below. As you might expect, payload capability is very low and so 3D printed parts have low infill and the board is made to be light.

Of course, our own [Sophi Kravitz] has been building her drone blimp army for some time and we are waiting for her attempt at world domination any day now. If you are in the mood for something lower tech, you can always rip apart a toy car and add your own balloon.


We’ve seen [Johan]’s AA-battery-sized Arduino/battery crossover before, but soon (we hope!) there will be a new version with more MIPS in the same unique form factor! The original Aarduino adhered to classic Arduino part choices and was designed to run as the third “cell” in a 3 cell battery holder to relay temperature readings via a HopeRF RFM69CW. But as [Johan] noticed, it turns out that ARM development tools are cheap now. In some cases very cheap and very open source. So why not update an outstanding design to something with a little more horsepower?

The Aarduino Zero uses the same big PTH battery terminals and follows the same pattern as the original design; the user sticks it in a battery holder for power and it uses an RFM69CW for wireless communication. But now the core is an STM32L052, a neat low power Cortex-M0+ with a little EEPROM onboard. [Johan] has also added a medium size serial flash to facilitate offline data logging or OTA firmware update. Plus there’s a slick new test fixture to go along with it all.

So how do you get one? Well… that’s the rub. It looks like when this was originally posted at the end of 2017 [Johan] was planning to launch a Crowd Supply campaign that hasn’t quite materialized yet. Until that launches the software sources for the Zero are available, and there are always the sources from the original Aarduino to check out.

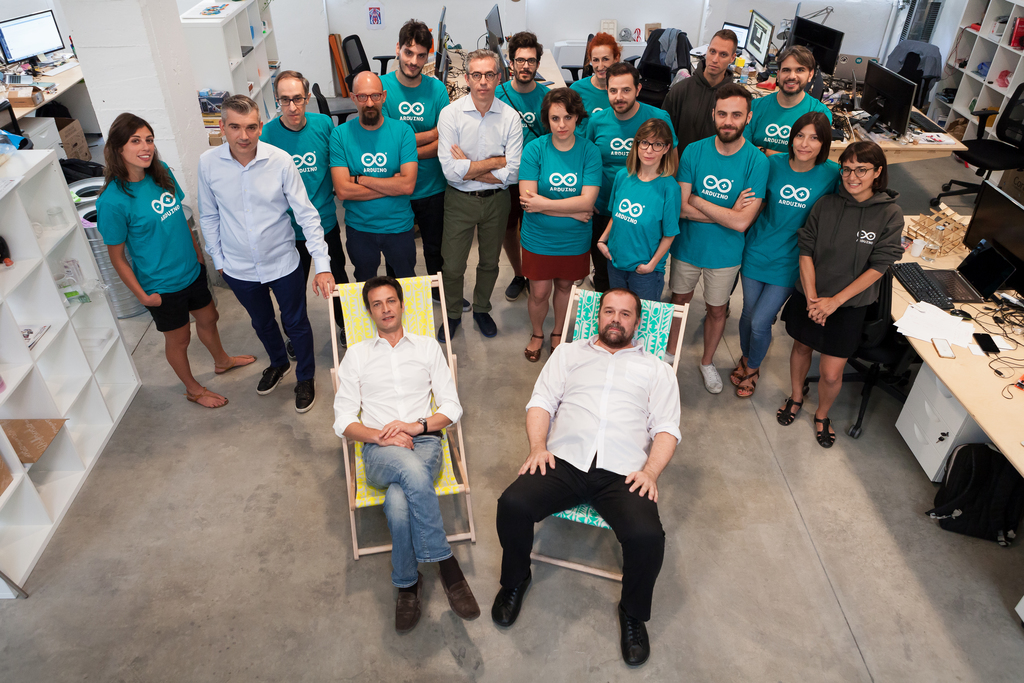
Who owns Arduino? We don’t mean metaphorically — we’d say that’s the community of users and developers who’ve all contributed to this amazing hardware/software ecosystem. We mean literally. Whose chips are on the table? Whose money talks? It looks like it could be ARM!

The Arduino vs Arduino saga “ended” just under a year ago with an out-of-court settlement that created a private holding company part-owned by both parties in the prior dispute over the trademark. And then, [Banzi] and the original founders bought out [Musto]’s shares and took over. That much is known fact.

The murky thing about privately held companies and out-of-court settlements is that all of the details remain private, so we can only guess from outside. We can speculate, however, that buying out half of the Arduino AG wasn’t cheap, and that even pooling all of their resources together, the original founders just didn’t have the scratch to buy [Musto] out. Or as the Arduino website puts it, “In order to make [t]his a reality, we needed a partner that would provide us with the resources to regain full ownership of Arduino as a company… and Arm graciously agreed to support us to complete the operation.” That, and the rest of the Arduino blog post, sure looks like ARM provided some funds to buy back Arduino.

We reached out to [Massimo Banzi] for clarification and he replied:

“Hi arm did not buy nor invest in arduino. The founders + Fabio Violante still own the company. As I wrote in the blog post we are still independent, open source and cross platform.”

We frankly can’t make sense of these conflicting statements, at least regarding whether ARM did or didn’t contribute monetary resources to the deal. ARM has no press release on the deal as we write this.

Announcing a partnership without details isn’t a new activity for Arduino. Recently we wrote about open questions on the Arduino Foundation. [Banzi] was willing to speak with Hackaday at length about that topic, suggesting more details were just weeks away but we have yet to see follow-through on that.

What we can tell is that [Banzi] and Arduino want us to know that they’re still independent. The Arduino post mentions independence and autonomy eight times in a 428-word post. (The lady doth protest too much?) They’re very concerned that we don’t think that they’ve been snapped up by ARM.

And there’s also good reason to believe that Arduino will remain autonomous even if ARM owns a big stake. ARM sells its intellectual property to a number of silicon manufacturers, who then compete fiercely by offering different peripheral sets and power budgets, and they’re very serious about providing them all with a level playing field.

Anyway, the various ARM chips are nice to work with from a hacker perspective. If the AVR-based UNO was the last non-ARM Arduino board ever made, we’d only shed a tiny little tear. On the other hand, if you’re an MSP430 or PIC fanboy or fangirl, we wouldn’t be holding your breath for a light-blue board sporting your favorite silicon but that is just conjecture.

So we have seemingly conflicting information on the details of this deal, but also promises of openness and transparency. On one hand we’re pleased that ARM is the apparent silent partner, but on the other hand we’re left confused and wanting more. Who owns Arduino?


Filed under: Arduino Hacks, Business, Current Events, Featured, news

Dear Arduino Community,

Back in July, we announced that the original Arduino founders regained full control of Arduino as a company. It was the culmination of a project that lasted several months, which required a tremendous amount of effort in finding the right partner that could help us make it happen while keeping the spirit of Arduino true to itself.

Throughout the litigation we dreamed of reclaiming control of the company, bringing it back to its original principles while designing a strategy that would allow us to tackle the challenges of the contemporary IoT world.

In order to make his a reality, we needed a partner that would provide us with the resources to regain full ownership of Arduino as a company while keeping it independent and true to its values of openness.

It wasn’t easy, but more than a year ago, in the middle of the litigation, we started a conversation with an important technology company that is an essential building block of today’s digital world: Arm.

During a very hot day in spring I visited California to meet with Arm. It was a great meeting of minds and we determined that such a partnership was the right fit for us. Arm is an extremely innovative company whose processors can be found inside virtually every mobile device on the planet; but they don’t actually build silicon. Instead, they have created an ecosystem of a thousand-plus partners, some of whom compete with each other, but Arm works in harmony with all of them.

Arm recognized independence as a core value of Arduino. This was very important for us, as it meant full understanding of our need to work with multiple silicon vendors and architectures as long as they make sense for Arduino—without any lock-in with the Arm architecture.

Following the meeting with Arm, I was thrilled. I shared my excitement with our new CEO Fabio Violante and my cofounders: Arduino could again be 100% ours, with the help of a supportive partner that leaves complete autonomy to our team and our community.

We worked very hard for many months to make this happen, and Arm graciously agreed to support us to complete the operation.

What should you expect from us in the future? A stronger Arduino, free to innovate with more firepower, and plenty of enthusiasm for future challenges and opportunities.

We will continue to work with all technology vendors and architectures moving forward. We stay independent; we stay open, and we still provide the most loved microcontroller development platform that has changed the lives of so many people around the world.

If you use the Arduino IDE to program the ESP32, you might be interested in [Andreas Spiess’] latest video (see below). In it, he shows an example of using all three ESP32 UARTs from an Arduino program. He calls the third port “secret” although that’s really a misnomer. However, it does require a quick patch to the Arduino library to make it work.

Just gaining access to the additional UARTs isn’t hard. You simply use one of the additional serial port objects available. However, enabling UART 1 causes the ESP32 to crash! The reason is that by default, UART 1 uses the same pins as the ESP32 flash memory.

Luckily, the chip has a matrix switch that can put nearly any logical I/O pin on any physical I/O pin. [Andreas] shows how to modify the code, so that UART 1 maps to unused pins, which makes everything work. it is a simple change, replacing two parameters to a call that — among other things — maps the I/O pins. You could use the technique to relocate the UARTs to other places if you choose.

If you want to learn more about the ESP32, we covered a good set of tutorials for you to check out. Or if you just want a quick overview, you can start here.


Filed under: Arduino Hacks, ARM


  • Newsletter

    Sign up for the PlanetArduino Newsletter, which delivers the most popular articles via e-mail to your inbox every week. Just fill in the information below and submit.

  • Like Us on Facebook