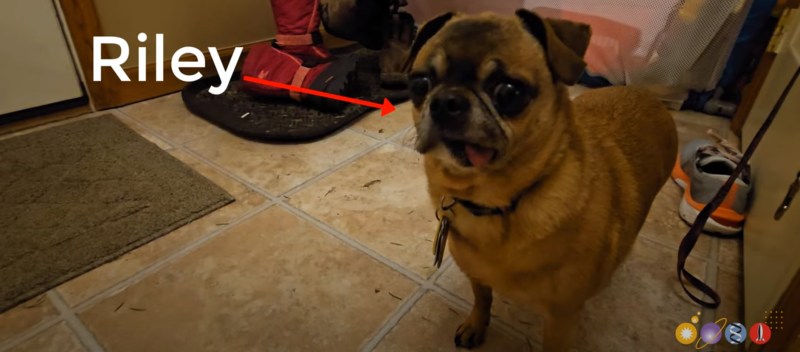
Riley, an 8 lb pug, has more beauty than brains, and a palate as unrefined as crude oil. While we hate criticizing others’ interests and tastes, his penchant for eating cat poop needed to stop. After a thorough exploration of a variety of options, including cat food additives that make its excrement taste worse (HOW? WHY? Clearly taste wasn’t the issue!), automatic litter boxes that stow the secretions, and pet doors that authenticate access to the room with the litter box, [Science Buddies] eventually settled on a solution that was amenable to all members of the family.
The trick was in creating a door mechanism with a blacklist of sorts rather than a whitelist. As the cat didn’t like to push the door open itself, the solution needed to have the pet door open by default. A magnet on Riley’s collar would trip a sensor attached to an Arduino that would control servos to swing the door shut immediately if he attempted to access the defecated delights. Of course safety was a consideration with the door swinging in Riley’s face.
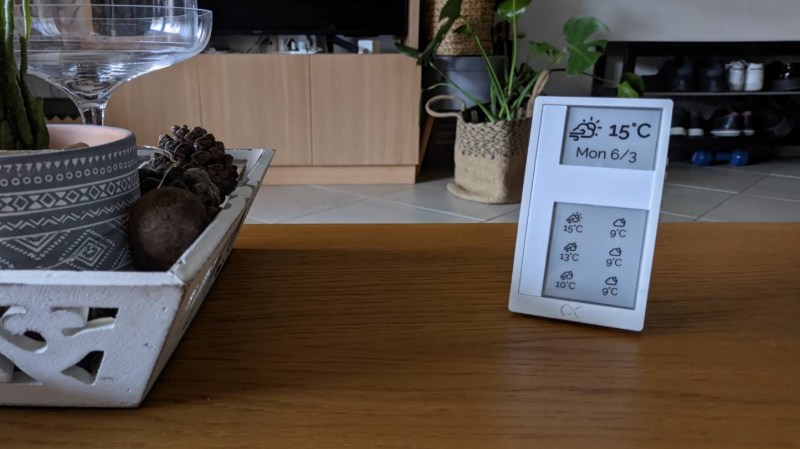
Usually, the problem comes before the solution, but for [Stavros], the opposite happened. A 4.7″ E-Ink screen with integrated battery management and ESP32 caught his eye, and he bought it and started thinking about what he wanted to do with it. The Timeframe (hackaday.io link as well) is a sleek desk calendar based around the integrated e-ink screen.
[Stavros] found the device’s MicroPython support was a little lackluster, and often failed to draw. He found a Platform.io project that used an older but modified library for driving the e-ink display which worked quite well. However, the older library didn’t support portrait orientation or other niceties. Rather than try and create something complex in C, he moved the complexity to a server environment he knew more about. With the help of CoPilot, he got some code that would wake up the ESP32 every half hour, download an image from a server, and then display it. A Python script uses a headless browser to visit Google Calendar, resize the window, take a screenshot, and then upload it.
The hardest part of the exercise was getting authentication with Google working reliably. A white sleek 3d printed case wraps the whole affair in an aesthetically pleasing shell. So far, this has been a great story of someone building something for themselves and using their strengths. Where’s the hack?
The hack comes when [Stavros] tried squeezing his calendar into a case that was too tight and cracked the screen. Suddenly a large portion of the screen wouldn’t draw. He turned what was broken into something new by mapping out the area that didn’t draw and converting the Python to draw weather information with Pillow rather than screenshot a webpage: clever reuse and a way to make good out of a bad accident.
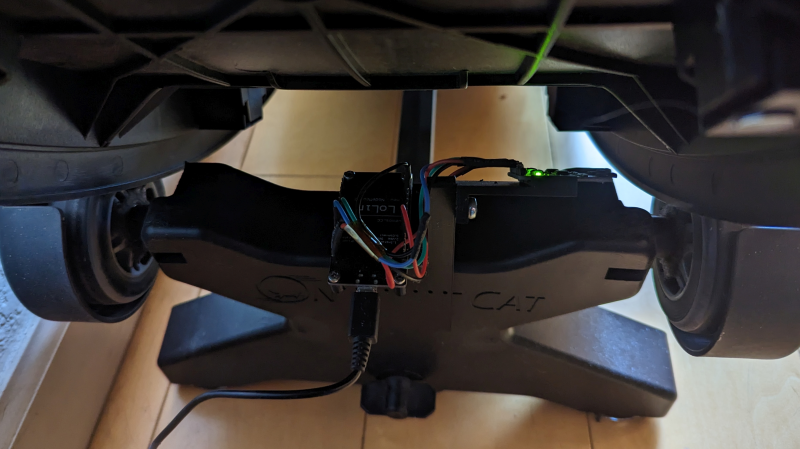
[Scott Cutler] has a young cat, [Cygnus], that loves to run on a cat wheel and [Scott] had some some important questions about [Cygnus]’s usage of the cat wheel like, how often it’s used, what direction is preferred and how fast does [Cygnus] go. To answer these questions, [Scott] put some telemetry sensors onto the cat wheel and analyzed the results.
An ESP8266 microcontroller and two 3144E hall effect modules were used to sense eight magnets glued onto the outer housing of a “One Fast Cat” cat wheel. [Scott] installed the ESP8266 and hall effect modules onto the base support for the wheels, using 3D printed brackets to secure them.
For the software side, the ESP8266 attaches an interrupt handler whenever a sensor passes by, recording a window of three previous measurements for valid sample determination and, if accepted, uses the time between samples to infer direction and speed. The ESP8266 connects to a pre-configured local WiFi network and has a telnet interface to extract stored log information, in the form of JSON data.
[Scott] has some nice graphs and other data visualizations on [Cygnus]’s usage, including a preference for running at 3 AM, achieving a maximum speed of 14 mph and an average of 4 seconds per run. The source is available on GitHub and the STL files are available embedded in [Scott]’s write-up. We’ve featured cat exercise trackers before with a giant hamster wheel outfitted with a Raspberry Pi and it’s nice to see some options that allow for a retrofit option in addition to a complete DIY solution.
Everybody loves a good BBQ. Getting your family and friends together on a long summer day and evening, cooking delicious food and having a great time as smoke drifts through the air — it’s the perfect weekend activity.
BBQs can also be stressful, however. Anyone who has ever tried to host one will know the challenges of managing multiple meats at once, trying to avoid any overcooking (or undercooking) disasters, and keeping track of all that equipment.
Automation can help run your BBQ much more smoothly, minimizing any mishaps and making sure everyone has the best experience possible. In this article, we’ll look at how home automation can improve the BBQ experience and share some examples from Arduino’s Project Hub.
How home automation improves BBQs
Keep track of different items. Automation makes it easier to manage multiple meats and other food items at the same time, notifying you when something is ready so you don’t get overwhelmed by tasks and neglect any of your cooking.
Stay on top of temperature by measuring each piece of food and ensuring it’s at the perfect point.
Create a more welcoming outdoor area with things like automated lighting, heaters, and even a smart garden.
Easy cleanup with robots and other tools to leave your grill and other tools sparkling clean.
Arduino community member Duncan Barbee knew that the most flavorful way to grill is to use charcoal to heat your smokers. While propane and electric smokers give you better temperature control, they lose that unique and delicious charcoal flavor.
But charcoal heaters present many challenges. You need to constantly stay on top of the temperature, adjusting the vents on a regular basis to make sure everything is just right as the charcoal level changes in the smoker.
Barbee wanted to build a project that gave him the best of both worlds — the tasty charcoal flavor with the ease and convenience of an electric or propane smoker. He developed a controller that monitors the temperature in the smoker and automatically adjusts the airflow to the charcoal to maintain the correct temperature at all times, allowing him to sit back and relax as the perfect charcoal-based BBQ unfolds.
Robert Korn had already created a sous vide controller using Arduino and a handful of other components, with great success. He chose to apply the same model to a smoker and devised the Smokerduino, which ensures perfectly cooked meat every time with minimal effort from the chef.
Roger Theriault and his wife enjoy making cheese and yogurt at home, but this is a long process involving a thermometer and lots of waiting around. To cut some steps out, he built his own smart thermometer to monitor the temperature of the food and beep when a specific temperature was reached and it was time for the next step.
However, when the device stopped working, Theriault decided to upgrade it instead of simply fixing it. The new iteration of the thermometer uses Alexa devices too, enabling him to easily monitor and control everything cooking in the kitchen or outside in the smoker.
The way it works is fairly straightforward — just give Alexa an instruction and it will find the recipe and instruct the given device to start from step one of that recipe. It also draws on the data from the recipe to monitor the temperature and make any notifications or adjustments needed.
Better BBQs with Arduino
Monitoring and controlling cooking is one of the most useful and rewarding use cases for home automation. Arduino’s products make it possible to assemble detailed and advanced projects to take your BBQs to the next level.
Check out the project hub for some more inspiration or visit the home page to learn more about how Arduino works.
Keeping the air in your home in the right condition is incredibly important. Your home is your safe haven from the outside world, a place where you can control your environment and enjoy the comfort and peace of a secure space.
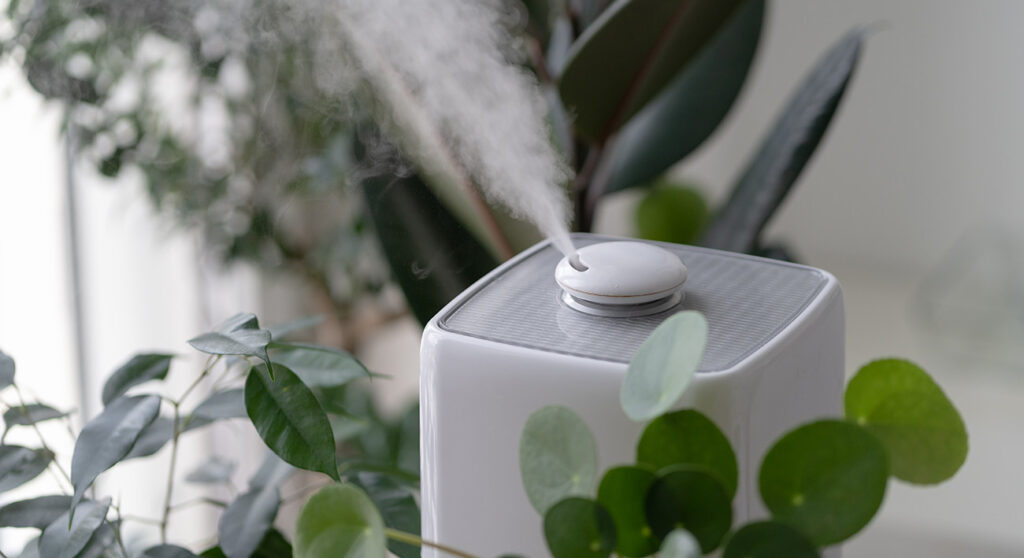
Humidifiers are an excellent way to keep the atmosphere of your home in exactly the right balance for your health and enjoyment. Traditional humidifiers work well, but automated humidifiers can work even better.
In this article, we’ll look at why humidifiers are so useful and how you can use home automation to create your own smart home humidifiers.
Why home humidification is important
Stay moisturized. Humidifiers keep the air in your home sufficiently full of moisture, which helps counteract the effects of artificial heating systems. This prevents dry skin — especially on the lips and hands — as a result of dry indoor air.
Keep your sinuses in good condition. Dry air, over time, can cause your sinuses to become irritated. It’s a feeling most people are aware of and can result in discomfort, headaches, and even nosebleeds. A good humidifier helps avoid this, ensuring your sinuses are lubricated and healthy at all times.
Make it easier to recover from illness. The right humidifier can ease the path to recovery from illnesses like the flu or a cold by helping your sinuses recover.
Minimise snoring. A noisy bed partner, over many months, can be the source of much stress and frustration. Snoring is a complex issue that can be difficult to solve, but a good humidifier can often ease the problem significantly by providing enough moisture to keep the throat and nose clear.
Living in Boston, Arduino user chenwei19940207 found that the air was so dry, especially in the evening, that a solution was needed. As a result, they decided to develop their own humidifier to turn on and off automatically, ensuring a consistent level of humidity in the air all year round and all day long.
Healthy air has three components — be fresh, clean, and the right humidity. The third factor is important because humans use evaporative cooling (sweating) to rid our bodies of excess heat. This is why humans can be comfortable and safe within a fairly wide range of humidity — between 30 to 70 percent at a push.
But we still struggle at lower levels of humidity. It can result in great discomfort, trouble breathing, and aggravated allergies, and anything below 20% humidity is especially difficult. As a result, it’s best to keep our homes at the right level of humidity.
Recognizing this, Arduino member Md. Khairul Alam developed a project to keep the home sufficiently humidified year round. His device senses the temperature and humidity in your home, checks if it is in the ideal humidity range, and turns on the humidifier to ensure you stay in the right zone.
Arduino “having11” Guy developed this project to regulate the humidity of their home. It involves attaching a dht11 temperature and humidity sensor to an Arduino, letting you modify your humidifier in a way that allows you to automatically turn the device on whenever the humidity in your home drops below a set level, for example 30%.
You also have the ability to set a “cooling down” period, avoiding the humidifier becoming overheated.
NOTE: It’s worth noting that this project uses high voltage and amperage, and doing any of these steps incorrectly could result in serious injury or even death. So be careful and don’t attempt this without any prior experience or skill!
Build a healthier smart home with Arduino
With Arduino, controlling the humidity of your home is just the beginning. Our Project Hub is filled with examples of home automation projects, using all kinds of technology to make their homes smarter, safer, and easier to live in.
Check out our site to find out more uses for Arduino and how you can get started with your own home automation projects.
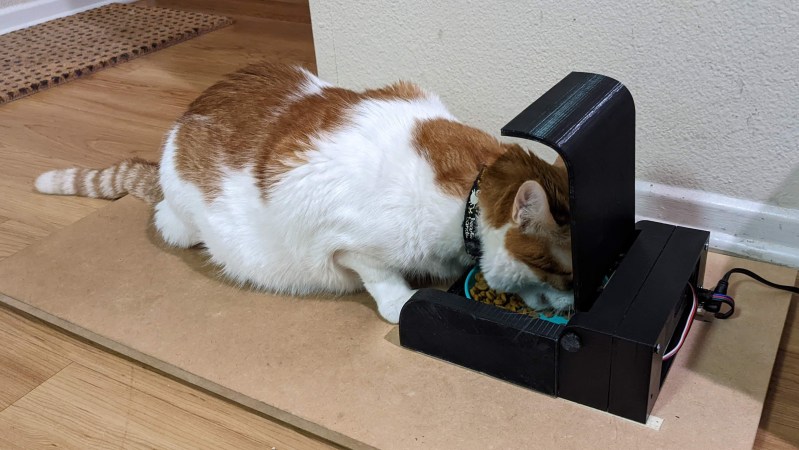
If you have more than one pet, you may know how hard it is to tell how much each furry friend is eating. If you introduce prescription foods, then this minor annoyance can have a major impact on your pet’s health. Facing this dilemma, [tomasdiazwahl] set out to make a pet feeder that feeds his pets exactly what they need when they approach the feeder.
Using the ever-popular Arduino Uno, the feeder is connected to a platform that uses load cells to detect the pet’s weight. The weight data is then used to identify which animal is looking for food. Once the pet is identified, the correct food bowl opens. It seems this prototype only has one food chamber to keep unauthorized pets from eating the special food, but the basic idea should be extensible to two or more chambers. While some existing solutions read the pet’s microchip or NFC collars to determine who’s at the feeder, [tomasdiazwahl] decided against these given the fickleness of trying to reliably get a reader at the correct position relative to the pet. As long as you don’t have multiple pets with the same weight, it should work just fine.
This project has a nice mix of woodworking, 3D printing, and electronics showing what can be accomplished when you aren’t afraid to mix techniques. We also really appreciate that [Tomasdiazwahl] spent the extra time to include a testing procedure and safety mechanism into the project. Designing a device to improve your pet’s health shouldn’t come with a safety risk!
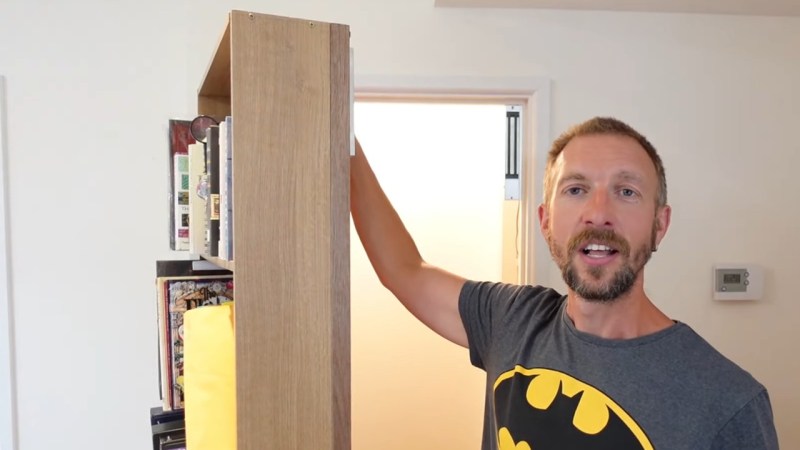
No spooky mansion is complete without a secret passage accessed through a book shelf — or so Hollywood has taught us. What works as a cliché in movies works equally well in an escape room, and whenever there’s escape rooms paired with technology, [Alastair Aitchison] isn’t far. His latest creation: you guessed it, is a secret bookcase door.
For this tutorial, he took a regular book shelf and mounted it onto a wooden door, with the door itself functioning as the shelf’s back panel, and using the door hinges as primary moving mechanism. Knowing how heavy it would become once it’s filled with books, he added some caster wheels hidden in the bottom as support. As for the (un)locking mechanism, [Alastair] did consider a mechanical lock attached on the door’s back side, pulled by a wire attached to a book. But with safety as one of his main concerns, he wanted to keep the risk of anyone getting locked in without an emergency exit at a minimum. A fail-safe magnetic lock hooked up to an Arduino, along with a kill switch served as solution instead.
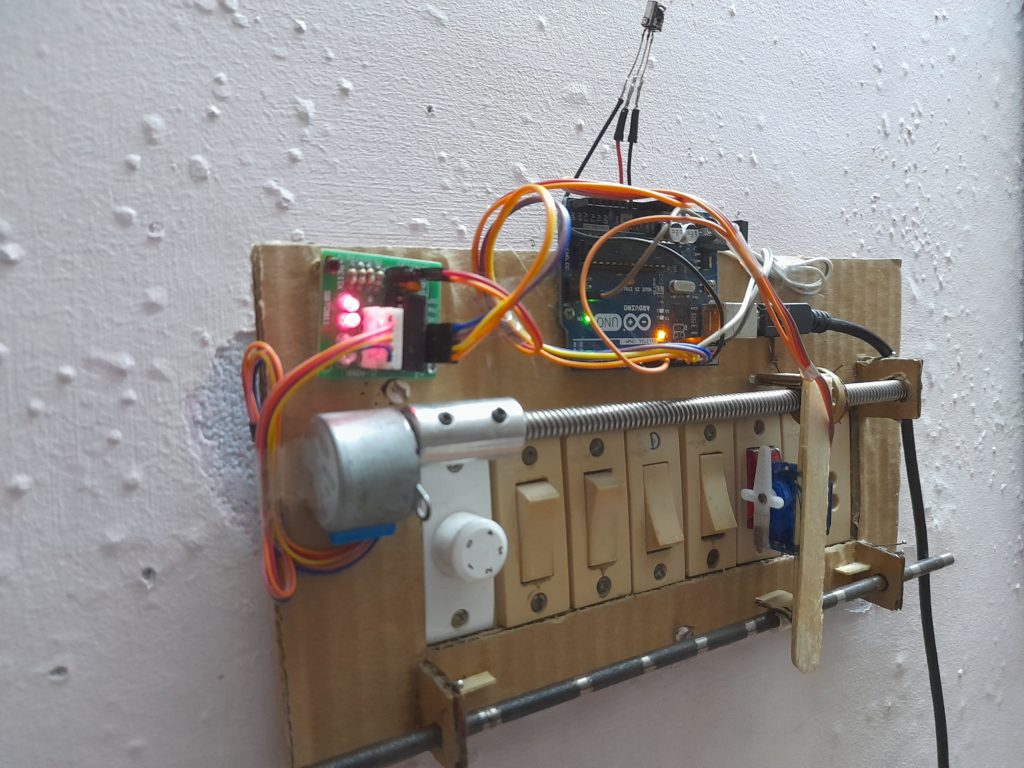
All too often, those who are new to Arduino struggle with creating large projects due to a lack of experience and components. This can be frustrating, but Instructables user MAKE_IT WITH_ME decided to tackle this issue by designing a super cheap way to automate home circuitry from just a single Starter Kit. His build uses a single Arduino Uno, although it can easily be swapped with something like a Nano or Mega, along with a stepper motor/driver, servo motor, threaded rod, and an IR receiver + remote combo.
The main portion of the home automation setup is the stepper motor assembly, and it is responsible for moving the servo motor back and forth across the bank of switches. Due to the stepper motor not knowing its initial position relative to the device, it must be “homed” or set to its zero position by moving right until the edge hits the limit switch. When a request to turn a switch on or off is received from the IR remote, the Arduino board decodes the instruction and converts the command into the number of steps the stepper motor must take to reach the desired location. After the servo moves and flips the switch on or off, the entire thing returns back to the initial area.
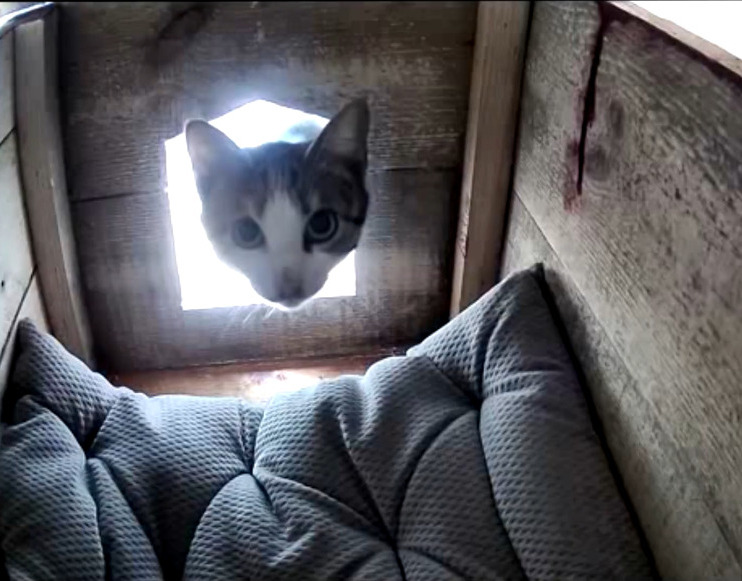
There are a lot of stray cats roaming around [Red Tie Projects’] neighborhood, and no one seems to care much about what happens to them. Fortunately for the cats, [Red Tie Projects] cares quite a lot, as evidenced by this colossal cat condo they built. The cats retain their freedom, but get food and a warm, sheltered bed whenever they decide to grace [Red Tie Projects] with their presence.
[Red Tie Projects] built this sturdy shelter from pallet wood and did a fine job of it, sealing all the seams and screws up with wood putty and waterproofing it with silicone. Inside there’s a heated pillow, a light, and a remote-controlled camera so RTP] can pan around and keep an eye on the cats. All the wires run out through a weatherproof junction box attached to the side and over to a control box made from an ATX power supply.
Most of the build is made from scrap, including the best part — an Arduino-driven motorized zip line for delivering food from the balcony to the cat porch. Details on the control box and the food delivery system are coming soon, as [Red Tie Projects] teases in the video after the break. We’re looking forward to seeing those. Oh, and don’t worry — there’s more than enough footage to cover the cat tax.
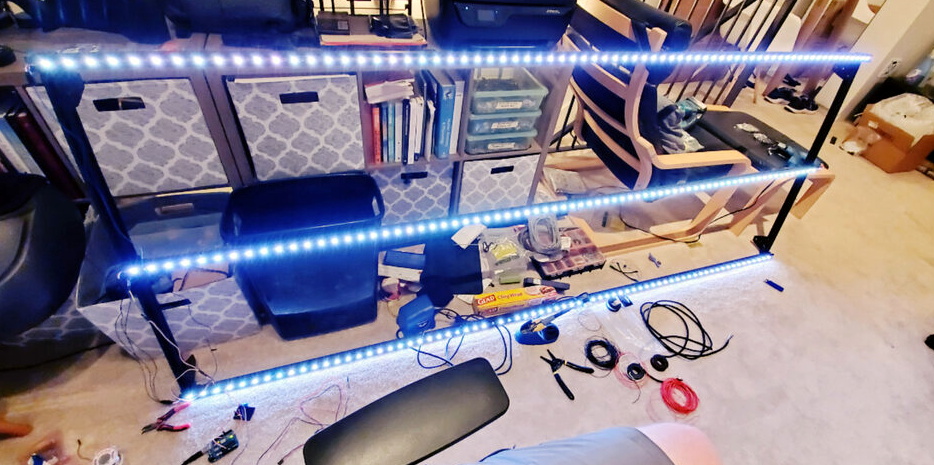
When we see RGB LEDs used in a project, they’re often used more for aesthetic purposes than as a practical source of light. It’s an easy way to throw some color around, but certainly not the sort of thing you’d try to light up anything larger than a desk with. Apparently nobody explained the rules to [Brian Harms] before he built Light[s]well.
Believe it or not, this supersized light installation doesn’t use any exotic hardware you aren’t already familiar with. Fundamentally, what we’re looking at is a WiFi enabled Arduino MKR1000 driving strips of NeoPixel LEDs. It’s just on a far larger scale than we’re used to, with a massive 4 x 8 aluminum extrusion frame suspended over the living room.
Onto that frame, [Brian] has mounted an undulating diffuser made of 74 pieces of laser-cut cardstock. Invoking ideas of waves or clouds, the light looks like its of natural or even biological origin while at the same time having a distinctively otherworldly quality to it.
The effect is even more pronounced when the RGB LEDs kick in, thanks to the smooth transitions between colors. In the video after the break, you can see Light[s]well work its way from bright white to an animated rainbow. As an added touch, he added Alexa voice control through Arduino’s IoT Cloud service.
Planet Arduino is, or at the moment is wishing to become, an aggregation of public weblogs from around the world written by people who develop, play, think on Arduino platform and his son. The opinions expressed in those weblogs and hence this aggregation are those of the original authors. Entries on this page are owned by their authors. We do not edit, endorse or vouch for the contents of individual posts. For more information about Arduino please visit www.arduino.cc
You are currently browsing the archives for the home hacks category.