Posts | Comments

Planet Arduino

Archive for the ‘Featured’ Category

Hey there, DIY IoT enthusiasts! Ever build a cool gadget with your Raspberry Pi, only to get stuck figuring out how to show off its data? Don’t worry, you’re not alone. Lots of makers like you face the same challenge: turning that awesome sensor data into something easy to see and interact with on your phone or laptop. 

The good news is, there are simple and reliable ways to bridge that gap and shed light on your data without losing time.

Visualize your Raspberry Pi data: Get started

Raspberry Pi and other Linux-based platforms have become popular in the IoT space due to their versatility and ease of use. However, a common issue is finding an effective way to visualize their data and connect them to visualization platforms.

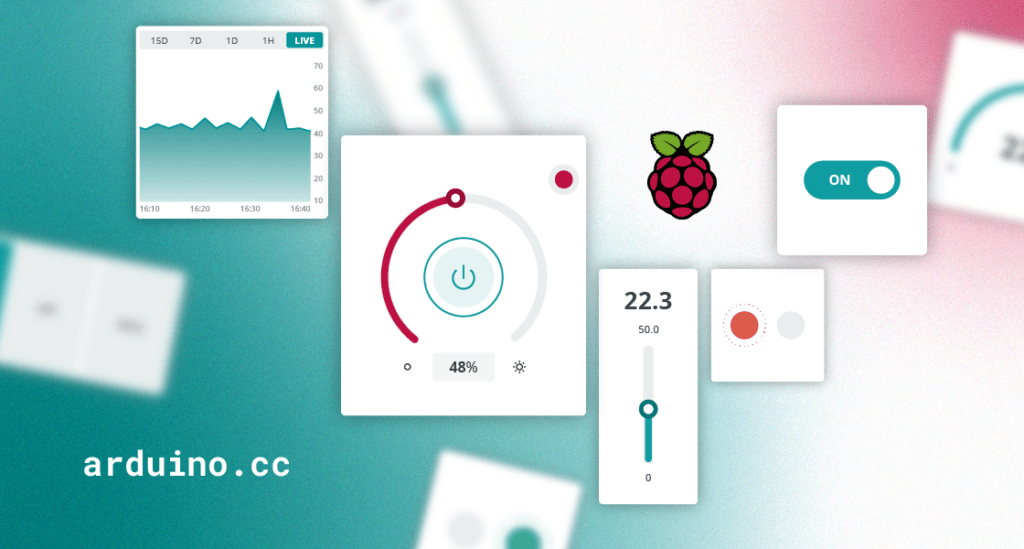
At the end of the day, what do you want? You have your code which is producing data and you want to have a dashboard to visualize it both in real time and its historical evolution. Furthermore, you would like to interact directly with your application from that dashboard too!
Let’s explore what kind of solutions you have at your disposal.

Choosing a visualization platform for your Raspberry Pi

You can visualize your device’s data by installing a visualization platform on your device or sending data to an external platform, self- or cloud-hosted. Each has its pros and cons, and the choice depends on your skills, time, and the complexity of the solution.

Installing a visualization platform on your device also implies setting up local data storage, like a database. This process along with the platform installation and maintenance can be complex and time-consuming, especially for beginners.

Transferring data to an external platform is typically easier as they usually offer a simple API to interact with them, but the type of solution can add complexity:

  • If you opt to establish your own platform and infrastructure, it may seem like you have more control over the solution. However, it can quickly become an overwhelming task for beginners, and ongoing maintenance can be even more challenging.
  • Choosing a cloud-hosted solution often seems like the most balanced option. However, it can also be complicated due to the wide range of alternatives, varying levels of complexity, and pricing models that can be difficult to understand.

Some of these alternatives were also described in a previous article, where we explored several ways to visualize data coming from Arduino or ESP32 based boards. 

Choosing the right programming language for your Raspberry Pi

But now, what? You have to program your application to collect data. Selecting the right programming language can depend on many different factors. Knowledge of the environment or simply your preference can be a deciding factor. But sometimes the decision is not so simple. Here we have some insights about some popular IoT programming languages

  • Python: Python is a top choice for IoT development due to its simplicity, rich library ecosystem, and active community. Its dominance in AI allows seamless integration of machine learning models.
  • JavaScript: JavaScript, with Node.js as a server-side runtime environment, is also a go-to language for IoT device development. It’s versatile and its event-driven nature aligns seamlessly with IoT requirements.  It’s particularly popular for applications that interact with web pages, thanks to the potential for significant code reuse.
  • Node-RED: Lastly, low-code programming environments like Node-RED have become very popular for IoT. It allows you to create your applications with an intuitive drag-and-drop interface, connecting hardware and platforms, and controlling anything from tiny sensors to the cloud.

Note: While other languages like C/C++ and Rust are also relevant, this blog post focuses on Python, JavaScript, and Node-RED due to their popularity and relative ease of use. 

Creating IoT monitoring dashboards with Arduino Cloud 

The Arduino Cloud is a cloud-hosted platform that provides a user-friendly environment to create customizable insightful dashboards used to monitor and control your IoT devices.

We recently announced that you can now seamlessly connect Python, MicroPython and JavaScript applications with the Arduino Cloud.  

The main benefit is its ease of use. You get rid of installation or maintenance headaches, while you connect your devices in minutes and visualize the data in your dashboards either from your browser or your mobile phone. You can create and customize your dashboards with an intuitive interface using drag-and-drop widgets. These dashboards provide real time interaction with your IoT devices and insightful historical information that can be additionally downloaded for offline analysis.

But there are many other cool features:

  • Real time alerts: You can receive notifications based on criteria configured in the Cloud. Learn more in this post.
  • Mobile phone app: You can access your dashboards using the IoT Remote app. 
  • Work collaboratively: You can share your code and dashboards with others.
  • Out-of-the box integrations: You have seamless integration with popular platforms like IFTTT, Zapier, Google Services, Alexa or Google Home.

Want to learn more? Check out this recent article announcing four new IoT monitoring dashboard features that may seem small, but pack a big punch for your connected projects. They include the ability to duplicate IoT Dashboards, IoT Value Widget customization, new data aggregation method and more.

How to connect your Raspberry Pi to Arduino Cloud

Connecting your Raspberry Pi to Arduino Cloud couldn’t be easier. You only have to follow these steps:

1. Set up an Arduino Cloud account.
2. Add your device to the Arduino Cloud as a Manual device.
3. Create your Thing and add your variables.
4. Create the code for your Raspberry Pi using your preferred development language and environment.
5. Create the dashboards for data visualization.

So, do you want to remotely monitor your Raspberry Pi creations and control them from anywhere? Stay tuned! Upcoming posts will showcase real-world examples of connecting your Raspberry Pi to the Arduino Cloud, enabling you to visualize sensor data and interact with your projects remotely. In the meantime, here’s a project from ProjectHub showing an integration with Raspberry PI using Python to show VCO2 data from a SGP30 sensor.

Start with Arduino Cloud for Free

Arduino Cloud is free to use. So, if you’re looking to streamline data visualization of your Raspberry Pi applications, consider giving the Arduino Cloud a try and leverage its full potential for your projects. You can explore the premium features for enhanced functionality.

The post A guide to visualize your Raspberry Pi data on Arduino Cloud appeared first on Arduino Blog.

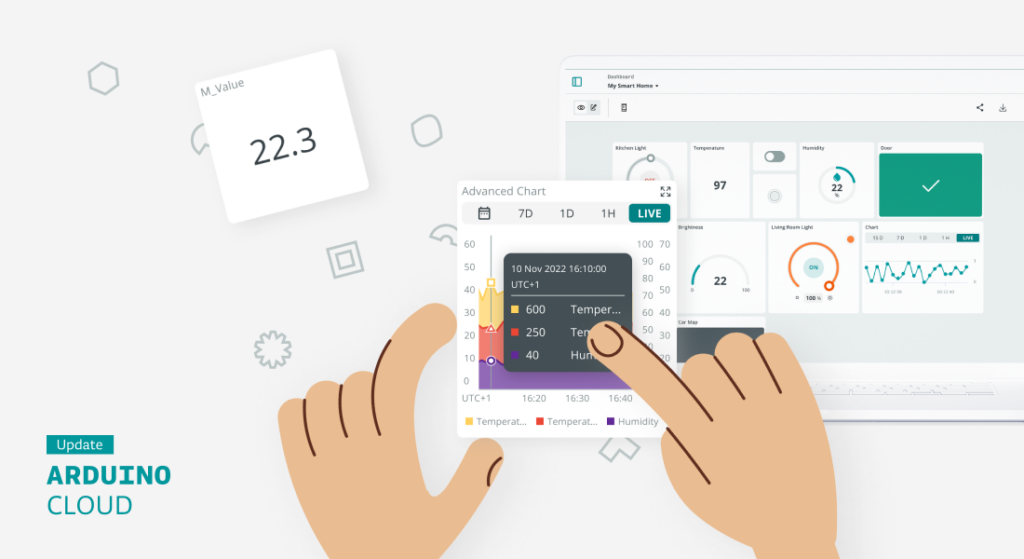
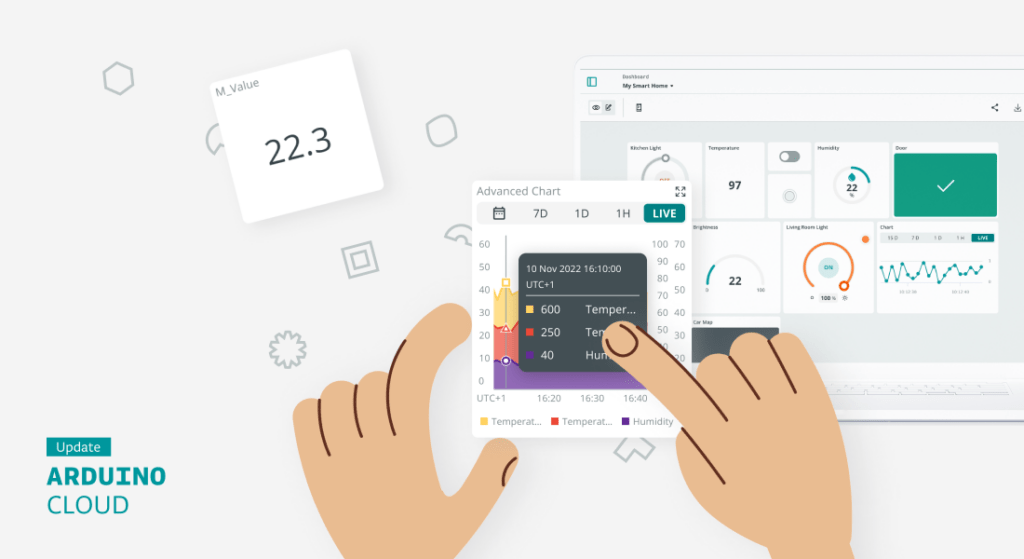
Arduino Cloud recently received a major upgrade renewing the user interface and the Arduino Cloud editor. And as we promised it was just the beginning. This article dives into some of the new IoT monitoring dashboard features that may seem small, but pack a big punch for your connected projects.

1. Duplicate IoT Dashboards

Dashboards are the heart of the Arduino Cloud, allowing you to effortlessly monitor and control your devices. That’s why improving their functionality is crucial.

Even though creating an IoT dashboard is an easy task with the intuitive drag-and-drop interface, it can become a bit tedious when you have to replicate many of them and apply minor adjustments. 

Now it is possible to duplicate your IoT dashboards with just one click. Just click on the three dots (?) of the dashboard that you want to clone and select “Duplicate.” This creates a copy that you can customize to meet your specific needs.

2. Customize your IoT Value Widget

Customizing widgets has been a common request from our user community, and we’ve recently addressed this with the introduction of decimal settings in the “Value” widget. This much-awaited feature allows users to configure the number of decimal digits displayed in the widget when dealing with floating-point variable types.

When selecting a floating-point variable type, users can specify the decimal precision shown in the widget and choose whether to truncate or round the value. Importantly, this setting only affects the visualization, not the actual variable value.

3. Enjoy the new data aggregation method in Advanced Chart widget

Advanced chart widgets are one of the most popular widgets for data analysis as they help you improve your data analysis. The widget now includes support for configuring the data aggregation method.

But what does it mean?

The chart widgets come with a smart implicit feature known as data aggregation. To prevent the chart from becoming too messy with an excess of data points, there is a fixed limit of data points per chart:

  • If the number of data points to show is lower than the maximum number of data points, there is no aggregation.
  • If the number of data points to show is bigger than the maximum number of data points, data is aggregated.

Before this update, there was only an implicit aggregation method, which was the average.

With this new Advanced Chart widget feature, you can now choose the aggregation method that suits your needs. Options include average, max value, and min value:

  • Average: Calculates the average of the data for each aggregation period.
  • Max value: Uses the maximum value within the aggregation period.
  • Min value: Uses the minimum value within the aggregation period.

This enhancement is a direct result of the feedback from our community. It’s a feature that has long been requested by users, and we’re happy to finally deliver it.

Check out this article if you want to learn more about Advanced Chart widgets. 

4. Deploy ready-to-use dashboards and firmware for your ESP32 devices

Templates are one of the most popular features of the Arduino Cloud. You can select a ready-to-use solution and deploy it with one click. You get the software and an IoT monitoring dashboard. If you need to do modifications for your IoT project, you can just edit the code and dashboard and off you go! It’s a fun and easy way to get started.

The exciting thing is that two new dashboard templates for ESP32 boards are now available, complementing the offering for Arduino boards:

With the SparkFun Weather Station kit template, you can program the SparkFun Weather Station kit firmware and get a ready-to-use dashboard that shows information about wind, rain, and sunlight.

Check out the full list of templates to see the ones that fit you more.

Bonus: IoT widget preview

As a bonus, we’re also introducing a handy new feature – now when you add a widget to a dashboard, you’ll see a preview and description of the widget. This makes it even easier to choose the right widget for your dashboard and streamline your project setup process.

Get started with Arduino Cloud

The Arduino Cloud is free to use. Create your Arduino Cloud account today and explore how you can bring your projects to the next level. If you need enhanced functionality, you can check the premium features and redeem a code for a free 30-day trial. 

Want to learn more about Arduino Cloud IoT monitoring dashboards? 

The post 4 new IoT monitoring dashboard updates on Arduino Cloud appeared first on Arduino Blog.
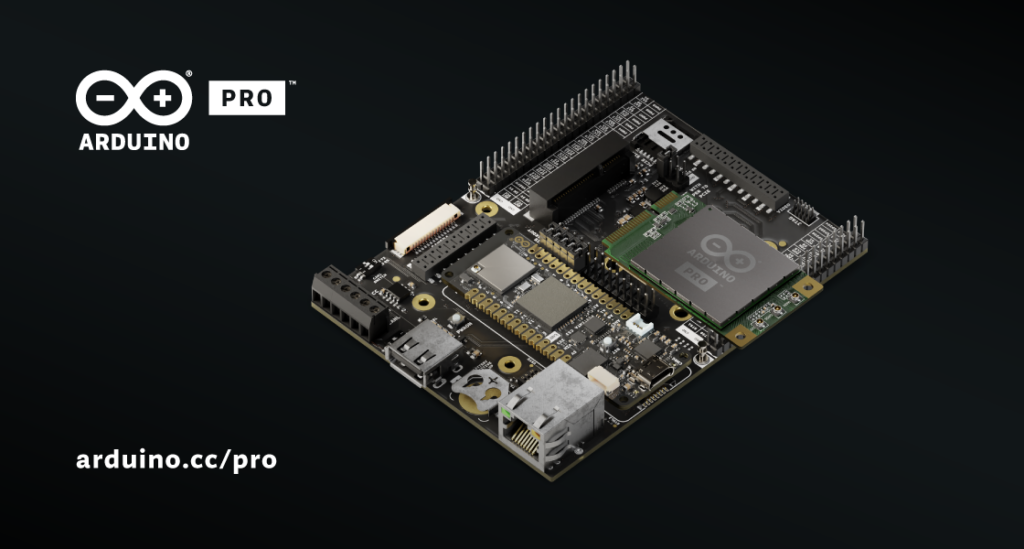
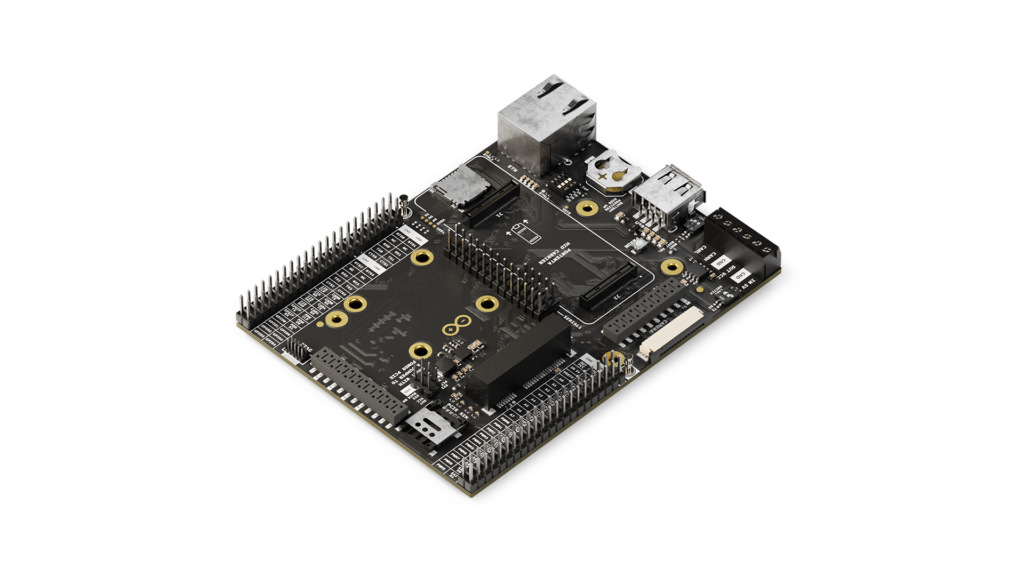
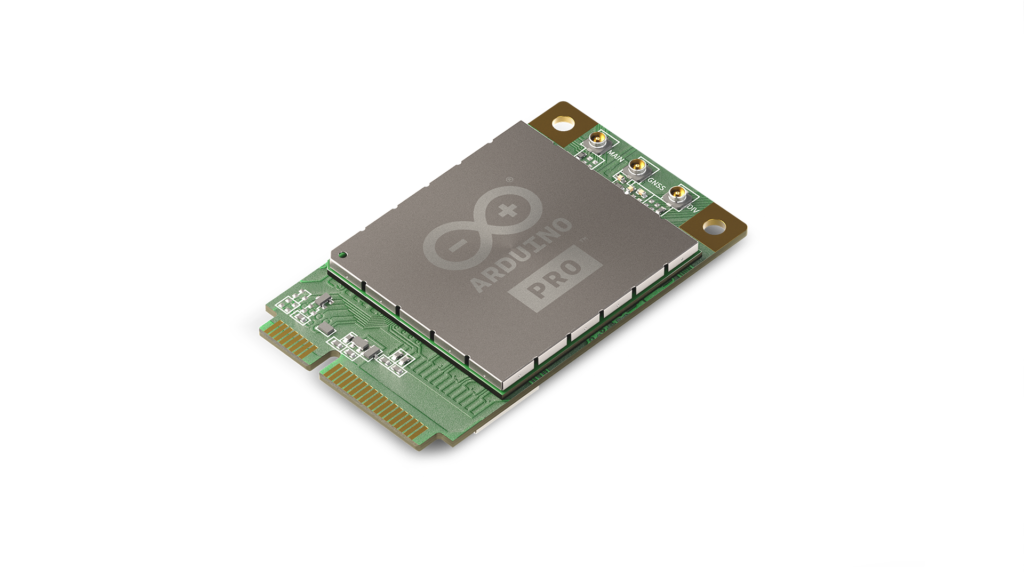
Our team at Embedded World (April 9th-11th in Nuremberg) has announced not one, but two groundbreaking additions to the Arduino Pro range that are ready to elevate your prototyping and connectivity experiences. Say hello to the Arduino Portenta Mid Carrier and the Arduino Pro 4G Module!

Portenta Mid Carrier: maximizing prototyping potential

This ultimate companion to the Portenta boards family is your gateway to seamless prototyping and expanded connectivity, designed to grant you zero hassles and maximum efficiency.

From CAN lines to Ethernet, microSD, USB, camera interfaces, and more, it allows you to effortlessly tap into high-density signals through dedicated headers. Plus, debug pins and the RTC battery backup will simplify your development journey even more.

Compatible with Portenta C33, Portenta H7, and Portenta X8, it adapts to your evolving development needs with ease. Whether you’re delving into machine vision prototyping or testing cellular connectivity, this is the carrier for you. 

Find out more from the dedicated page, or head straight to the store.

Arduino Pro 4G Module: revolutionizing connectivity

Are you ready to revolutionize your connectivity game? Engineered to seamlessly integrate with the Portenta family, the Arduino Pro 4G Module comes with a plethora of benefits, ensuring your projects thrive with lightning-fast data throughput and high bandwidths, powered by a robust Cat.4 modem from Quectel. 

Enjoy secure data transfer, long-range global coverage even in the most isolated locations, and cost-efficient flexibility – all in the widely adopted Mini PCIe form factor: from remote maintenance to building safety inspection, the possibilities are endless. 

The full details are available on our website, but you can also jump right to purchase from the Arduino Store!

Embark on your journey of innovation with Arduino’s expanding ecosystem

Our end-to-end ecosystem of hardware, software, and cloud solutions keeps expanding to meet your needs. The Portenta Mid Carrier and Arduino Pro 4G Module are only the latest additions that promise to unlock new realms of creativity and innovation for seasoned developers and passionate hobbyists alike.

So, what are you waiting for? Dive into a world of seamless prototyping and unparalleled connectivity today, with the Portenta Mid Carrier and Arduino Pro 4G Module.

The post The new Arduino Pro 4G Module and Portenta Mid Carrier expand our ecosystem, and your options! appeared first on Arduino Blog.

The 2024 State of Edge AI Report is out, and we’re proud to be in it — for the second year in a row!

“Edge AI is a crucial technology in this world of finite resources. It allows us to monitor and optimize consumption in real time: so the use of electricity or water, for example, can be optimized not just for today, but for the future. Manufacturing, agriculture and logistics can minimize their impact, with huge potential for cost savings as well as lowering our carbon footprint,” explains Fabio Violante, CEO of Arduino.

Edge AI has witnessed a remarkable surge in recent years, driven among other factors by the urgent need for efficient resource management and sustainability. Indeed, this technology leverages real-time data analytics and predictive modeling to enable proactive decision-making in a wide variety of sectors. 

The 2024 “State of Edge AI” Report, curated by Wevolver, contains a plethora of examples and insights relevant to applications ranging from healthcare to automotive. 

For example, edge AI solutions facilitate precision farming practices by analyzing soil moisture levels, weather patterns, and crop health data to optimize irrigation and fertilization, thereby maximizing yields while minimizing environmental impact.

In logistics and transportation networks, deploying AI-powered edge devices in vehicles and infrastructure makes real-time monitoring of traffic conditions and route optimization feasible. This not only improves operational efficiency but also enhances safety by mitigating the risks of accidents and breakdowns. Edge AI also facilitates the development of smart cities by enabling intelligent management of utilities, transportation systems, and public services through seamless integration with IoT devices and sensors deployed across urban environments. This empowers municipalities to optimize resource allocation, reduce congestion, and enhance the overall quality of life for residents.

In addition to optimizing resource and energy use to reduce financial and environmental impacts, edge AI-powered systems can lead to significant cost savings by foreseeing equipment failures. Predictive maintenance was indeed the focus of our contribution to this year’s report, showcasing products like Opta, Nicla Sense ME and Portenta Machine Control and success stories (like AROL’s and Engapplic’s) that bring the benefits of edge AI into the realm of present, tangible opportunities for enterprises in any industry and at any stage of their development. 

Curious to find out more? Just download the 108-page report for free at this link

“Simplicity is the key to success. In the tech world, a solution is only as successful as it is widely accepted, adopted and applied — and not everyone can be an expert. You don’t have to know how electricity works to turn on the lights, how an engine is built to drive a car, or how large language models were developed to write a ChatGPT prompt: that plays a huge part in the popularity of these tools,” Violante adds. “That’s why, at Arduino, we make it our mission to democratize technologies like edge AI — providing simple interfaces, off-the-shelf hardware, readily available software libraries, free tools, shared knowledge, and everything else we can think of. We believe edge AI today can become an accessible, even easy-to-use option, and that more and more people across all industries, in companies of all sizes, will be able to leverage this innovation to solve problems, create value, and grow.”

The post Arduino featured in the 2024 State of the Edge AI Report appeared first on Arduino Blog.


In a world where industrial automation is rapidly advancing, education often struggles to keep pace. 

This disconnect leaves a big gap in practical, industry-relevant skills among graduates. 

Addressing this critical need, we’re excited to introduce the Arduino PLC Starter Kit. Powered by the robust Arduino Opta mini PLC and backed by the intuitive Arduino PLC IDE, this kit is set to revolutionize programmable logic control education.

Continue reading to find out more about the PLC Starter Kit.

What is the Arduino PLC Starter Kit?

Before we delve into the details of this exciting new offering, let’s explain exactly what a PLC is. A Programmable Logic Controller (PLC) is a type of industrial computer that’s used to automate, control and coordinate a wide range of manufacturing processes and machinery. 

The Arduino PLC Starter Kit isn’t just another educational tool; it’s a comprehensive solution designed to bridge the gap between theoretical knowledge and practical application in industrial automation — a powerful simulation tool specifically created for vocational and university students considering a career in manufacturing.

Here’s what this groundbreaking kit offers:

  • 20 hours of in-depth lessons — Explore the world of programmable logic control with the ‘Explore PLC’ course. The course has been created by educators and covers all the essential contents including the history of programmable logic controllers, Modbus RS-485 communications, and how PLCs integrate with industrial simulated systems. 
  • Arduino Opta WiFi — Built with industrial IoT capabilities, our versatile and easy-to-use micro PLC offers real-time control, monitoring, and predictive maintenance for a variety of applications. Based on the existing  Arduino Opta WiFi, it includes the STM32H747XI dual-core Arm® Cortex®-M7 +M4 MCU, making it exceptionally reliable and robust for your classroom.
  • Digital input and output simulators – The kit’s custom-designed hardware helps bring learning to life by allowing users to replicate real-world situations. The input simulator (DIN Simul8) includes 8 switches and power control, while the output simulator (DIN Celsius) features a resistor array and a temperature sensor.
  • Arduino PLC IDE — Our popular programming tool, Arduino PLC IDE, makes programming simple. Choose from any of the five programming languages defined by the IEC 61131-3 standard (Ladder, Functional Block Diagram, Structured Text, Sequential Function Chart, or Instruction List) to quickly code a range of PLC applications
  • Arduino IDE 2 — Another benefit of the kit is that it can be programmed using our powerful IDE 2. A step up from the classic Arduino IDE, the Arduino IDE 2 offers increased performance, an improved user interface and other new features, such as autocompletion and a built-in debugger.

And let’s not forget that all the kit’s hardware is fully compatible with the Arduino Cloud.

Get industry-ready with real-life simulations

Thanks to their exceptional flexibility, programmable logic controllers are being used more and more frequently in a wide range of industries. From production plants, assembly lines and packaging machines to heating control systems, traffic lights and elevators, PLC applications are vast and varied.

To help students prepare for the demands of these competitive industries and the challenges they face, we believe they need access to high-quality PLC simulation tools. After all, there’s a big difference between reading about programming in a textbook and actually doing it. As Benjamin Franklin once famously said, “Tell me and I forget, teach me and I may remember, involve me and I learn”. And that’s where the PLC Starter Kit comes into play.

Boasting industrial IoT capabilities, the kit’s Opta WiFi mini PLC — together with the input and output simulators – allows students to design and implement programs that simulate real-life industrial automation projects.

Take a manufacturing production line, for instance. To prevent overheating and a potential fire, the equipment’s PLC might be programmed to shut down when the input sensor detects a high temperature. With the PLC Starter Kit, students can simulate a similar scenario and gain practical knowledge about how inputs and outputs interface with a PLC.

It’s a great way to promote a deeper understanding of industrial automation and system behavior, while giving students the hands-on experience and critical thinking skills they’ll need to tackle real-world challenges in their professional careers.

Try the Arduino PLC Starter Kit today

With its powerful industrial IoT capabilities, easy programming software and wealth of online content, the PLC Starter Kit is the perfect introduction to automated programming for students and educators. 

Interested in using the PLC Starter Kit in your education setting? Order the PLC Starter Kit here or get in touch through your local distributor and discover how it can transform your learning environment.

The post Introducing the new Arduino PLC Starter Kit: Plug into the future of industrial automation appeared first on Arduino Blog.
This year we have so many talks, presentations, and announcements we had to spread out over three days! Arduino Days 2024 will be held from March 21st to 23rd – giving us more time to celebrate our community with our yearly event: 100% online, free, and open to all.

The full schedule is now available on the dedicated Arduino Days website: explore the program to find the topics that are the most inspiring or interesting to you, and turn on notifications for the three YouTube lives linked below. 

Day #1: March 21st from 3:30 PM CET — Let’s Get to Business

We start off with a day dedicated to innovative transformation for professionals. From Bob Martin (Wizard of Make / Senior Staff Engineer at Microchip) and Foundries.io CEO George Gray, to founder and CEO of Blues Ray Ozzie and Bosch general manager Marcellino Gemelli – you’ll hear from a variety of pros who are leveraging the open-source ecosystem to innovate their industry with flexible, reliable, out-of-the-box solutions.

Day #2: March 22nd from 3:30 PM CET Makers in the Making

On the second day, the spotlight turns to the educators who embrace Arduino as a platform to teach STEM and engage students of all ages and skill levels. Discover how teachers can use Arduino’s Science Kit R3 to reveal the beauty of physics in Alan Bates’ talk, or find out how Alvik supports MicroPython beginners with project-based learning in Austin Gardner’s. And don’t miss new product presentations: we’re excited to introduce you to the upcoming PLC Starter Kit!

Day #3: March 23rd from 3: 30 PM CET All About the Community

Last, but definitely not least, Saturday will be a huge celebration of makers’ diverse skills and passions! Join this third awesome session to hear about a variety of original projects presented by their own creators, and dive deep into topics ranging from accessibility (with inventor Danielle Boyer) to product quality testing. Don’t miss our partner talks – with STMicroelectronics, Analog Devices, and more – and keep an ear out for our latest major announcements, including one for the new product we’ve been working on with Silicon Labs.

We hope you’ll join us to celebrate Arduino Days live on YouTube, and let us know what your favorite sessions are in the chat comments. 

Don’t forget there will also be dozens of in-person independent events around the world: check out the Arduino Days website in a few days for the official map! 

No matter how you decide to show your love for open source, we look forward to seeing you at Arduino Days!

The post Arduino Days: Full schedule is online! appeared first on Arduino Blog.
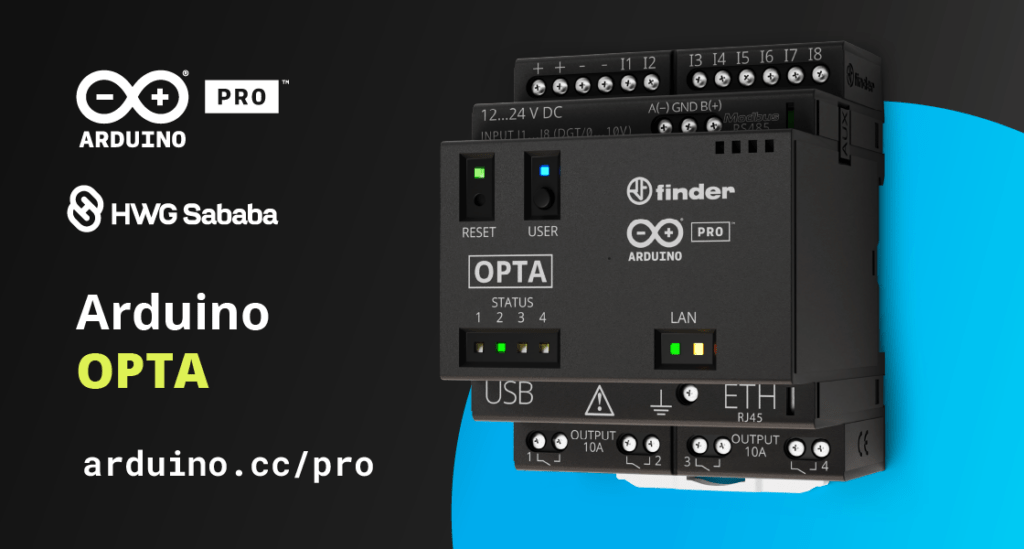
Connecting machines and equipment to the internet became easier than ever when we launched the Arduino Opta micro PLC, enabling real-time control, monitoring, predictive maintenance and more – in industries ranging from smart agriculture to large-scale manufacturing to building automation. 

Supporting our well-known Arduino sketch programming experience and any of the five IEC 61131-3 PLC standard languages, the Opta was designed to be powerful yet easy to use from the start – as well as highly secure. Indeed, the Opta supports OTA firmware updates and ensures data security from the hardware to the Cloud thanks to the physical onboard secure element and X.509 Standard compliance. 

In addition, as part of the go-to-market for this innovative hardware solution, we actively committed to verifying its security against the threats posed by cyberattacks. 

To this end, in late 2023 we started a collaboration with global cybersecurity provider HWG Sababa: their Offensive Team engaged in a penetration test that lasted weeks, assessing Opta’s security posture and pinpointing any weaknesses. Their meticulous report allowed us to remedy any vulnerabilities before they became actual issues, and now we are proud to say the Opta is more secure than ever.

The software patches and configuration updates we carried out are part of our ongoing commitment to providing you the most robust solutions on the market in every respect – including against ever-evolving cyber threats. The rigorous testing process and following activities our team completed only confirms Opta as an ideal candidate for any industrial automation project you have in mind. 

To find out more about the testing process itself, check out the case study published by HWG Sababa

The post Opta: Enhanced cybersecurity after HWG Sababa’s testing appeared first on Arduino Blog.
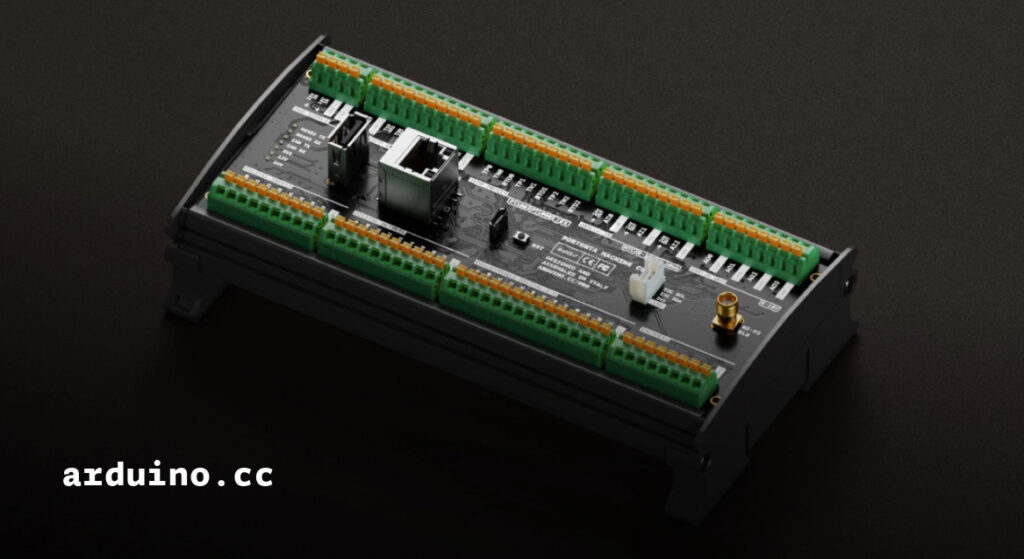
At Arduino, we’re committed to providing developers with tools that make the coding process smooth and efficient. That’s why we’re thrilled to announce the new Arduino_PortentaMachineControl library, an upgraded version designed to replace the deprecated Arduino_MachineControl library. It comes with a number of improvements, from a revamped structure to enhanced documentation, making it easier than ever to manage the features of the Arduino Portenta Machine Control.

Don’t know the Arduino Portenta Machine Control? It’s a versatile industrial control unit offering soft-PLC control, diverse I/O options, and flexible network connectivity. For more information about this product, visit the dedicated page.

What you’ll find in the new library

  • Enhanced library structure: We restructured the library to improve its organization, making it more intuitive. This ensures that you can quickly locate and utilize the functions you need for your projects. 
  • Easier-to-understand names: We standardized function and class names for better consistency and readability. This change ensures a clearer and more understandable codebase. 
  • Optimized efficiency: We eliminated unnecessary functions, decluttering the library and focusing on the essential features needed for effective machine control. 
  • Refreshed and clearer examples: You’ll find reworked examples to showcase the library’s capabilities, providing a better demonstration of the board’s features and of their usage.

User manual and migration tutorial

But that’s not all! Alongside the library, we’re excited to release the official user manual for the Arduino Portenta Machine Control: an essential and in-depth guide to all the board’s features, readily available to all users.

In addition – knowing that transitioning from the old Arduino_MachineControl library might pose some challenges – we’ve prepared a detailed migration tutorial to guide you seamlessly through the process. Make the switch confidently and take advantage of the improved functionality offered by the new library!

And if that’s not enough, we’ve also included additional technical documentation with the library, ensuring that you have all the information you need to benefit from its new and improved capabilities.

Ready to elevate your iIndustrial product?

Download the Arduino_PortentaMachineControl library through the Arduino IDE library manager or directly from the GitHub repository.

Don’t forget to explore the user manual and the migration tutorial to make the most of the new features.

We’re excited to see how this library empowers your projects and takes your Arduino development to new heights. Happy coding!

The post New Portenta Machine Control library boosts industrial project performance appeared first on Arduino Blog.
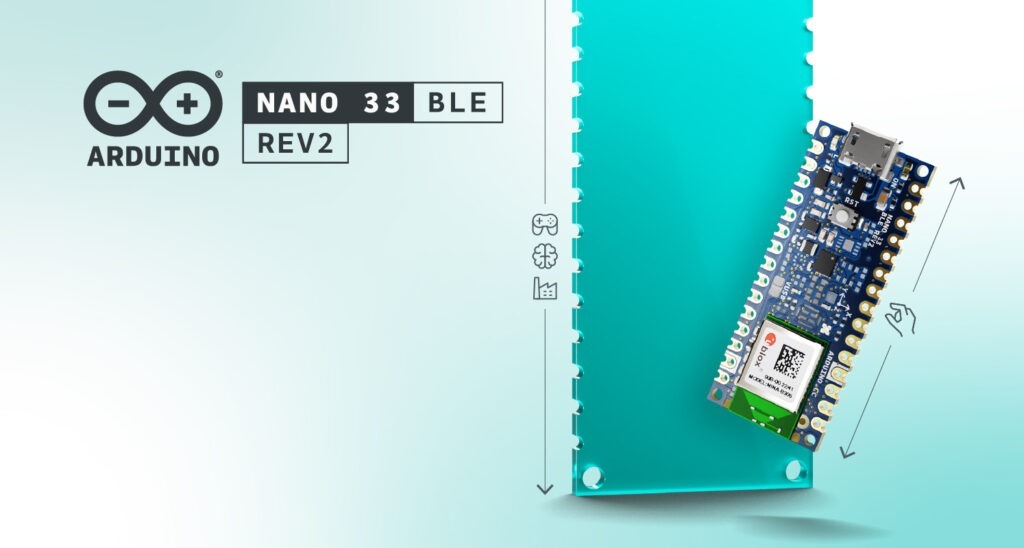
The Nano 33 BLE is one of our most popular boards, and for good reason. It’s small and 3.3-V-compatible; it comes with an embedded nine-axis IMU featuring accelerometer, gyroscope and magnetometer; it has a powerful processor; it offers a powerful Bluetooth® Low Energy module with an internal antenna that can be used to transmit data between different devices using the ArduinoBLE library; and it can be programmed with MicroPython. 

It’s basically everything you need for projects that span from wearable to advanced robotics. 

So, why work on making it better?

Because we listen to our community, that’s why. And based on your requests, we’ve come up with improvements to enhance your experience with a revised iteration of the Arduino Nano 33 BLE with a newly integrated IMU to expand experimentation possibilities, and a streamlined PCB design to grant easy access to essential features.

And here is exactly what you can find in the new Rev2, compared to its predecessor:

  • It has a combination of two IMUs (BMI270 six-axis IMU plus BMM150 three-axis IMU) instead of a single, nine-axis one.
  • While retaining the compact form factor, the new Nano 33 BLE Rev2 incorporates new pads and test points for USB, SWDIO, and SWCLK, making it easier to access these crucial points on the board.
  • We introduced a new VUSB soldering jumper on the top side, allowing you to conveniently enable the VUSB pin while using the castellated pins.
  • In addition, the Nano 33 BLE Rev2 transitions the power supply component to the MP2322 to guarantee increased performance. 

These updates collectively contribute to a more streamlined and robust device, ready for you to test and build just about any IoT project – and more. For example, the Nano 33 BLE Rev2 is still ideal to control RGB LEDs over Bluetooth®, using an app on your phone, and supports OpenMV’s fork of MicroPython

If you already know the Nano 33 BLE from its first revision, you can easily migrate your sketches to use them with the new and improved version: if you need help, just follow our dedicated tutorial.

After the launch of the Nano ESP32 earlier this year, it’s the perfect addition to the “tiny footprint, mighty features” family that has proven time and time again that we can ramp up features and performance while scaling down size. Don’t believe us? Check out the classic Arduino Nano or upgrade to the Nano 33 BLE Sense Rev2 if you want to include a complete set of sensors, too. 

For full tech specs, tutorials and inspiration on the Nano 33 BLE Rev2, head to the dedicated Arduino Docs page. Ready to get your own? The Nano 33 BLE with headers and without headers are now available on our Store.

The post Not bigger, just better: Introducing the Nano 33 BLE Rev2 appeared first on Arduino Blog.

We’ve just released Arduino IDE 2.3, and along with the usual list of bug-fixes and improvements, this new version marks the end of the experimental phase for the debug feature – which is now stable and fully incorporated into the IDE!

True to our belief in open standards and interoperability, the debug feature is now based on a standard framework documented in the new specifications and guidelines. As a result, maintainers of Arduino cores can now add debugging for any board and leverage the UI and debugging engine provided by the Arduino IDE. 

What’s more, thanks to this new open framework, we already enabled the debug feature for all the Arduino boards based on the Mbed™ core, which include GIGA R1 WiFi, Portenta H7, Opta, Nano BLE and Nano RP2040 Connect, while the Renesas-based boards (UNO R4, Portenta C33) will follow in the next hours.

We’ve worked on implementing debug in IDE 2 for a long time, in collaboration with the open-source community and, more recently, in close contact with Espressif to make sure that ESP32 devices would be fully supported. So keep an eye on the upcoming release of the Arduino-ESP32 core, which will support the new debug framework! 

Want to be able to debug your favorite board using IDE 2.3?

Get in touch with the platform developer or, even better, help them by submitting a pull request to implement the new specifications.

We look forward to receiving your feedback on the new debugging features in the Arduino forum or, if you’re a developer and want to report a bug, directly in the GitHub repository.

Still curious about those bug-fixes? Arduino IDE 2.3 fixes security issue CVE-2023-4863 (see details in this commit).

Enjoy the new Arduino IDE, and help us make our development environment better than ever! 

The post IDE 2.3 is out, and you’ll love the new debugging features in it appeared first on Arduino Blog.


  • Newsletter

    Sign up for the PlanetArduino Newsletter, which delivers the most popular articles via e-mail to your inbox every week. Just fill in the information below and submit.

  • Like Us on Facebook