Posts | Comments

Planet Arduino

Archive for the ‘Tech Hacks’ Category

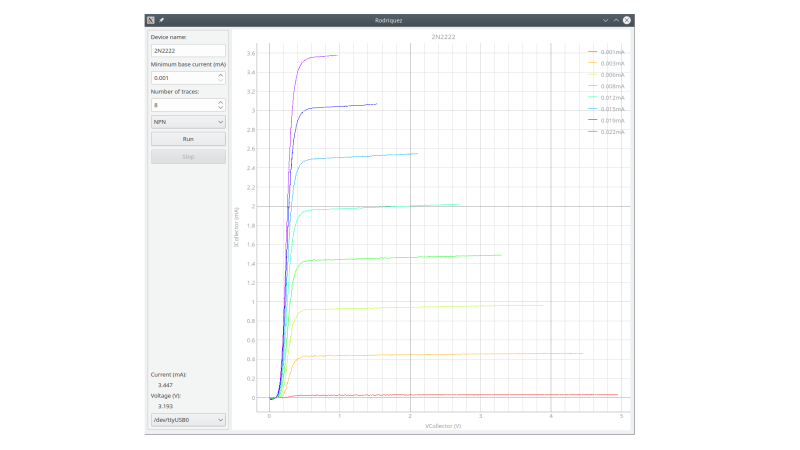
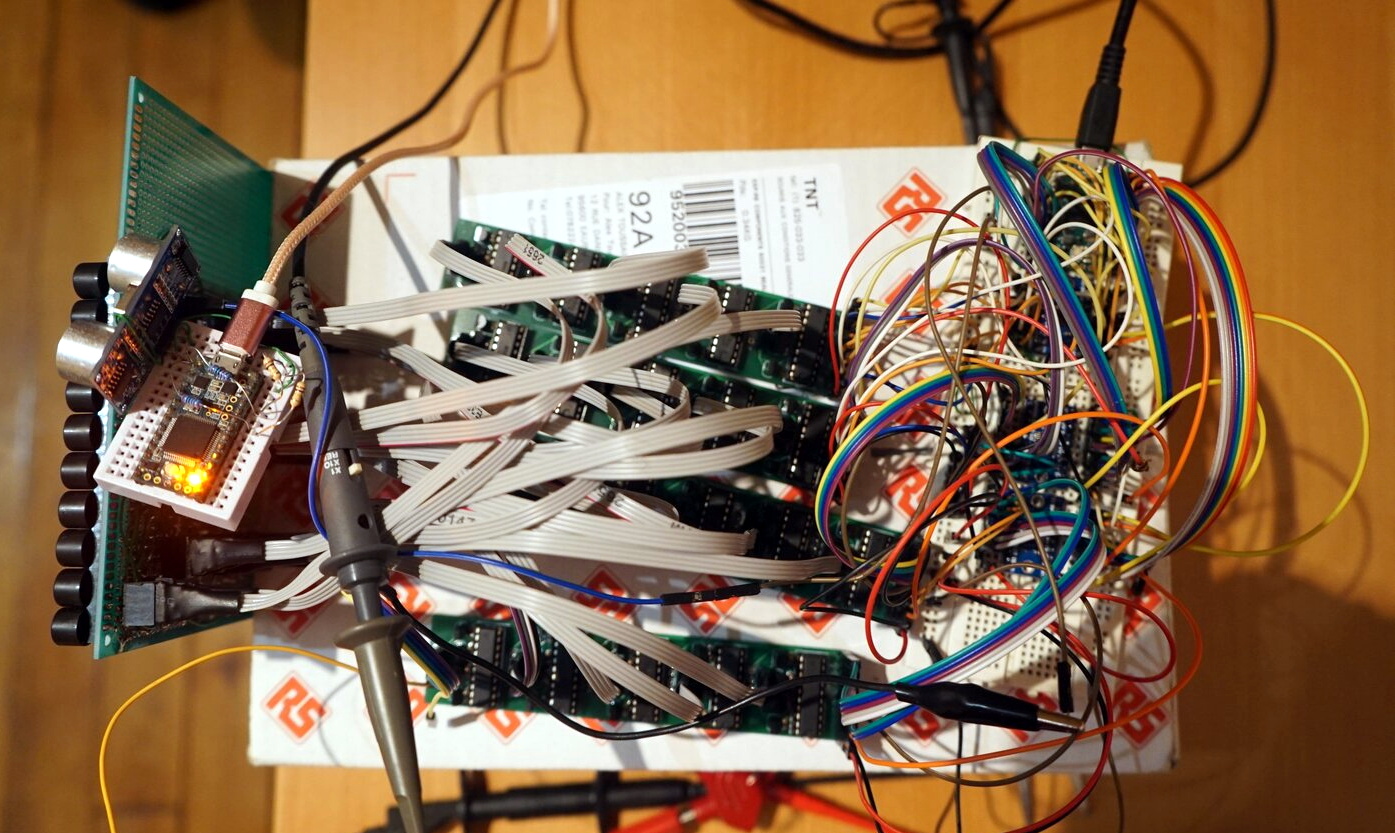
In response to an online discussion on the Electrical Engineering Stack Exchange, [Joseph Eoff] decided to prove his point by slapping together a bare-bones IV curve tracer using an Arduino Nano and a handful of passives. But he continued to tinker with the circuit, seeing just how much improvement was possible out of this simple setup. He squeezes a bit of extra resolution out of the PWM DAC circuit by using the Timer1 library to obtain 1024 instead of 256 steps. For reading voltages, he implements oversampling (and in some cases oversampling again) to eke out a few extra bits of resolution from the 10-bit ADC of the Nano. The whole thing is controlled by a Python / Qt script to generate the desired plots.

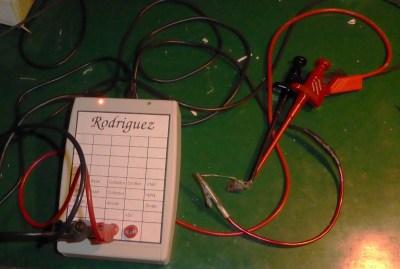
While it works and gives him the IV curves, this simplicity comes at a price. It’s slow — [Joseph] reports that it takes several minutes to trace out five different values of base current on a transistor. It was this lack of speed that inspired him to name the project after cartoon character Speedy Gonzales’s cousin,  Slowpoke Rodriguez, AKA “the slowest mouse in all of Mexico”. In addition to being painstakingly slow, the tracer is limited to 5 volts and currents under 5 milliamps.

[Joseph] documents the whole design and build process over on his blog, and has made the source code available on GitHub should you want to try this yourself. We covered another interesting IV curve tracer build on cardboard ten years ago, but that one is much bigger than the Rodriguez.

Who wouldn’t want an autonomous drone to deliver cans of fizzy drink fresh from the fridge? [Alex Toussaint] did, and in thinking how such a machine might work he embarked on a path that eventually led him to create a fully functional ultrasonic 3D scanner. In writing it up he’s produced a straightforward description of how the system works, which should also be of interest to anyone curious about phased array radar. He starts with an easy-to-understand explanation of the principle behind phased array beam forming, and there follows his journey into electronics as he uses this ambitious project to learn the art from scratch. That he succeeded is testament to his ability as well as his sheer tenacity.

He finally arrived at a grid of 100 ultrasonic emitters controlled from an Arduino through a series of shift register boards. Using this he can steer his ultrasonic beam horizontally as well as vertically, and receive echoes from objects in three-dimensional space. The ornamental bird example he uses for his scanning tests doesn’t quite emerge in startling clarity, but it is still clear that an object of its size and rough shape is visible enough for the drone in his original idea to detect it. If you would like to experiment with the same techniques and array then all the resources can be found in a GitHub repository, meanwhile we’re still impressed with the progress from relative electronics novice to this. We hope the ideas within it will be developed further.

We’ve seen ultrasonic arrays before, but mainly used in levitation experiments.

One of the biggest challenges for wireless sensor networks is that of power. Solar panels usually produce less power than you hoped, especially small ones, and designing super low power circuits is tricky. [Strange.rand] has dropped into the low-power rabbit hole, and is designing a low-cost wireless sensor node that runs on solar power and a supercapacitor.

The main components of the sensor node is an ATMega 328P microcontroller running at 4Mhz, RFM69 radio transceiver, I2C temperature/humidity sensor, 1F supercapacitor, and a small solar panel. The radio, MCU, and sensor all run on 1.5-3.6V, but the supercap and solar panel combination can go up to 5.5V. To regulate the power to lower voltage components a low-drop voltage regulator might seem like the simplest solution, but [strange.rand] found that the 3.3V regulator was consuming an additional 20uA or more when the voltage dropped below 3.3V. Instead, he opted to eliminate the LDO, and limit the charging voltage of the capacitor to 3.6V with a comparator-based overvoltage protection circuit. Using this configuration, the circuit was able to run for 42 hours on a single charge, transmitting data once per minute while above 2.7V, and once every three minutes below that.

Another challenge was undervoltage protection. [strange.rand] discovered that the ATmega consumes an undocumented 3-5 mA when it goes into brown-out below 1.8V. The small solar panel only produces 1 mA, so the MCU would prevent the supercapacitor from charging again. He solved this with another comparator circuit to cut power to the other components.

We see challenges like these a lot with environmental sensors and weather stations with smaller solar panels. For communication, low power consumption of a sub-Ghz radio is probably your best bet, but if you want to use WiFi, you can get the power usage down with a few tricks.

In the study of ballistics, you can do very little without knowing the velocity of a projectile. Whether you need to hit a target at over a mile, check if a paintball gun is safe for opposing players, or photograph high-velocity objects, you need a way to measure that velocity. [td0g] enjoys the challenge of photographing bullets impacts, and has created an open-source ballistic chronograph to help achieve this.

A rifle bullet punching through a wine glass, captured with the help of the chronograph

[td0g]’s design makes use of two light gates spaced some distance apart, and the time that an object takes to travel between the two is measured and used to calculate velocity. Most commercial ballistic chronographs also work in this way. [td0g] created the light gates using pairs of infrared photodiodes and LEDs. When there is a sudden dip in the amount of light received by the photodiode, the Arduino control circuit knows that an object has passed between the photodiode and LEDs and triggers the timer. An LCD shield on the Arduino is used to control the software and display velocity. As you probably guessed, clock accuracy is very important for such time measurements, and [td0g] demonstrates a simple technique using a smartphone metronome app to manually calibrate the clock to acceptable accuracy for his purposes.

This is the second such chronograph that [td0g] has built, and he changed the frame to be mostly 3D printed for easier construction, and upgraded the sensor boards to custom PCBs instead of the perfboard. If you want to build your own, all the design files are up on Github, and the light gate sensors should be for sale on Tindie soon. He has successfully used the rig to measure various projectiles ranging from 100m/s (paintball) to 875 m/s (rifle bullet). With a high power rifle, the chronograph needs to be at least 2 m from the muzzle to avoid damage or false readings from the muzzle blast, which also means the careful aim is required to put the bullet through the sensing area, without killing the chronograph in the process.

Getting the shutter to trigger at just the right moment is probably the biggest challenge of high speed photography. We’ve a number of different triggers, including for water balloon photography, and a laser for droplets.


  • Newsletter

    Sign up for the PlanetArduino Newsletter, which delivers the most popular articles via e-mail to your inbox every week. Just fill in the information below and submit.

  • Like Us on Facebook