Posts | Comments

Planet Arduino

Archive for the ‘connect four’ Category

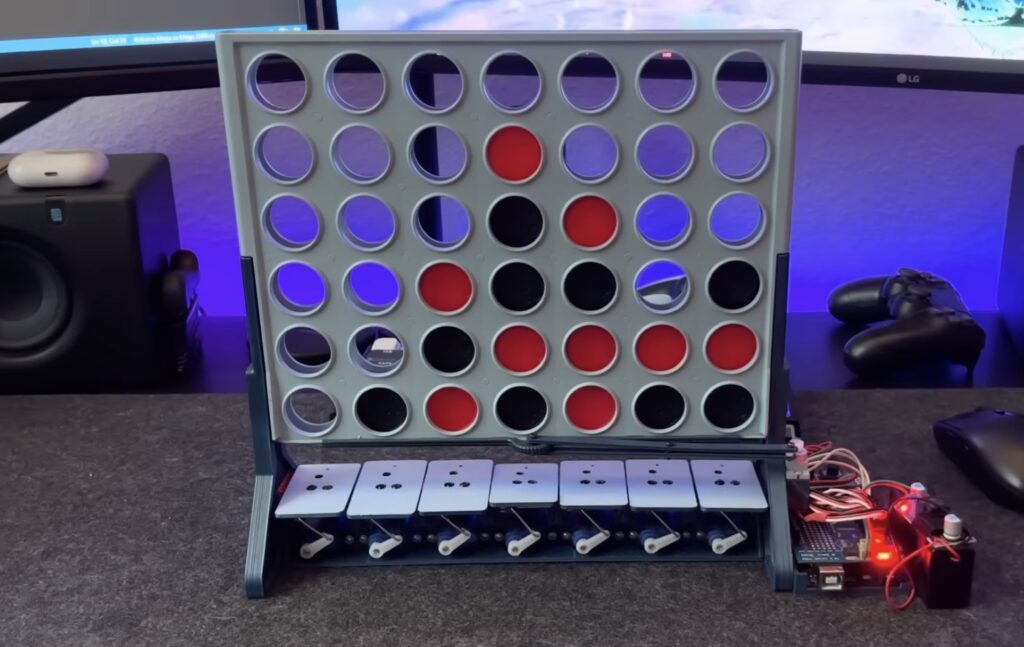
Good old-fashioned tabletop games are a lot of fun to play, but they’re a pain in the butt to set up. We all know the pain of divvying out Monopoly money and organizing tiny plastic houses. Connect Four players might spend as much time organizing pieces between games as they do actually playing. To facilitate Connect Four speed runs, Jared Dilley built this board that automatically sorts the pieces after a game.

A normal Connect Four board just dumps all the pieces out of the bottom after a game, forcing players to classify them by color. Dilley’s updated board does all of that automatically. At the push of a button, it will begin ejecting pieces from the bottom. Little motorized flaps cause the falling pieces to drop one way or the other. The machine repeats that process for all the rows and each player ends up with a pile of the appropriate pieces on their side of the board, ready for a new game.

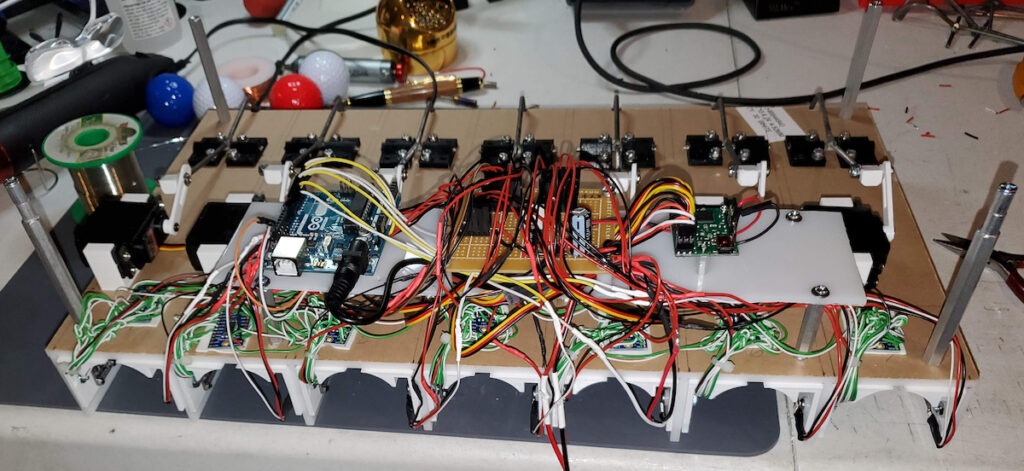
An Arduino Mega 2560 detects whether a piece is red or black using an infrared sensor. Dilley adjusted the sensor so that it registers an infrared reflection for red pieces, but not black pieces. Each column has its own sensor, so the Arduino can recognize the colors of the entire bottom row. It then sets the positions of the flaps accordingly using servo motors controlled through a servo shield. Finally, another servo quickly releases the bottom row and then moves back to block the following row. That process repeats until all the pieces have been sorted.

We can’t imagine that many people play enough Connect Four to make this worthwhile, but it is still a lot of fun to see in action and crosses into “oddly satisfying” territory.

The post Automating Connect Four setup and cleanup appeared first on Arduino Blog.

The childhood classic tabletop game of Connect Four entails dropping either a red or yellow disc into one of several columns in a grid with the hope of lining up four in a row. And even though the game has existed digitally for a while now, it is mostly played on LCD screens with fancier graphics and AIs against which the player competes. Wanting to push this paradigm further, Mirko Pavleski built a mini tabletop arcade cabinet that uses an Arduino Nano and an LED matrix instead to run the game.

In order to display the current grid to the player(s), Pavleski purchased an 8×8 WS2812B individually addressable LED matrix that gets powered by the Arduino Nano‘s 5V regulator. Because the game can either be played against another human or an AI opponent, the cabinet contains three buttons for selecting the chip’s drop location and a buzzer to deliver audible feedback when an event occurs. The entire device was constructed from a few 5mm PVC boards lined with colored paper for an old-fashioned aesthetic.

Watching the microcontroller AI opponent play Connect Four in real-time is quite impressive, owing to the relatively small computing resources of the Arduino Nano’s ATmega328 MCU. To see it in action, you can watch Pavleski’s video below or check out his project write-up on Hackster.io.

The post Electronic game of Connect Four played on an 8×8 LED matrix appeared first on Arduino Blog.

Have you dreamed of combining the two incredible activities mini-golf and Connect Four together into the same game? Well one daring maker set out to do just that. Bithead’s innovative design involves a mini-golf surface with seven holes at the end corresponding to the columns. The system can keep track of where each golf ball is with an array of 42 color sensors that are each connected to one of seven I2C multiplexers, all leading to a single Arduino Uno

The player can select from six distinct levels of AI, all the way from random shots in the dark to Q Learning, which records previous game-winning moves to improve how it plays over time. It can putt by first loading a golf ball into a chamber and then spinning up a pair of high-RPM motors that launch it. For the human player, there is a pair of dispensers on the left that give the correct color of ball. 

The entire system runs on an Intel NUC that hosts the game which was written in C#. There’s a large 22″ touchscreen at the front that is mounted at eye-level for easy interactions. Although it took Bithead nearly 18 months and $3,500, the end result is spectacular.

Be sure to check out his great write-up, which has a couple of demonstration videos and a build log. 

The post Playing Connect Four against a mini-golfing AI opponent appeared first on Arduino Blog.

Recreating classic games in software is a great way to get better at coding or learn to code in the first place. If you do it in hardware though, you’ll gain a lot more than coding skills. Just ask [Kelly] and [Jack] did, when they built this Arduino-based electronic Connect Four for a school project.

We love that their interpretation manages to simplify game play and make it more fun than the original version. All the players have to do is turn it on and start pushing the arcade buttons along the bottom to choose the column where they want to make a play. The LEDs animate from top to bottom to imitate the plastic disc dropping down through the board. If a win is detected — four in a row of the same color going any direction — the board fills up with the winning color and the game starts over.

The state machine doesn’t currently do anything about tie situations, so there’s a reset button hidden on the side. As [Kelly] and [Jack] explain in their walk-through video after the break, that is something they would like to address in the future, along with making it possible to choose whatever battle color you want. We think a reset animation that mimics the look of the discs spilling out the bottom would be cool, too.

If you’ve never implemented a game on hardware before, something like this might be a bit daunting. May we suggest a game of 4×4 Tic Tac Toe instead?


  • Newsletter

    Sign up for the PlanetArduino Newsletter, which delivers the most popular articles via e-mail to your inbox every week. Just fill in the information below and submit.

  • Like Us on Facebook