Posts | Comments

Planet Arduino

Archive for the ‘Painting Robot’ Category

Driven by a desire to print massive pieces of art on his new studio’s blank wall, Shane Wighton of the YouTube channel Stuff Made Here set out to create a large painting robot, which he calls “Janksy” after the famous artist and the jankiness of the construction.

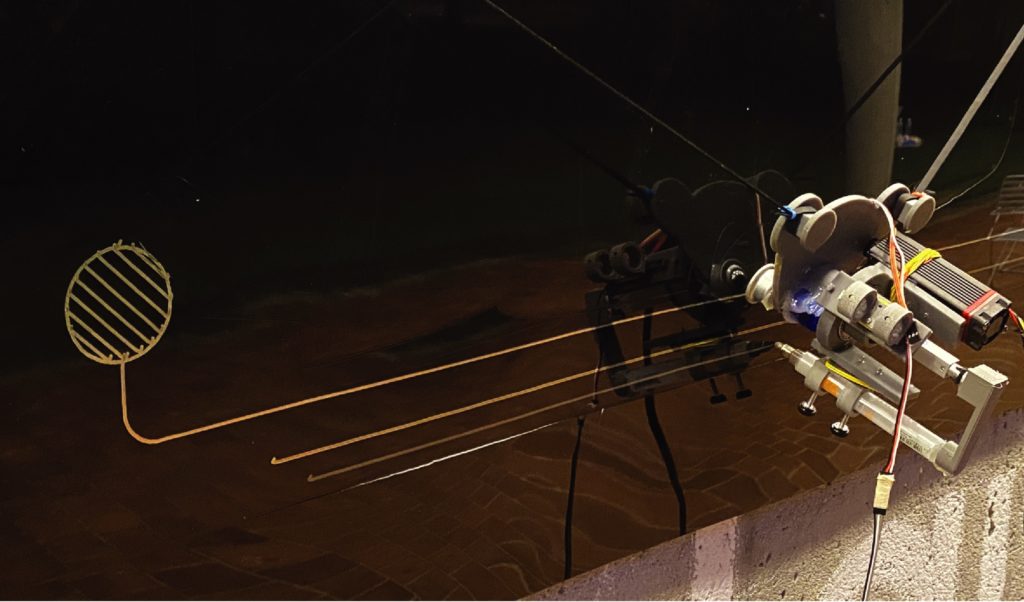
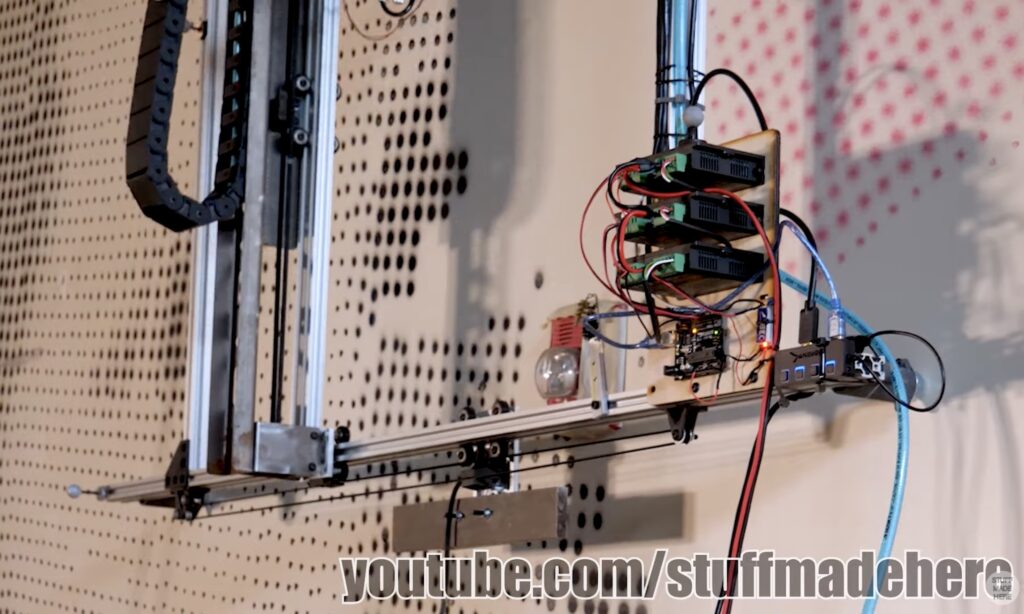
In principle, the device works by using a large gantry that spans the entire length of the wall to move horizontally whilst a series of cables and pulleys move it vertically. To avoid vibrations caused by moving such a large amount of weight so quickly, a second and far smaller/faster gantry houses a spray nozzle that deposits paint dots. All of this hardware is controlled by an Arduino Uno that translates positional commands into movements for the onboard stepper motors and servo.

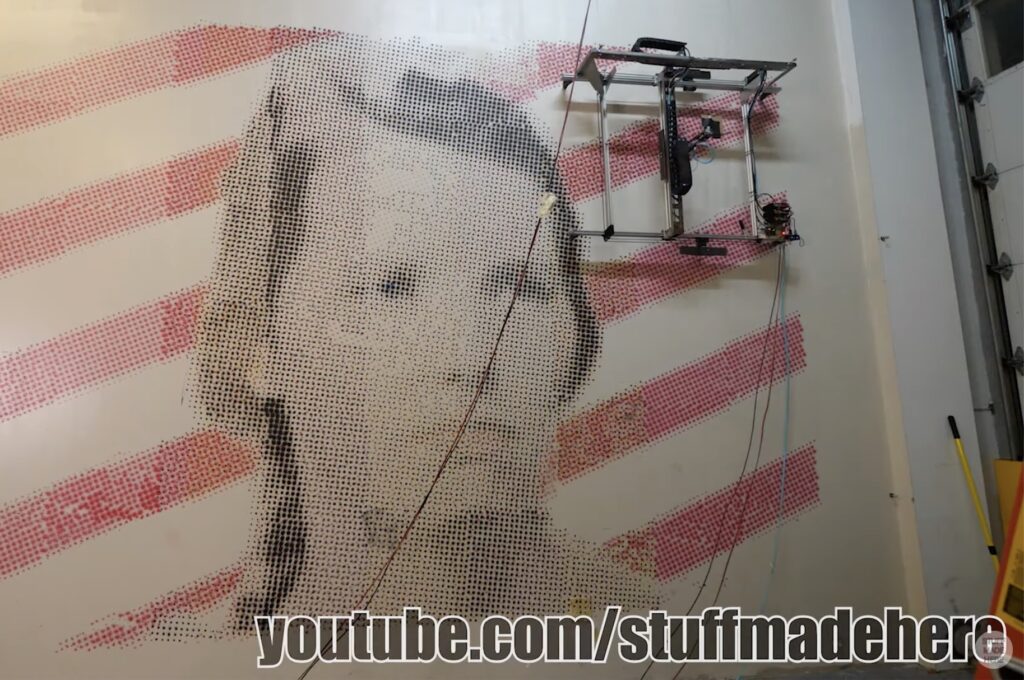
Generating the dot array is done by first taking the initial digital image and converting it into four layers that each correspond to cyan, yellow, magenta, and black, just like a traditional inkjet printer. From there, every dot is scaled based on the intensity of the color, with larger dots appearing brighter and smaller ones showing up as dimmer. 

After painting the wall over the course of several days, Wighton’s mural of his wife’s signature glare was complete. And even though it doesn’t look like much up close, taking a few steps back makes the entire thing come alive — imperfections and all. 

The post YouTuber Shane Wighton built a robot that paints murals appeared first on Arduino Blog.

When we think of circuits, we tend to picture wires or PCB traces. But a circuit is anything that conducts electricity between components. Today we have more options than ever before thanks to material like conductive ink and thread. Utilizing conductive ink on a large scale, Duco is an open source wall-climbing robot that brings interactivity to vertical everyday surfaces.

Duco’s inspiration came from Sandy Noble’s fantastic Polargraph, which was a hanging pen plotter robot that could draw large images. But those images didn’t serve any purpose beyond visual appeal. Duco takes the Polargraph idea into a whole new direction. By swapping between special pens, Duco can draw conductive, dielectric, cleaning, or decorative lines on walls. Those combine to create multilayer functional circuits.

An Arduino Uno board controls Duco through a motor shield. It has two stepper motors, a servo motor, a linear actuator, and a UV light. It is capable of switching between two different pens — normally the conductive and dielectric ink. The UV light cures the ink after Duco applies it to a wall. Most of Duco’s frame parts were 3D-printed.

In one demonstration, Duco drew a working piano circuit onto a wall. Once the components, including control boards and speakers, were added to the circuit, people could play the piano by touching the conductive pads. In another demonstration, Duco turned a wall into a large capacitive touch sensor grid similar to a massive track pad. Duco’s creators even experimented with a laser module add-on, which let the robot cut the circuit “substrate” material.

The post Duco is a wall-climbing robot that paints circuit murals appeared first on Arduino Blog.

Jackson Pollock was famous for his unique style of splattering large blobs of paint across a canvas, and it was this technique that JBV Creative was trying to imitate. But rather than working by hand trying to painstakingly dip a brush into paint and then flinging it many times over, he wanted to build a robot that could do this task for him while still creating works of art. 

The main part of the Flingbot, the name JBV gave to his system, is comprised of a catapult arm that is capable of both rotating and adjusting how far it can throw paint. A servo motor at the back pulls an elastic band a certain amount based on the desired distance, and a second one releases a pin to perform the launching action. As another parameter for generating abstract art, the silicone scoop itself can bend to change its shape. Every servo motor is connected to a single SSC-32U servo controller board that receives commands from an Arduino Uno.

Paint gets dispensed from one of the 12 total reservoirs that each has a gravity-feeder out its base with a servo motor that controls how much paint is deposited into the scoop. Once all of the paint has been collected for a launch, the Uno adjusts the angle and tension of the arm and finally releases the paint. 

To see how JBV Creative constructed this robot and a glimpse of the artwork it produced, check out his video below as well as his project write-up here.

The post Flingbot is a robot that flings paint at a canvas appeared first on Arduino Blog.

For a class project, University of Stuttgart students Ekin Sila Sahin, Lior Skoury, and Simon Treml came up with a unique painting robot named the Physical Twin.

The Physical Twin travels on a three-wheeled chassis and mounts a four-axis arm with a brush. An operator controls the arm to dip the brush into an onboard paint container, and can then manipulate it for application.

The controller consists of a joystick for movement as well as a mini version of the arm. Four potentiometers measure arm input angles, which are duplicated on four corresponding servos on the robot. A pair of Arduino Mega boards are used for the setup — one on the mobile robot and another in the remote unit.

You can see the device in action in the videos below, showing off direct operation and the ability to play back prerecorded movements.


  • Newsletter

    Sign up for the PlanetArduino Newsletter, which delivers the most popular articles via e-mail to your inbox every week. Just fill in the information below and submit.

  • Like Us on Facebook