Italians have a love of innovation and design and it shows at Maker Faire Rome. In this episode of Make:Cast, I look back at Maker Faire Rome in October 2019 during a pre-Covid time when live events could happen. I was guided through Maker Faire Rome by Alessandro Ranellucci, the curator of Maker Faire Rome, along with Massimo Banzi, co-founder of Arduino. Maker Faire Rome 2020 is happening as a virtual event this weekend.
You know you’ve done it. You’re walking through the store and you see those pillows covered in sequins that change color depending on which way you lay them. You swipe your fingers across the surface, for a letter, or maybe a simple drawing. Then comes the satisfying part, you swipe […]
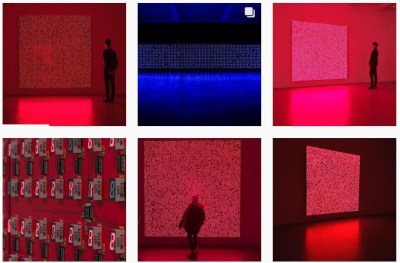
This seven segment art display makes use of a 81 seven segment red common cathode LED displays. The LEDs are arranged onto 100x100mm boards that each contain an Arduino Nano and 9 seven segment displays, daisy chained through three-pin headers located on the sides of the boards. The pins (power, ground, and serial) provide the signals necessary for propagating a program across each of the connected boards.
The first board – with two Arduino Nanos – sends instructions for which digits to light and drives the display, sending the instructions over to the next board on the chain.
In a multiplexed arrangement, a single Arduino Nano is able to drive up to 12 seven segment displays, but only 9 needed to be driven for the program, keeping D13’s built in LED and the serial pins free. Since no resistors are featured on the boards, current limiting is done through software. This was inspired by the Bubble LED displays on the Sinclair Scientific Calculator, and was done in order to achieve a greater brightness by controlling the current through the duty cycle.
The time between digits lighting up is 2ms, giving them some time to cool down. The animations in the demos featured falling and incrementing digits, as well as a random number generator using a linear feedback shift register.
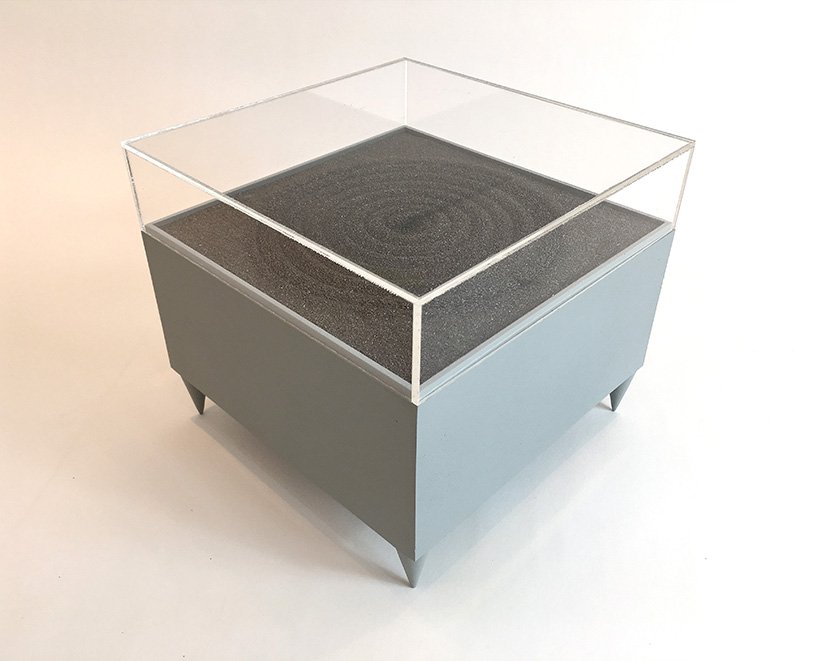
Artist Jo Fairfax has created automated drawing machines inspired by carefully manicured Japanese rock gardens, AKA zen gardens. The mesmerizing artwork uses magnets and motors that move underneath a bed of iron filings, generating soothing shapes as viewers come near via motion sensor.
An Arduino Uno is utilized for the device, or rather devices, and you can see a square “magnet garden” in the first video below, automatically producing a circular pattern. A (non-square) rectangular garden sketches a sort of snake/wave pattern in the second clip.
The build is reminiscent of sand drawing machines that rotate a metal marble through magnetic force, but does away with a visible source of movement as the filings react directly to the magnetic field as it’s applied.
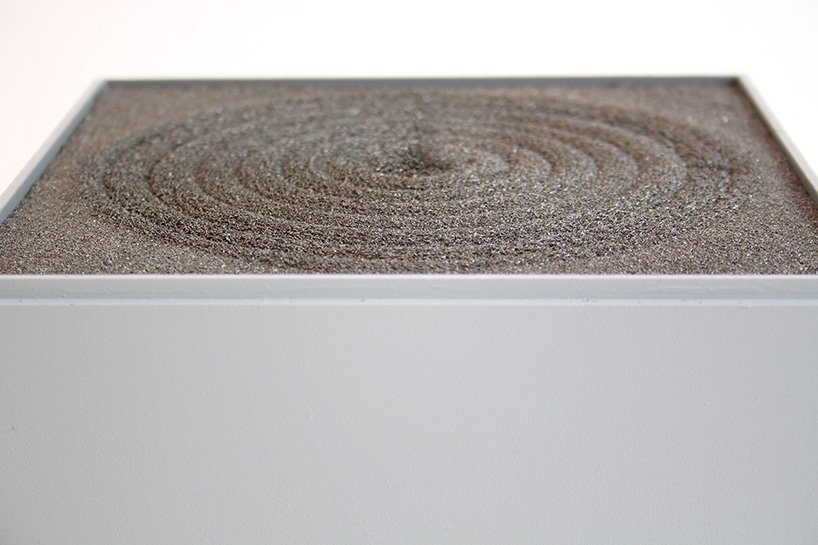
An Arduino Uno is programmed to set off a mechanism with integrated magnets below the platform of iron filings. each time a viewer approaches the machine, it starts to ‘draw’ and agitate the black particles, moving them around the platforms. Slowly the drawings become three dimensional and the sense of the magnets’ tracing becomes visible.
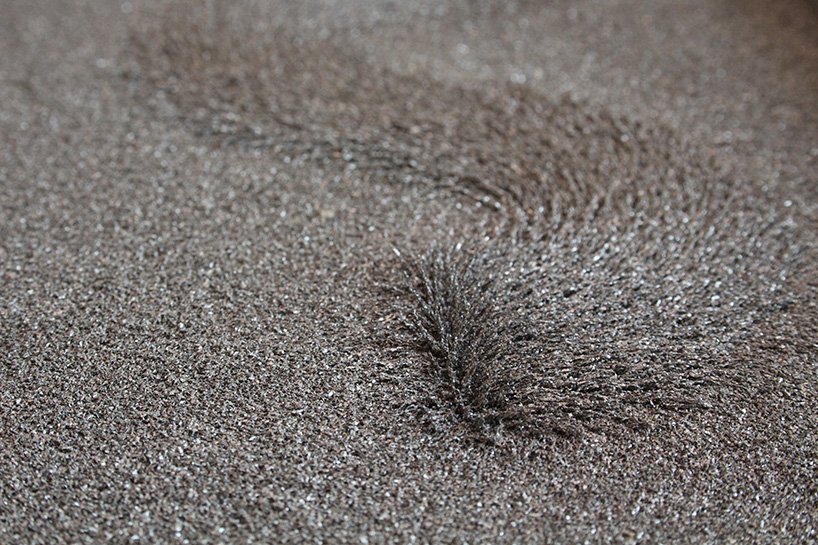
The charged iron filings create varying geometric clusters that shape the zen gardens. The drawing machines reveal the forces acting on them, imitating grass and sand that react to the natural force of the wind. the gesture of the viewer’s movement that activates the machine coupled with the magnetic power makes the artwork become a dialogue of forces… elegant and subtle, just like a zen garden.
Artist Jo Fairfax has created automated drawing machines inspired by carefully manicured Japanese rock gardens, AKA zen gardens. The mesmerizing artwork uses magnets and motors that move underneath a bed of iron filings, generating soothing shapes as viewers come near via motion sensor.
An Arduino Uno is utilized for the device, or rather devices, and you can see a square “magnet garden” in the first video below, automatically producing a circular pattern. A (non-square) rectangular garden sketches a sort of snake/wave pattern in the second clip.
The build is reminiscent of sand drawing machines that rotate a metal marble through magnetic force, but does away with a visible source of movement as the filings react directly to the magnetic field as it’s applied.
An Arduino Uno is programmed to set off a mechanism with integrated magnets below the platform of iron filings. each time a viewer approaches the machine, it starts to ‘draw’ and agitate the black particles, moving them around the platforms. Slowly the drawings become three dimensional and the sense of the magnets’ tracing becomes visible.
The charged iron filings create varying geometric clusters that shape the zen gardens. The drawing machines reveal the forces acting on them, imitating grass and sand that react to the natural force of the wind. the gesture of the viewer’s movement that activates the machine coupled with the magnetic power makes the artwork become a dialogue of forces… elegant and subtle, just like a zen garden.
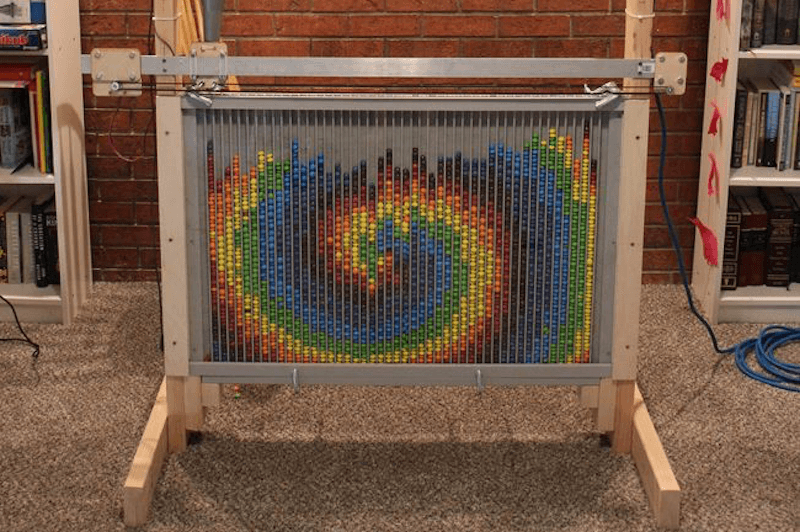
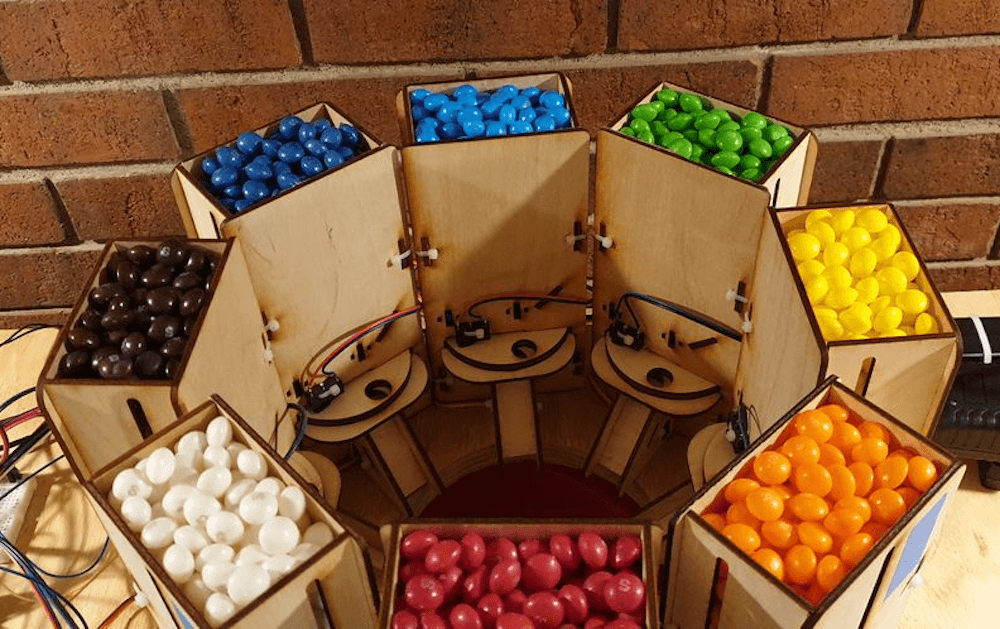
Skittles candies come in various vibrant colors. While they may be a tasty treat, JohnO3 had another idea: to create an amazing automated display for the little circles.
His device, dubbed the “Skittle Pixel8r,” uses an Arduino Mega to pull a dispensing funnel between one of 46 channels, covered on one side with a piece of glass.
On top of the shuttle mechanism, eight boxes release the correct flavor/color into an intermediate tube via individual metal gear servos. The Arduino then commands the linear axis to move the funnel to the appropriate bin. This process is repeated 2,760 times until an image, measuring up to 785 x 610mm (31 x 24 inches), is completed.
The Skittle Pixel8r an incredible build, and perhaps we could see it expanded even further to not just dispense, but also sort Skittles as an all-in-one auto art installation! Code and files for the project can be found here.
Microcontroller demo boards such as the Arduino UNO are ubiquitous on Hackaday as the brains of many a project which inevitably does something impressive or unusual. Sometime someone builds a particularly tiny demo board, or an impressively large one. In the case of the board featured here, the Arduino is a gorgeous labor of love which can’t really be called a board since there is no PCB. Instead of the traditional fiberglass, [Jiří Praus] formed brass bars into the circuitry and held it together with solder.
This kind of dedication to a project leaves an impression. His notes show he saw the barest way to operate an ATMega328, built it, tested, and moved on to the power supply to make it self-sustaining, then onto the communication circuit, and finally the lights. The video below shows a fully-functional Arduino happily running the blink program. He plans to encase the brass portion in resin to toughen it up and presumably keep every bump from causing a short circuit. The components are in the same position due to a custom jig which means a standard shield will fit right into place.
The great irony of the social media revolution is that it’s not very social at all. Users browse through people’s pictures in the middle of the night while laying in bed, and tap out their approval with all the emotion of clearing their spam folder. Many boast of hundreds or thousands of “friends”, but if push came to shove, they probably couldn’t remember when they had last seen even a fraction of those people in the real world. Assuming they’ve even met them before in the first place. It’s the dystopian future we were all warned about, albeit a lot more colorful than we expected.
Every social action requires that a specific and deliberate physical interaction be performed, which have largely been designed to mimic normal human contact. A pat on the shoulder signifies you want to follow the wearer, and adding them as a friend is as easy as giving a firm handshake. These interactions bring more weight to the decisions users make. For example, if somebody wants to remove you as a friend, they’ll need to muster up the courage to look you in the eye while they hit the button on your chest.
The jacket uses an Arduino to handle the low level functions, and a Raspberry Pi to not only provide the slick visuals of the touch screen display, but record video from the front and rear integrated cameras. That way you’ve even got video of the person who liked or disliked you. As you might expect, there’s a considerable energy requirement for this much hardware, but with a 5200 mAh LiPo battery in the pocket [Tuang] says she’s able to get a run time of 3 to 4 hours.
Considering how much gadgetry is packed into it, the whole thing looks remarkably wearable. We wouldn’t say it’s a practical piece of outerwear when fully decked out, but most of the electronic components can be removed if you feel like going low-key. [Tuang] also points out that for a garment to be functional it really needs to be washable as well, so being able to easily strip off the sensitive components was always an important part of the design in her mind.
Sometimes you have an idea, and despite it not being the “right” time of year you put a creepy skull whose eyes tell the time and whose jaw clacks on the hour into a nice wooden box for your wife as a Christmas present. At least, if you’re reddit user [flyingalbatross1], you do!
The eyes are rotated using 360 degree servos, which makes rotating the eyes based on the time pretty easy. The servos are connected to rods that are epoxied to the spheres used as eyes. Some water slide iris decals are put on the eyes offset from center in order to point in the direction of the minutes/hours. An arduino with a real time clock module keeps track of the time and powers the servos.
The jaw opens and closes on the hours – springs are screwed to the inside of the jaw to the outside of the skull behind the bones that surround the eyes; they’re hidden when the skull is in its box. A third servo is used as a winch to pull the jaw open from the inside of the bottom of the chin. When it releases, the springs close the mouth and the clack of the teeth replaces an hourly chime.
A bit late (or early) for Halloween, but it’s a really fun project. [Flyingalbatross1] has made the arduino code available, as well as showing plenty of images of how the parts are put together. Take a look at this this atomic clock-in-a-skull, or you make your own talking skull for Halloween!
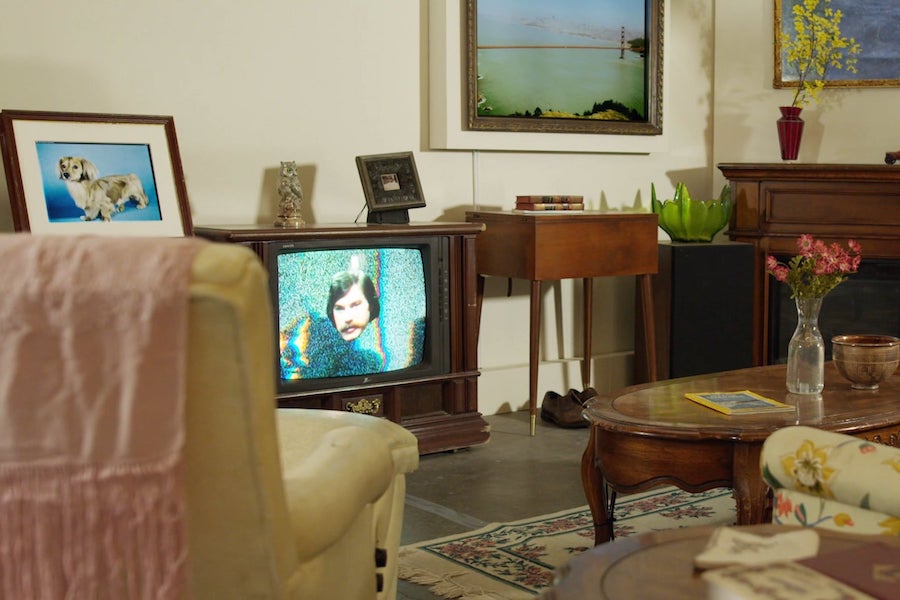
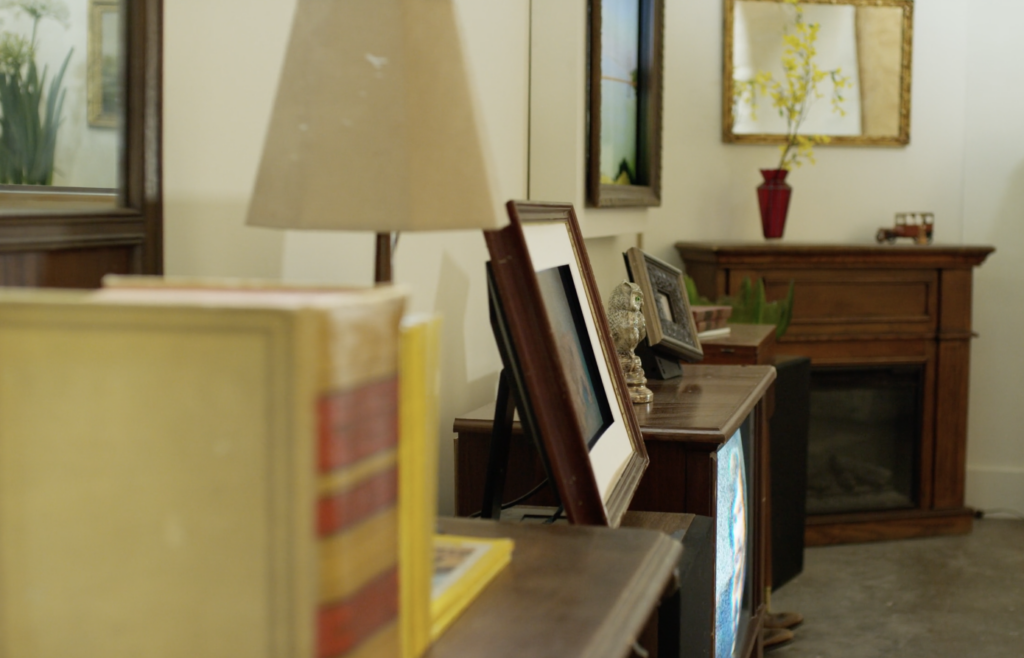
What can you do with items that are destined for the dump? As seen here, if you’re Neil Mendoza, you transform old furniture, TVs, computers, art, and even an Arduino Zero that somehow ended up in the trash into a musical installation.
His resulting “House Party” features decorations and control components that according to the project’s write-up are entirely salvaged. A MIDI interface, software written in openFrameworks, and a JSON file are used to coordinate sound and movements, which include spinning picture frames and flowers, tapping shoes, and a television that loops through a rather dreary weather report snippet.
House Party is a musical installation that explores prized possessions in their native habitat. All the materials used to create this artwork, from the furniture to the computers, were scavenged from the discarded trash. The music is a mix of mechanical and synthesized sounds. The piece was created while an artist in residence at Recology SF.
The actuators in the installation are controlled by an Arduino Zero (also found in the trash) and each screen is connected to a computer running custom software written in openFrameworks (OF). Composition was done in Logic where a MIDI environment was set up to send MIDI data to the Arduino and an OF control program. The control program then sent the data to the other computers over ethernet as OSC. For the final installation, the control program read the data from a JSON file, triggered the screens and Arduino and played the synthesized parts of the music.
Be sure to see all the zany action in the video below!
Planet Arduino is, or at the moment is wishing to become, an aggregation of public weblogs from around the world written by people who develop, play, think on Arduino platform and his son. The opinions expressed in those weblogs and hence this aggregation are those of the original authors. Entries on this page are owned by their authors. We do not edit, endorse or vouch for the contents of individual posts. For more information about Arduino please visit www.arduino.cc
You are currently browsing the archives for the Art category.

 Italians have a love of innovation and design and it shows at Maker Faire Rome. In this episode of Make:Cast, I look back at Maker Faire Rome in October 2019 during a pre-Covid time when live events could happen. I was guided through Maker Faire Rome by Alessandro Ranellucci, the curator of Maker Faire Rome, along with Massimo Banzi, co-founder of Arduino. Maker Faire Rome 2020 is happening as a virtual event this weekend.