Posts | Comments

Planet Arduino

Archive for the ‘Java’ Category

Phyton and Javascript integration

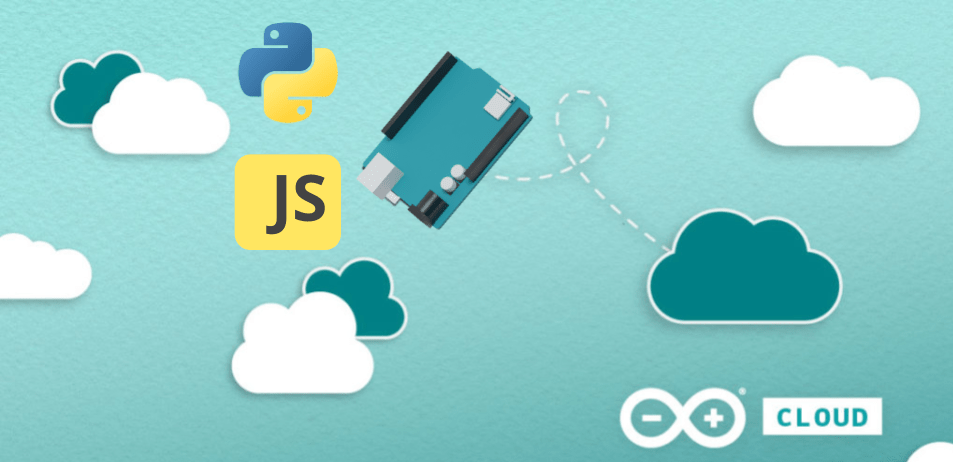
The Internet of Things (IoT) has become a ubiquitous term, encompassing a vast array of applications ranging from small-scale embedded systems to complex networked devices. Traditionally, IoT development has been synonymous with programming in languages like C and C++. However, the landscape is rapidly evolving, with modern languages like Python and JavaScript gaining traction in the IoT space for devices running Linux or other OS, and also with MicroPython for lower resources devices.

In an exciting development, we are thrilled to announce the creation of a workflow on the platform that enables users to seamlessly connect their devices based on these languages with the Arduino Cloud, empowering users to harness their full potential in creating IoT solutions.

The new Manual setup workflow

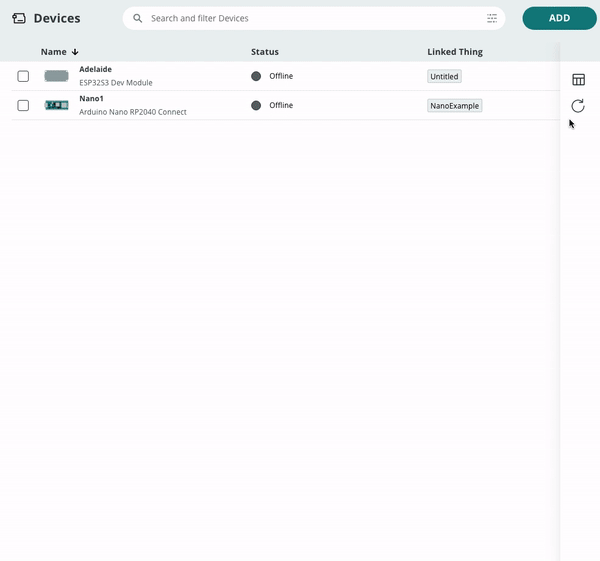
Traditionally, Arduino Cloud allowed the creation of devices based on Arduino or ESP32/ESP8266 hardware, with automatic sketch creation in C/C++ using the Arduino IoT Cloud library. This workflow featured automatic board provisioning and configuration within the platform. However, we have expanded the device creation process to introduce a new workflow, accommodating applications programmed in Python, MicroPython, or JavaScript, and so offering the ability to create a new breed of applications and devices that can be connected to the Arduino Cloud.

This new workflow, known as “Manual Setup for Any Device” provides users with credentials that can be utilized within their Python, MicroPython, or JavaScript applications. This enables users to keep developing and programming their devices using their preferred environment. Integration with the Arduino Cloud can be achieved using libraries developed in any of the supported languages. Comprehensive documentation, along with a wide array of examples, supports users throughout the implementation process.

Example on how to connect Python, MicroPython or JavaScript to Arduino Cloud

By offering this flexible workflow, Arduino Cloud acknowledges the diverse requirements and preferences of developers. Whether you prefer the convenience of automatic provisioning or the flexibility of manual configuration, the choice is now in your hands.

What can you actually do?

Python – The choice for AI

Python is a versatile and widely-used programming language that offers significant benefits for IoT device development. Its simplicity, readability, and extensive library ecosystem make it an ideal choice for both beginners and experienced developers. Python’s vast library ecosystem provides access to a wide range of pre-built modules and functions, allowing developers to leverage existing code and accelerate development. Additionally, Python’s active and supportive community offers a wealth of knowledge and resources, making it easier to troubleshoot issues, seek advice, and learn from others’ experiences.

Python is not only a versatile language for IoT device development but also the de facto standard language and environment for AI programming. Its extensive library ecosystem, including popular libraries such as TensorFlow, PyTorch, and scikit-learn, makes Python the language of choice for implementing machine learning and deep learning algorithms. The availability of these libraries, along with Python’s intuitive syntax and flexibility, enables developers to build and deploy sophisticated AI models and integrate them seamlessly into IoT applications. Python’s dominance in the AI landscape further adds to its value for IoT device development, as it allows developers to leverage AI capabilities and unlock advanced functionalities in their IoT solutions.

Learn more about how to connect your Python applications to the IoT Cloud.

Micropython – The power of Python on tiny processors

MicroPython is a popular platform for IoT development due to its simplicity, efficiency, and versatility. It supports various microcontroller platforms, including Arduino, ESP32, and Raspberry Pi Pico, offering cross-platform compatibility. With its familiar Python syntax, MicroPython is easy to learn and use, making rapid prototyping and development accessible. It optimizes memory usage and runtime performance, even on resource-constrained devices. MicroPython benefits from an extensive library ecosystem, enabling quick integration of functionalities and interoperability with other IoT platforms. Its active community provides abundant resources, support, and a vibrant ecosystem for IoT innovation. Overall, MicroPython is a powerful tool for building efficient and feature-rich IoT devices.

If you want to learn more about how to connect to the IoT Cloud using MicroPython, check this getting started article and the full tutorial

Javascript – Event driven applications across multiple platforms

JavaScript has found its place in IoT device development across various platforms. Node.js, a server-side runtime environment, offers JavaScript’s event-driven and non-blocking nature for efficient handling of IoT tasks. Espruino, a JavaScript platform for microcontrollers, enables direct coding on resource-constrained devices. Johnny-Five, a JavaScript robotics and IoT framework, allows control and interaction with hardware platforms using JavaScript. JavaScript’s versatility, reuse of web development skills, and extensive libraries make it an accessible choice for IoT development. Its event-driven nature aligns well with IoT requirements, and the availability of frameworks and community support fosters rapid development and integration with web-based services.

Check this article to learn more about how to connect your Javascript applications to the IoT Cloud.

But what is Arduino Cloud?

Arduino Cloud is a platform that simplifies the process of developing, deploying, and managing IoT devices. It supports various hardware, including Arduino boards, ESP32, and ESP8266 based boards, and makes it easy for makers, IoT enthusiasts, and professionals to build connected projects without coding expertise. What makes Arduino Cloud stand out is its intuitive interface that abstracts complex tasks, making it accessible to all users. With its low-code approach, based on auto generated code,  and the extensive collection of examples and templates, Arduino Cloud offers a simple way for users to get started and enables them to put the focus on their application code. 

The platform’s IoT Cloud tool allows for easy management and monitoring of connected devices through customizable dashboards, which provide real-time visualisations of the device’s data. Furthermore, the IoT Cloud can be accessed remotely through the mobile app Arduino IoT Cloud Remote, which is available for both Android and iOS devices, allowing users to manage their devices from anywhere.

Ready to start?

Visit the Arduino Cloud website to access official documentation and resources for the Arduino IoT Cloud, where you will find extensive documentation to get started with the new Manual device setup workflow. Create an account and start building your own projects today!

As the IoT landscape continues to evolve, Arduino Cloud remains at the forefront, embracing the flexibility and power of Python and JavaScript. We invite you to explore this new feature, unlock your creativity, and share your innovative projects with the Arduino community. Publish your projects on the Arduino Project Hub (PH), where like-minded enthusiasts can discover, learn, and collaborate on IoT solutions that push. 

Additionally, engaging in community discussions and project sharing is encouraged in the forum, providing a platform for exchanging ideas, seeking advice, and fostering collaboration among fellow IoT enthusiasts. Together, let’s shape the future of IoT and create a vibrant ecosystem of innovation and knowledge-sharing.

The post Arduino Cloud Embraces Python and JavaScript for new IoT projects appeared first on Arduino Blog.

When [Im-pro] wants a display, he wants it to spin.  So he built a persistence of vision (POV) display capable of showing a 12-bit color image of 131 x 131 pixels at 16 frames per second. You can see a video about the project below, but don’t worry, you can view it on your normal monitor.

The project starts with a Java-based screen capture on a PC. Data goes to the display wirelessly to an ESP8266. However, the actual display drive is done by an FPGA that drives the motor, reads a hall effect index sensor, and lights the LEDs.

Perhaps the most interesting part of the project is the FPGA-based mapping of the rectangular coordinates of the incoming video to the polar coordinates required by the display. There are 4 arms of LEDs or “wings” and a 3D printed structure that is all included in the post.

The FPGA is a Cmod S6 which is a breakout board for a Xilinx Spartan 6 with more than enough horsepower to handle the workload. There are also custom PCBs involved, so when you think about it, it is a fairly wide-ranging project. Java software, ESP8266 software, FPGA configurations, a 3D-printed design, and PCB layouts. If you want something simple to tackle that has a bit of everything in it, this might be your next project.

Most of the POV displays we see don’t have this kind of color-depth and resolution. We’ve seen displays built around fans. Our favorite, though, is the dog speedometer.

[mfaust] wakes up in the morning like a regular person, goes to work like a regular person, types in tedious commands for his software versioning utilities like a regular person, and then, as a reward, gets his coffee, just like rest of us. However, what if there was a way to shorten the steps, bringing us all closer to the wonderful coffee step, without all those inconvenient delays? Well, global industry is trying its best to blot out the sun, so mornings are covered there. [Elon Musk’s] thinktank proposed the hyperloop, which should help with the second step. [mfaust] built a control station for his versioning software. Raise your cup of joe high for this man’s innovative spirit.

He first laid out all the buttons, LED lights, and knobs he’d like on a panel to automate away his daily tasks. Using photoshop he ended up with a nice template. He laminated it to the top of a regular project box and did his best to drill holes in the right places without a workshop at his command. It’s pretty good looking!

Since this is the sort of thing an Arduino is best at he, in a mere two tries, wired everything up in such a way that it would all cram into the box. With everything blinking satisfactorily and all the buttons showing up on the serial out, he was ready for the final step.

Being a proficient and prolific enough developer to need a control panel in the first place, like a sort of software DJ, he wrote a nice interface for it all. The Arduino sits and waits for serial input while occasionally spitting out a packet of data describing its switch status. A Java daemon runs in the background of his computer. When the right bits are witnessed, a very nicely executed on screen display reports on the progress of his various scripts.

Now he can arrive at the hyperloop terminal during the appropriate work time slot in Earth’s perpetual night. After which he simply walks up to his computer, flips a few switches, glances quickly at the display for verification, and goes to drink some nice, hydroponically grown, coffee. Just like the rest of us.


Filed under: Arduino Hacks

Matthias Faust has created an Arduino controller for speeding up software development.

The “Maven Box” is based on an Uno and communicates with a Java program running on a desktop. The device is equipped with customizable buttons, switches and a dial, which act as physical inputs for expediting his daily routine. This enables Faust to select a branch from several GitHub projects, stash changes before pulling, pull the changes, trigger a maven build, as well as display the status of six tests on a set of notification LEDs.

Every job has it’s routine. I am a software developer who works with a Git/Maven based workspace everyday. So when I start working, my daily routine is to update and build my local workspace, pulling changes from GitHub, execute a maven build and execute the updated software. Usually I get my first coffee after that, but because I love coffee so much I thought there must be a faster way to get my system updated and running.

Whether a software developer yourself or simply a fan of awesome Arduino builds, check out the Maven Box’s Instructables page to see more!

Jul
19

Talk To The (Robotic) Hand

arduino, arduino hacks, Java, Robotics, robots hacks, voice command Comments Off on Talk To The (Robotic) Hand 

Robotic hacker [Andrea Trufini] apparently likes choices. Not only does his robotic arm have six degrees of freedom, but it has a variety of ways he can control it. The arm’s software can accept commands through a programming language, via potentiometers, an infrared remote, or–the really interesting part–through spoken commands.

The videos don’t show too much of the build detail, but the arm is mainly constructed of laser cut plywood and uses an Arduino. Hopefully, we’ll see more particulars about the build soon but for now have a look at a similar project.

The software (myrobotlab) is on github and looks very impressive. The Java-based framework has a service-oriented architecture, with modules that support common processors (like the Arduino, Raspberry Pi, and Beagle Board) along with I/O devices (like motors, sound devices, and that Leap Motion controller you just had to buy). As you might expect from the demonstration found below, there are speech to text and text to speech services, too. Like a lot of open source projects, some of these services are more ready for prime time than others but that just means you can contribute your hacks back to the project.

You could build some pretty powerful robots with a framework like this. How powerful? One of the services knows how to play chess.


Filed under: Arduino Hacks, robots hacks
Oct
25

Introduction

After helping many people get started with the world of Arduino and electronics,  we still find a small percentage of people who are turned off by the concept of programming or have trouble breaking larger tasks into smaller ones with regards to writing algorithms for their code/sketch.

So after being introduced to a new graphical programming tool called “Ardublock“, we were excited about the possibilities wanted to share it with our readers. Ardublock provides a truly graphical and non-coding solution to controlling an Arduino, that is an open-source product and thus free to download and try for yourself.

Installation

Ardublock is a Java application that runs from inside the Arduino IDE, which can be downloaded from here. It’s only one file, that needs to be placed in a new folder in the Arduino IDE. The folder names must be the same as shown below:

ardublock installation folder

Once you’ve copied the file, simply open the Arduino IDE and select Ardublock from the Tools menu:

arduino ide tools menu ardublockFrom which point a new window appears – the Ardublock “development environment”:

ardublock development environment

 Using Ardublock

It’s quite simple – you simply select the required function from the menu on the left and drag it into the large area on the right. For a quick example where we blink the onboard LED on and off – watch the following video:


The following image is the screen capture of the program from the video:

ardublock LED Blink

As you can see the “blocks” just fit together, and parameters can be changed with the right mouse button. After a few moments experimenting with the Ardublock software you will have the hang of it in no time at all.

And thus you can demonstrate it to other people and show them how easy it is. And there is much more than just digital output controls, all the functions you’re used to including I2C, variables, constants, servos, tone and more are available.

The only technical thing you need to demonstrate is that the Arduino IDE needs to stay open in the background – as once you have finished creating your program, Ardublock creates the required real Arduino sketch back in the IDE and uploads it to the board.

This is also a neat function – the user can then compare their Ardublock program against the actual sketch, and hopefully after a short duration the user will have the confidence to move on with normal coding.

Conclusion

Ardublock provides a very simple method of controlling an Arduino, and makes a great starting point for teaching the coding-averse, very young people or the cognitively-challenged. It’s open source, integrates well with the official IDE and works as described – so give it a go.

And if you enjoyed this review, or want to introduce someone else to the interesting world of Arduino – check out my book (now in a third printing!) “Arduino Workshop” from No Starch Press.

tronixstuff

In the meanwhile have fun and keep checking into tronixstuff.com. Why not follow things on twitterGoogle+, subscribe  for email updates or RSS using the links on the right-hand column? And join our friendly Google Group – dedicated to the projects and related items on this website. Sign up – it’s free, helpful to each other –  and we can all learn something.

The post Review – “Ardublock” graphical programming for Arduino appeared first on tronixstuff.

Dec
14

When we say “there are no limit for  Arduino”, here we have a project,  sent by [ladvine] in wich Arduino meets biomedic tech. The WiFi shield is the real application when they speak about Arduino. There is a long paper about it on this [website] that I suggest to visit to understand more this important project.

iPacemaker is an reprogrammable implant pacemaker with wireless connectivity.
A user friendly embedded web interface helps in changing every parameters of the implantable pacemaker. The important feature is the WiFi alliance complaint hardware which supports every wireless device to establish connection with the IMD. GSM connectivity can be used in absence of WiFi in remote areas helping in Telemetry.
Wireless protection in case of WiFi is enabled through WPA2 security with AES Encryption and Java Web interface which has inherent security capabilities. Shielding the GSM and WiFi antennas helps reduce unwanted patient radiations.


  • Newsletter

    Sign up for the PlanetArduino Newsletter, which delivers the most popular articles via e-mail to your inbox every week. Just fill in the information below and submit.

  • Like Us on Facebook