While democratizing professional solutions may seem like an oxymoron, that’s exactly what Arduino Pro is out to achieve. Our business-oriented unit stands at industrial clients’ side with a growing ecosystem of high-performance, reliable, secure products that aim to provide the right solution for every need big and small companies may have, in any field and at any stage of their growth.
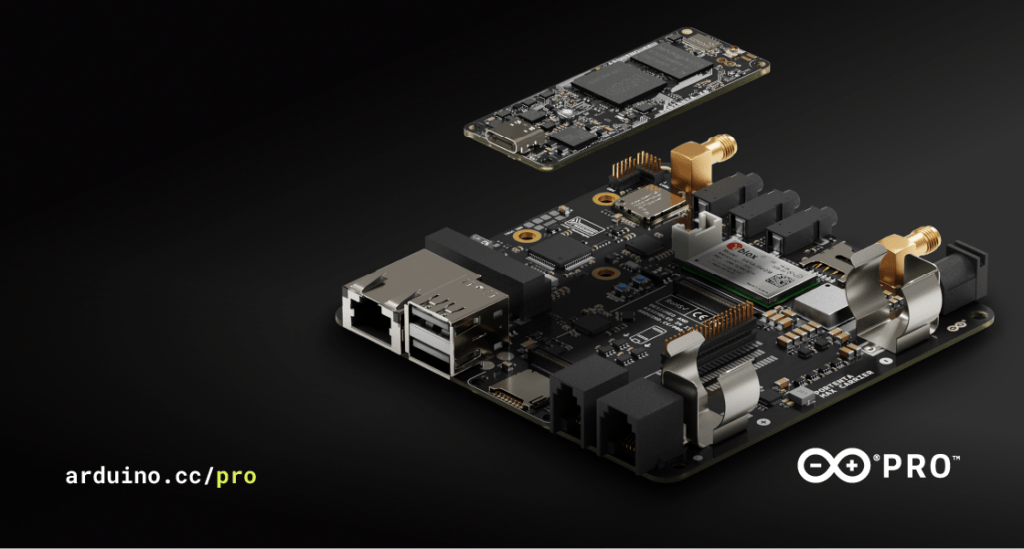
Case in point: the Portenta C33. The module – which we are introducing at Embedded World 2023 – leverages the R&D carried out for previous Portenta modules, optimizing every aspect and streamlining features to offer a cost-effective option to users starting out with Industrial IoT or automation, or those who have more specific, targeted needs than H7 or X8 cater to.
Is the Portenta C33 right for you? Check out its main tech specs:
Arm® Cortex®-M33 microcontroller by Renesas
MicroPython and other high-level programming languages are supported
Onboard Wi-Fi® and Bluetooth® Low Energy connectivity
Secure element for industrial-grade security at the hardware level
Secure OTA firmware updates (connecting to Arduino IoT Cloud or third-party services)
Compatible with Portenta, MKR, and Nicla components
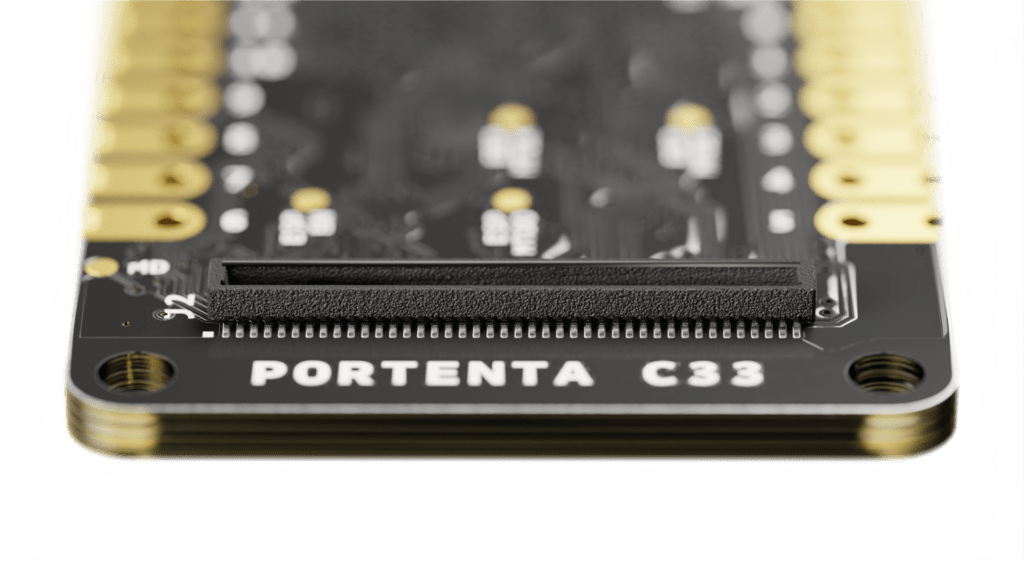
Castellated pins
Wide variety of peripheral interfaces, including CAN, SAI, SPI, and I2C
What’s more, the Portenta C33 is born into an extensive ecosystem that comes not only with a variety of components that easily combine, but also with ready-to-use software libraries and Arduino sketches shared and perfected by our incredible community.
If that sounds like everything you need to prototype and develop your next project – or perhaps your first project – for industrial or building automation, you can find more details on the Arduino Pro website and join the waiting list.
If you are attending Embedded World in Nuremberg, Germany from March 14th to 16th, come visit Arduino Pro inside the tinyML Pavilion at booth 2-238. We will be presenting the Portenta C33 at the show and our experts will be happy to introduce you to our newest product.
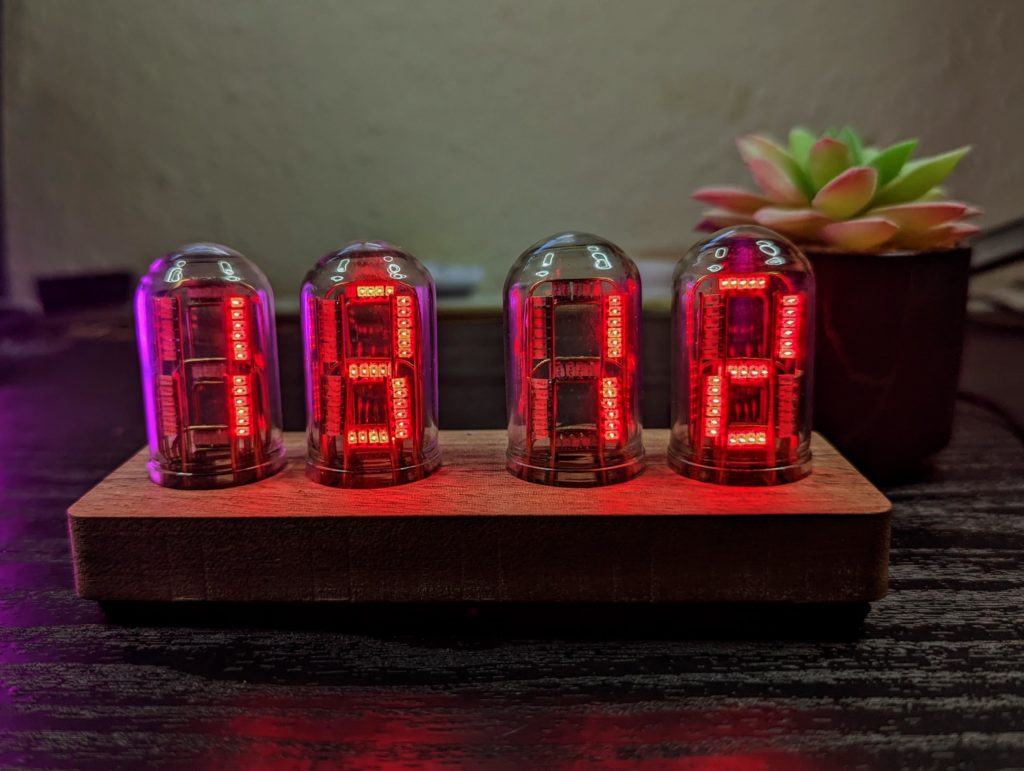
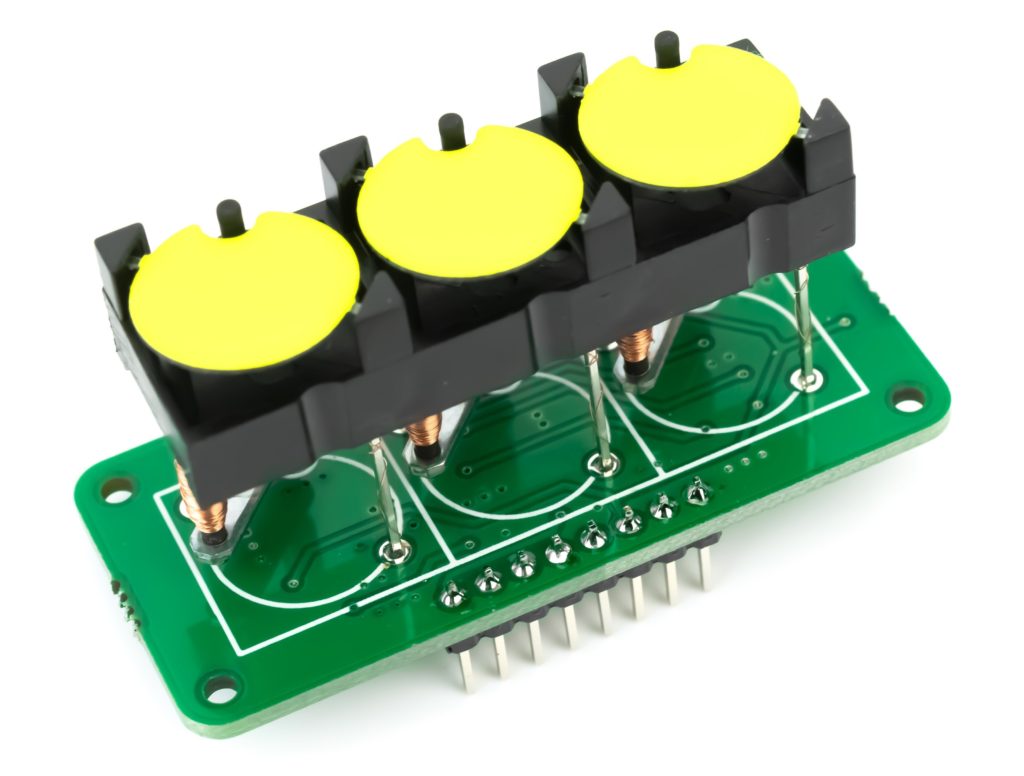
Everyone loves a nice Nixie tube clock, but Nixie tubes are expensive and difficult to find. Even if you can source a working set, driving the vintage tubes is a complicated undertaking by modern standards. Nixie tubes require high voltage and multiplexing, which is a pain. To solve these problems while retaining the aesthetic, 4Dcircuitry built this clock that utilizes freeform circuit faux Nixie tubes.
Each of the “Nixie tubes” used in this project is actually made entirely with 1206 SMD (surface-mount device) LEDs. But instead of soldering those onto PCBs, 4Dcircuitry attached them to formed 0.8mm brass rods to create tiny circuit sculptures. Those plug into custom PCBs which arrange the circuit sculptures, each a single segment, in a horizontal stack. Glass tubes cover each stack, making them look like Nixie tubes when viewed from the front.
An Arduino Nano board controls the LEDs. It doesn’t have enough pins for every segment, so the circuit uses shift registers. A DS3231 RTC (real-time clock) module provides accurate timekeeping. The base of the unit is a piece of wood milled on a CNC router, adding to the minimalist retro aesthetic. While it isn’t a requirement, 3D-printed jigs help to form the brass rods into the proper shapes, which would be difficult to do well entirely by hand.
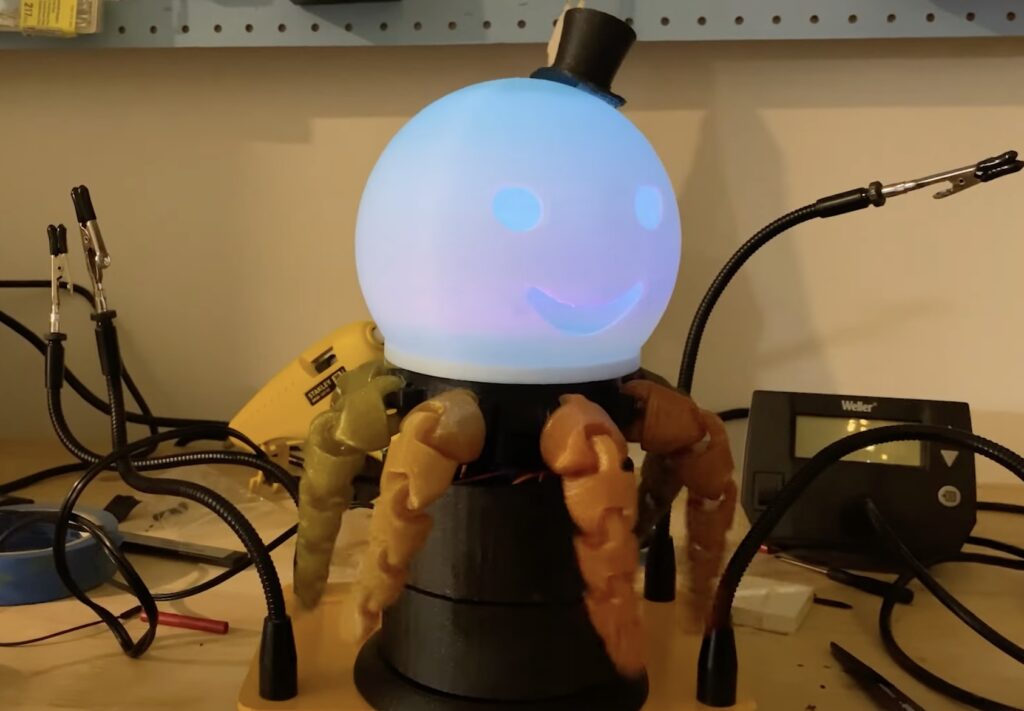
Sometimes the only motivation you need for a project is “because I want to.” That is especially true for cute and quirky decoration that doesn’t need to prioritize functionality. The perfect example of this is Ruby Zoom’s Lamptopus, which is the most adorable desk lamp in the world.
Lamptopus is a small lamp designed to sit on a desktop and look as cute as possible. Its 3D-printed body was modeled after an octopus, with the light shining through its smiling, bulbous head (complete with top hat) and long articulated tentacles dangling down from there. Those tentacles really stand out because Lamptopus has a trick up its sleeve: it rotates. As it spins back and forth, the tentacles swing to and fro. It is just plain delightful.
If you have access to a 3D printer, this is a fun project that should be fairly easy to tackle. The light comes from two Adafruit NeoPixel rings and two servo motors provide the rotation. An Arduino Uno board controls those, with the sketch starting the rotation at set intervals. All of the 3D files and the sketch are on GitHub if you want to build your own Lamptopus, and Ruby Zoom’s video provides thorough instructions.
Before digital display technology became affordable and practical, electromechanical flip-disc (AKA “flip-dot”) displays were a popular choice thanks to their high visibility and ability to scale to large sizes. For all practical purposes, flip-disc displays have been obsolete for decades. But we’re seeing a resurgence in demand for them, as they have an attractive and nostalgic appeal. If you’re interested in using them, Marcin Saj has a great tutorial explaining how to control a flip-disc display with an Arduino.
Part of the reason that flip-disc displays are hard to find today is that they’re electromechanical devices that require dedicated manufacturing. Each “pixel” is a bistable device that will remain in its set position until the user actively resets the position. To flip the disc, the user must supply a pulse of electricity through an electromagnet coil in the correct polarity. One direction sets the disc to one side, and the reverse polarity sets the disc to the other side. Because the discs are bistable, the user only needs to flip the necessary discs to achieve the states they require — not the entire display. Flip-discs are relatively slow, so that is important for reducing overall refresh time.
Saj’s tutorial goes into depth on these control techniques using a custom driver board with a 595D shift register and an H-bridge. The shift register reduces the number of Arduino I/O pins required for control by setting the states of the discs one after the other. The H-bridge is a set of interconnected switches that makes it easy to reverse the polarity of a portion of a circuit, which is the active disc in this case. By storing the states of the discs in memory, one can skip over the discs that are already in the proper state and save time.
This tutorial is meant to work with Flipo.io’s own flip-disc displays and drivers, which were designed specifically for use with Arduino boards and that will be launching soon through Kickstarter. The tutorial focuses on a three-disc display, but it appears that Flipo.io intends for users to expand that into larger arrangements.
We’re excited to announce the release of our latest Arduino Cloud feature, the Advanced Chart Widget! This new and improved widget is a significant upgrade from our previous chart widget, offering more customization options and functionality that will make it easier than ever to visualise and analyse your device data. In this blog post, we’ll be exploring the benefits of the Advanced Chart Widget, how to use it, and how you can take advantage of this new feature.
Your devices always monitored with the Arduino Cloud dashboards
But, what is the Arduino Cloud? Arduino Cloud is an integrated platform that provides an easy and efficient way to develop, deploy and manage IoT devices. Supporting a broad list of hardware, including Arduino boards, ESP32 and ESP8266 based boards, the platform enables makers, IoT enthusiasts and professionals to build connected projects effortlessly. What sets Arduino Cloud apart is its user-friendly and intuitive interface that abstracts complex tasks, making it accessible to users who are not familiar with coding.
Users can build dashboards from a rich palette of widgets, that include switches, buttons, colour selectors, status, gauges, maps and, of course, a chart widget where you can plot the temporal evolution of one variable of one device.
Benefits of the Advanced Chart Widget
The Advanced Chart Widget is a powerful tool for monitoring and analysing device data. Its ability to display multiple variables in one chart allows for easy comparison of data points, making it particularly useful for tracking multiple data streams such as temperature and humidity in a greenhouse, or energy usage in a building.
Moreover, the Advanced Chart Widget is highly customizable, allowing you to tailor it to your specific needs. You can adjust the colors and types of the charts, the labels on the axes and the legend to make the data easier to read and interpret.
One limitation of the standard Chart widget is its inability to display data over custom time periods. It only offers four predefined time spans: real time, 1 hour, 1 day, and 15 days. However, the Advanced Chart Widget offers the ability to select an arbitrary period of time, giving users access to the full history of their device data, according to the retention period of their plan. This is a crucial advantage for users who need to track long-term trends and patterns, enabling them to make informed decisions based on their device’s complete data history.
Real-World Use Cases
The Advanced Chart Widget has a wide range of use cases, from monitoring environmental conditions to tracking energy consumption. For example, you could use the widget to monitor the temperature and humidity in a greenhouse to ensure optimal growing conditions for your plants. Alternatively, you could use it to track energy consumption in a building and identify areas where you can reduce your energy usage. With the ability to display multiple variables in one chart, the possibilities are endless!
How to Use the Advanced Chart Widget
Using the Advanced Chart Widget is easy!
Create your dashboard as usual, then click “Add Widget”. Select “Advanced Chart” from the list of available widgets.
Customise your chart by selecting the variables you want to show, choosing the chart type and colour for each variable, and configuring the Y-axes with the labels you want to use. You can also choose whether to show a legend for your chart.
Once you’ve customised your chart, you can adjust its size and location on your dashboard. Remember that you can customise separate dashboard views for browsers or the mobile app.
Last but not least: an improved Percentage widget!
Good things come in pairs and we’re excited to announce the release of our new and improved Percentage widget. This latest update allows you to customize the widget with a variety of icons, making it easier to identify the purpose of the widget at a glance. Choose from a range of predefined icons, including battery, temperature, storage, and more. Plus, with the ability to set a threshold, the widget’s color will change when the value goes above or below a certain value, providing instant visual feedback. Whether you’re tracking your device’s battery life or monitoring your storage capacity, the improved Percentage widget is the perfect tool for keeping an eye on important metrics.
You can learn more about the new Advanced Chart widget checking the documentation. Please note that the Advanced Chart widget is a feature available starting from the Maker plan, but we believe it is well worth the investment for anyone looking to get the most out of their device data. Upgrading to a paid subscription is easy, and you’ll gain access to additional features and support that will help you get the most out of our platform.
With the Advanced Chart widget, it’s easy to create great-looking charts that help you understand your data at a glance. So why not give it a try today?
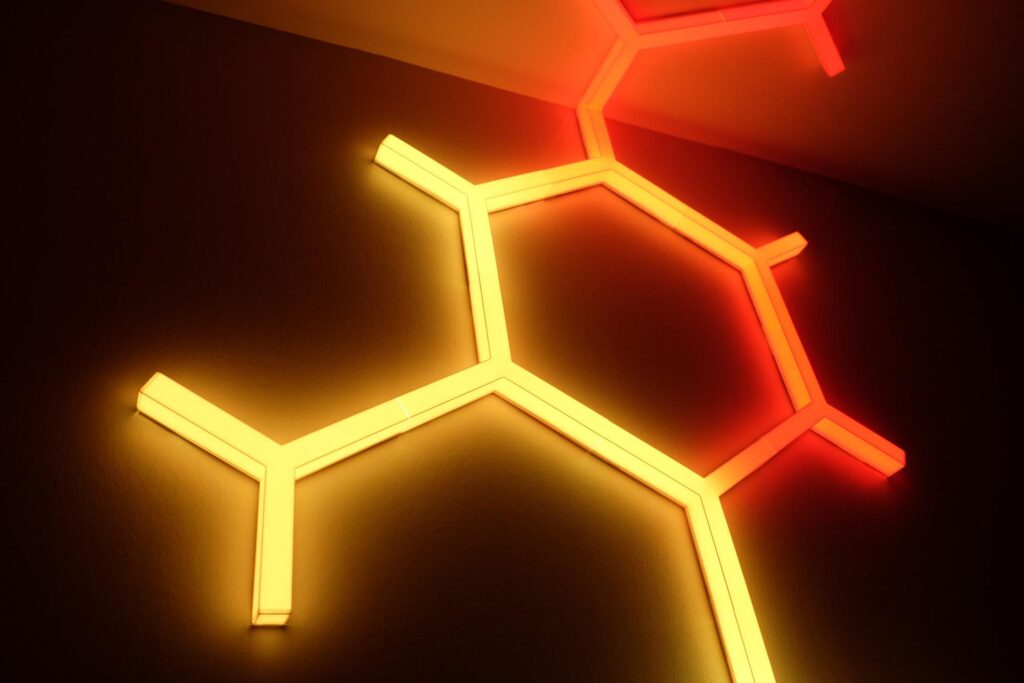
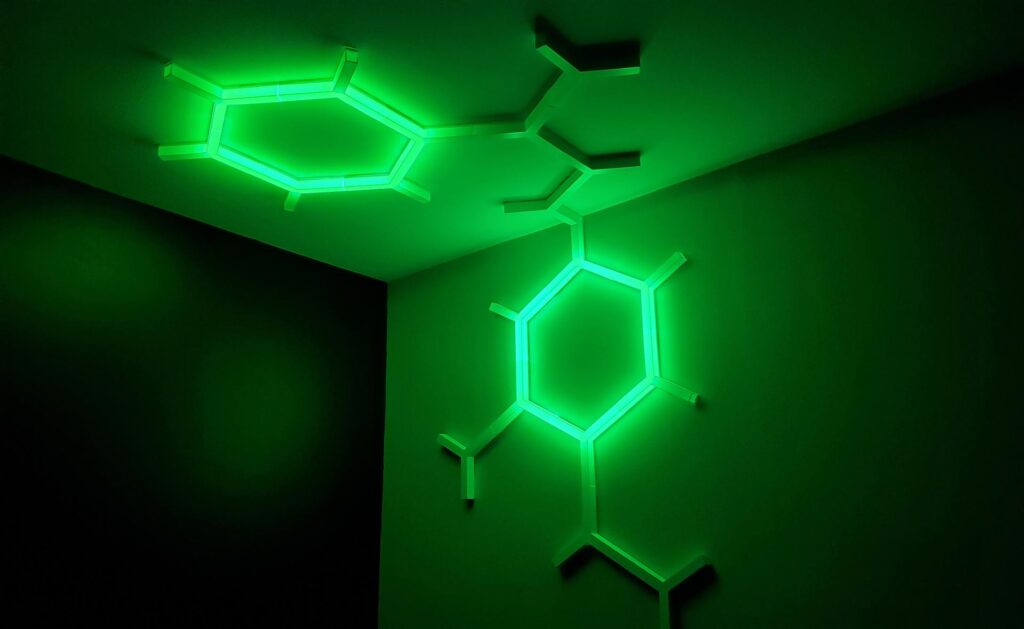
LED accent lighting is very trendy right now, as it can add quite a lot of visual interest to a room without introducing clutter. But commercial products are often either very expensive or subpar in quality and capability. Fortunately for makers, this kind of project is perfect for a DIY weekend build. One great option is Nancy’s HEXA LEDs, which are gorgeous, affordable, and controllable via Bluetooth®.
Nancy’s design work here is fantastic and HEXA LEDs look awesome. As the name suggests, they’re hexagonal arrangements of LEDs. They’re modular, which gives the builder the freedom to create whatever pattern they like. It is even possible to have HEXA LEDs flow from a wall onto the ceiling or around a corner to an adjacent wall. An Android app (sorry, no iOS app available) lets the user control the LED effects, animations, and colors.
To create your own HEXA LEDs decor, you will first need to decide on the pattern you want. From there, you can 3D-print all the required parts. Those include the supports that mount to the wall, the diffusers that cover the LEDs, the electronics housing, and so on. The brain of the system is either an Arduino Nano or a Nano Every board. An HC-06 module allows for communication with the Android app. Illumination comes from strips of WS2812B individually addressable RGB LEDs. Proper power distribution is critical and becomes more complex as you add more LEDs, so be sure to follow Nancy’s instructions carefully.
If you want LED wall art that will wow your visitors, then you don’t need to look any further.
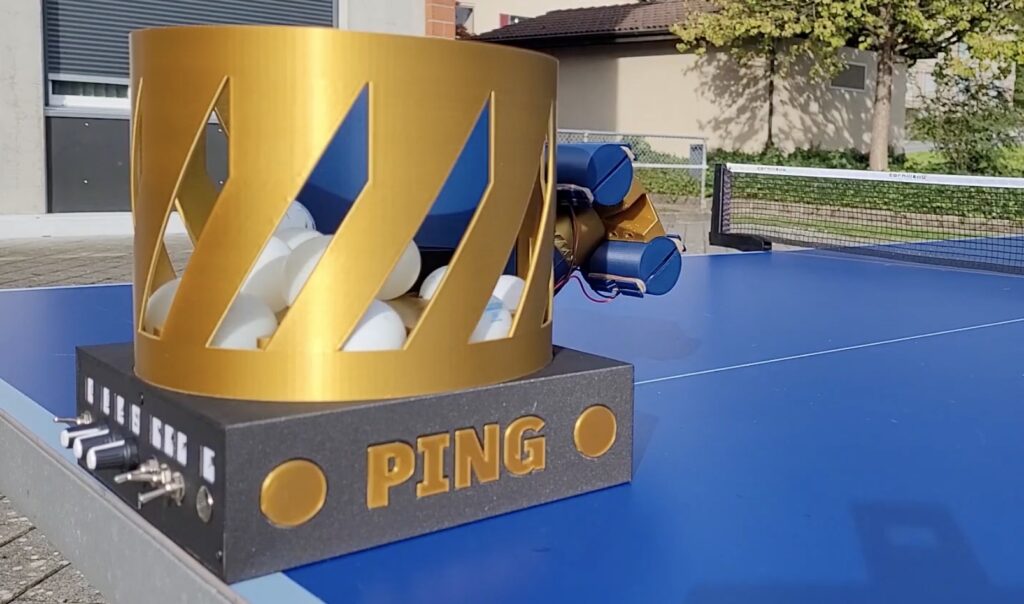
Ping pong is one of the most popular sports in the world, but that doesn’t mean that it is easy to find people to practice with. Lone players are typically forced to practice by using return boards (or one half of the table flipped up), but that is overly predictable. To provide a better training experience, BINGOBRICKS designed this ping pong robot that serves balls according to user preferences.
This is a bit like a tennis ball serving machine, but tailored to the particular quirks of ping pong. Through a control panel on the back of the robot, the user can set the serve parameters. Those include the direction of the serve and even the spin of the ball — anywhere from a full top spin to a full back spin. A quick launch tube swap lets the user switch between high ball releases or low ball releases. To keep the player on their toes, the machine can release balls in different directions throughout a session.
Most of the robot’s body and mechanical parts are 3D-printable. An Arduino Nano board controls the motors according to the parameters set by the switches and dials. Potentiometers allow adjustment for the intervals between serves, speed, and spin, while three toggle switches control the directions in which the robot will serve balls. A servo motor controls the angle of the launch tube, a pair of DC motors spin the launch wheels (their relative speed sets the ball spin), and another DC motor rotates the hopper’s feed arm.
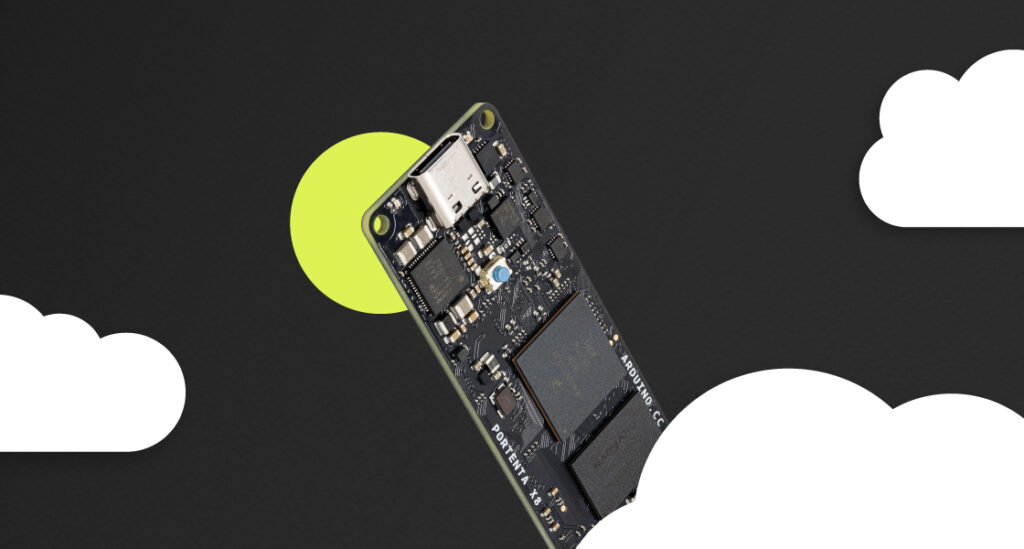
You may have heard about Portenta X8 for its flexibility of usage of Linux combined with real-time applications through the Arduino environment.
But now, a new set of features have been added to Portenta X8 thanks to its brand-new Arduino Python container. Update your board with the latest image (here is a tutorial showing how to do so) and start exploiting a wide range of unique functionalities:
Set up your Portenta X8 in just a couple of clicks with the full revised out-of-the-box experience
Self-provision your boards in Arduino Cloud keeping security in mind
Gather real-time and historical data in one place and display them on widget-based dashboards
Manage and monitor your fleet of devices from anywhere together with all your team
Keep your X8 up-to-date with secure OTA updates with the Portenta X8 Board Manager add-on
It is now time to learn more about the incredible number of projects Portenta X8 can help you build up.
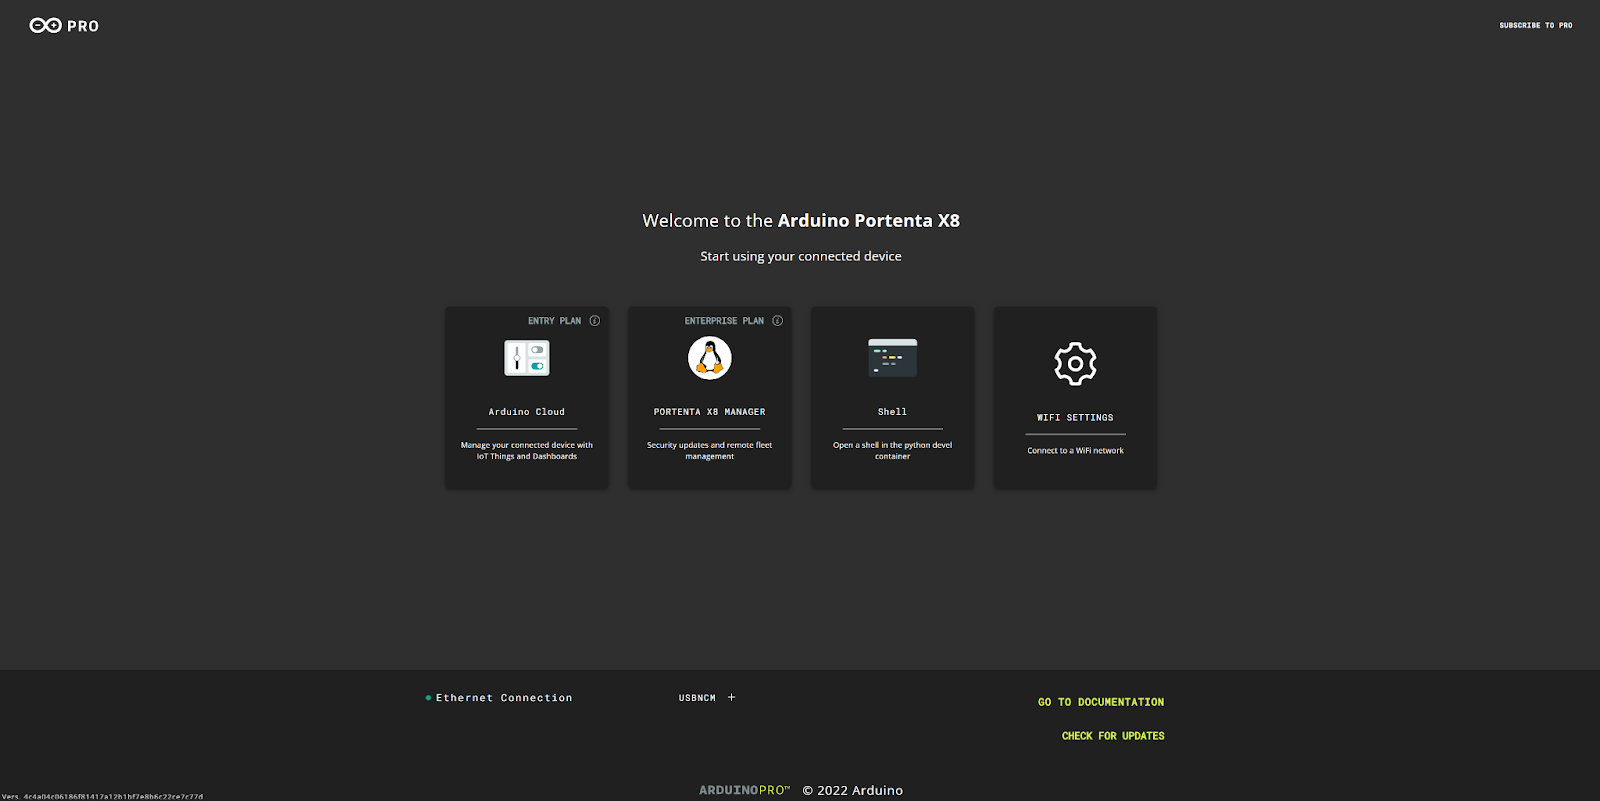
All Portenta X8 settings in one place
Connect your Portenta X8 in the browser and start setting it up in no time through the dedicated out-of-the-box experience.
Connect your X8 to the Wi-Fi® in just a couple of clicks and start leveraging all its multiple features:
1. Shell. Communicate to your X8 through a dedicated Shell running in a Python-Alpine Container. Explore multiple examples and easily develop your Python applications.
2. Arduino Cloud. Always thought about connecting your X8 to the Cloud? Wait no more. Create an Arduino Cloud account and enjoy this new feature. With the out-of-the-box experience, your Portenta X8 can be securely self-provisioned in Arduino IoT Cloud, you just need to create API keys and the Python container running on X8 will do the rest. When provisioned, you can start directly interacting with an example Thing and Dashboard that will be automatically generated for you to guide you step-by-step in this new journey.
3. Portenta X8 Manager. Securely monitor your fleets of Portenta X8 by purchasing the Portenta X8 Manager:
Securely maintain your Linux distribution
Deploy and update applications packaged into containers
Secure over-the-air updates to target Portenta X8 devices/fleets
With the new out-of-the-box experience, the Portenta X8 now has a full suite of tools available for every kind of user.
Create amazing dashboards with Portenta X8
Making Portenta X8 compatible with Arduino Cloud means opening a wide range of new applications.
This compatibility is guaranteed by a brand-new Python container. Through Arduino Cloud APIs, the Python container ensures full interaction and simple porting of any Python-developed application in the Cloud.
Thus, connect your Portenta X8 with external sensors or other peripheral devices and visualize their data in widget-based dashboards. Push button, Messenger, Scheduler, and Chart are just a few of the many widgets you can select to build your ultimate control center.
Do you have multiple boards or sensors connected? It’s easy, Arduino Cloud is able to manage data coming from different boards/things in just one dashboard.
In addition, a preconfigured dashboard allows you to monitor the health and usage of your Portenta X8. The diagnostics of your fleets has never been easier.
And remember, you can monitor your dashboards anywhere, anytime. Use your dashboards on the go, and control projects from your smartphone using the free IoT Remote app.
Manage your Portenta X8 from anywhere
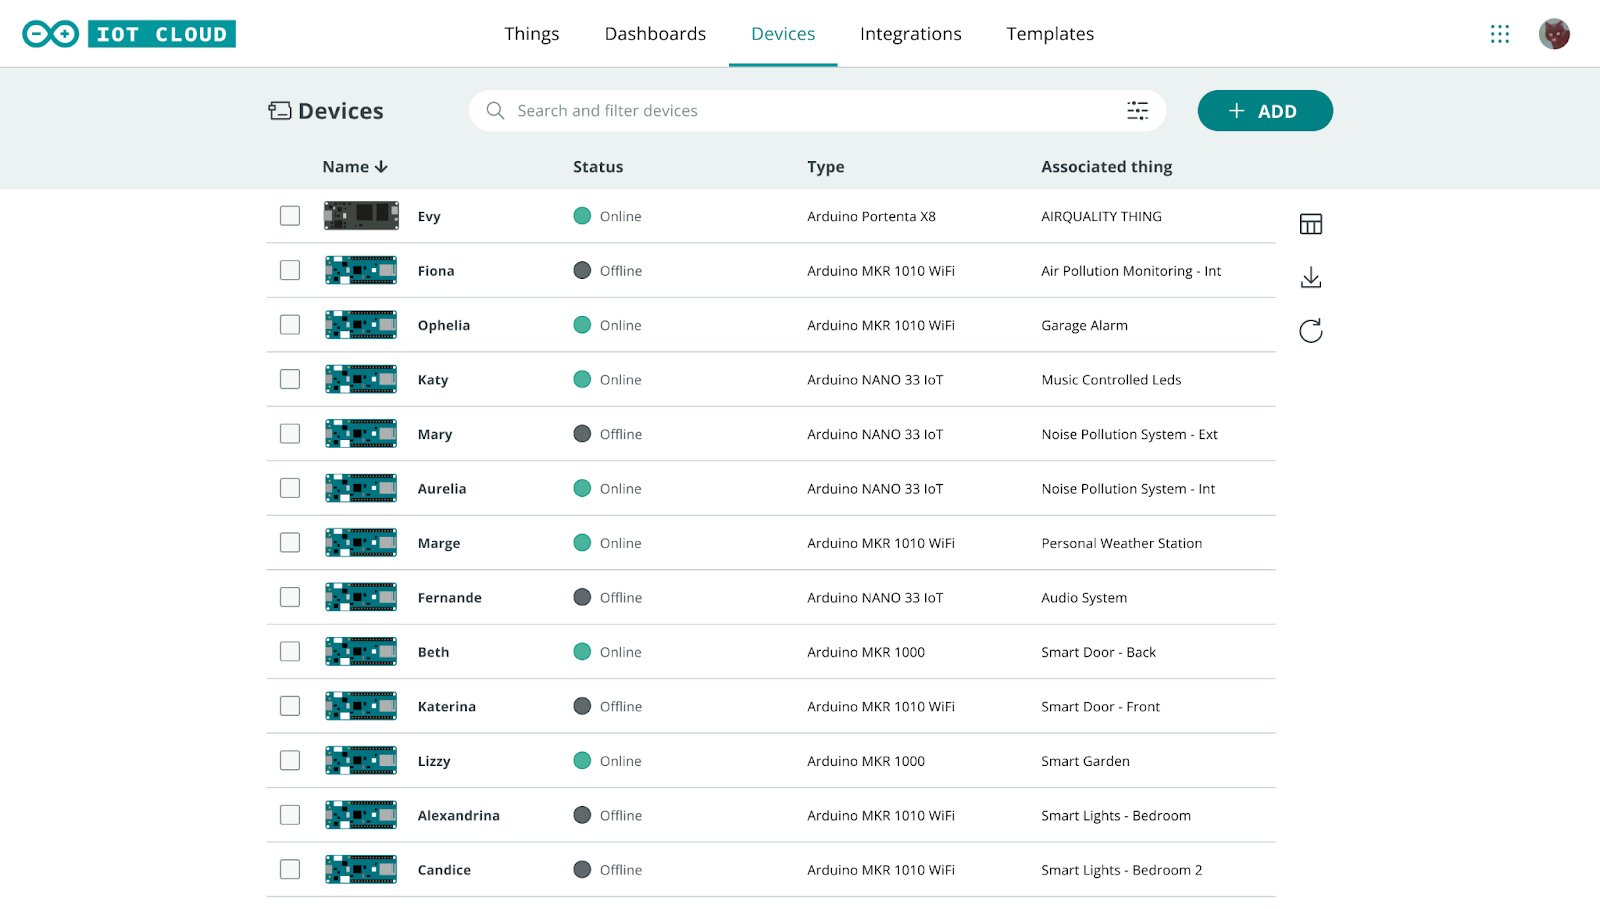
You probably already know that you can use Arduino Cloud to have full control over your fleets of compatible devices, including Arduino, ESP32, and ESP8266 boards.
Filter and Group your devices according to multiple parameters, such as name, type, customizable tags, etc., and monitor their status whenever you like.
Looking for the Portenta X8? Just search for it in the search bar and you will be able to check which Thing and dashboard are assigned to it.
If you would like to be sure that your Portenta X8 is always up-to-date, start using it by subscribing to the dedicated tool called Portenta X8 Board Manager.
This add-on enables any user to receive constant Linux OS updates from Arduino, not only for Linux image, but also for all the containers developed and updatable over time. So, if you would like to keep track of the status of your full Portenta X8 fleet and perform secure remote OTA updates, this is the perfect solution for you.
Try it now!
Update your Portenta X8 and get started with Arduino Cloud and associated documentation.
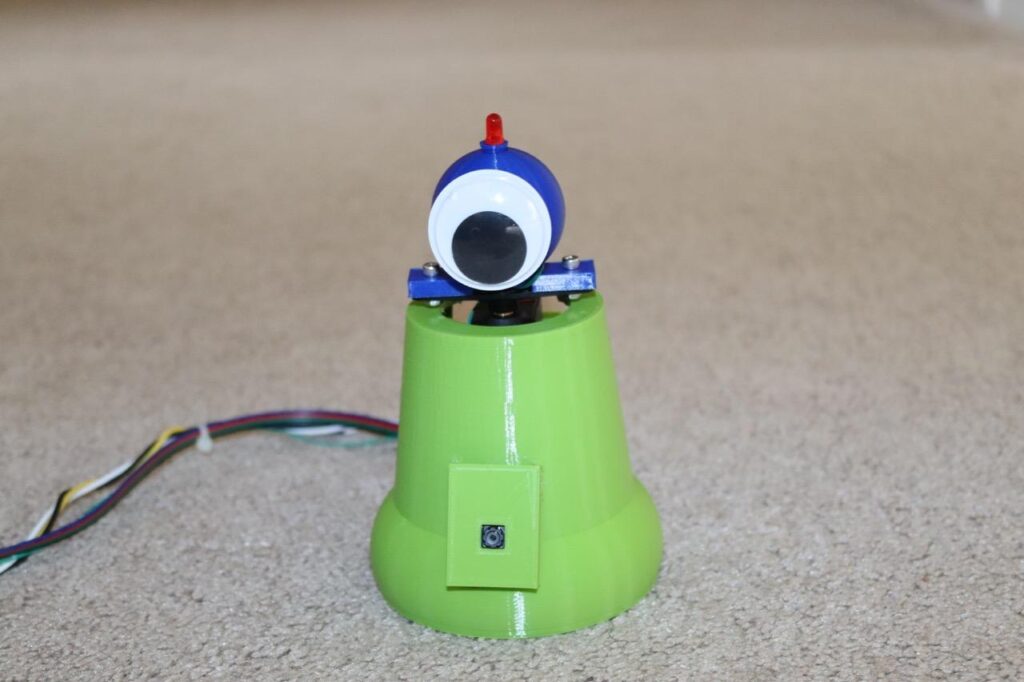
Unlike every other hands-free light switch that relies on infrared motion detection or changes in ambient light values, Michael Rigsby’s “Look at Me Light Switch” project instead requires a person to stare at it for six seconds.
Based on an embedded machine learning model and a microcontroller, this device uses Person Sensor from Useful Sensors, which relies on a camera to gather images, processes them, and outputs the results over I2C. This information can include the total number of faces as well as individual bounding boxes for every detected face. From here, the information sent by the Person Sensor is read by an Arduino Uno and used to determine if someone is staring at the switch.
When the face is initially found, a small red LED starts to blink at the top to indicate that the user has been seen. Then once they have been staring for over three seconds, a servo-actuated googly eye spins around to show the action was successful and a relay is toggled to turn the light on or off via a remote control.
As Rigsby notes, “This is not a ‘clap on, clap off’ switch from years past; this is a ‘look on, look off’ switch for the present age.” The Clapper was popular in the 1990s, so who knows, maybe his tinyML solution could be the next big thing in lighting control? To see more about this fun project, you can watch Mike’s video below and read his write-up here on Instructables.
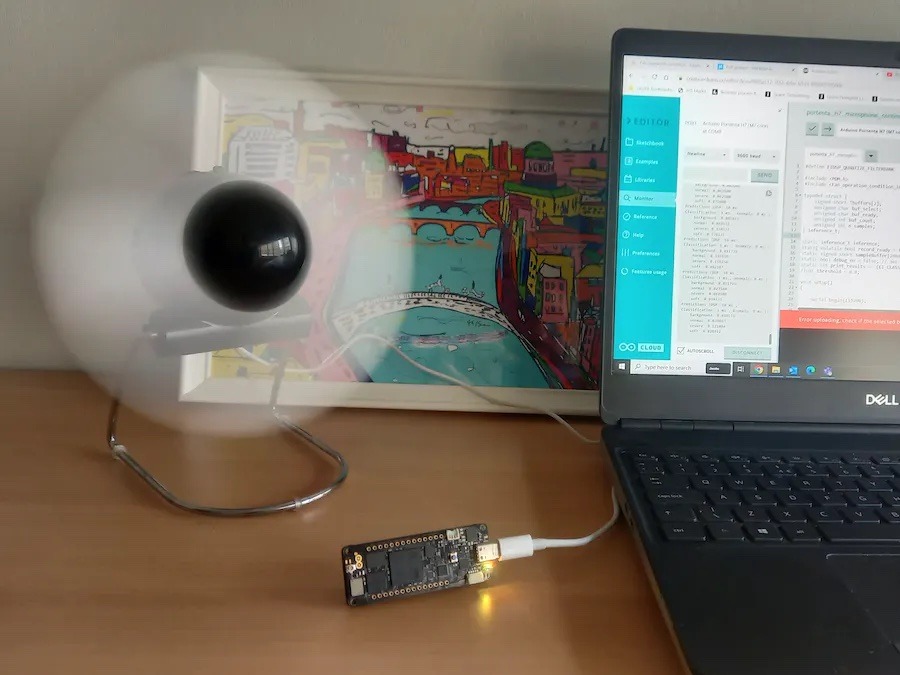
Embedded audio classification is a very powerful tool when it comes to predictive maintenance, as a wide variety of sounds can be distinguished as either normal or harmful several times per second automatically and reliably. To demonstrate how this pattern recognition could be incorporated into a commercial setting, Kevin Richmond created the Listen Up project that aims to show the current status of a running fan based solely on its noise profile.
Richmond started by collecting 15 minutes of data for each label, namely background noise, normal operation, soft failure, and severe failure. Once collected, the data was split into two-second samples and uploaded to the Edge Impulse Studio, after which an impulse was configured to use an MFE audio processing block and a Keras classification model. Once trained on the dataset, the model achieved an accuracy of almost 96% using real-world testing data.
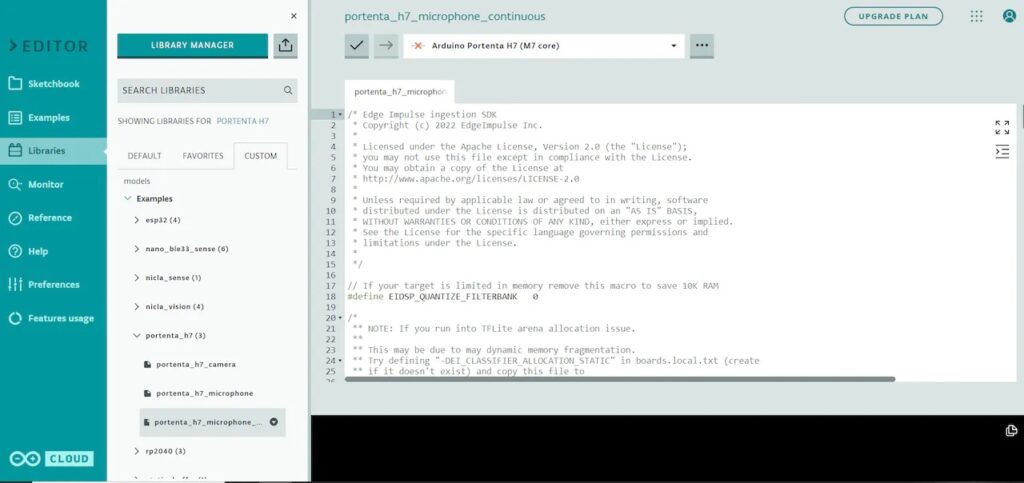
In order to utilize the classifier, Richmond deployed his Edge Impulse project as an Arduino library for use in an Arduino Portenta H7 sketch. In it, the microphone continuously gathers new audio data before passing it into the classification model to receive a result. The probability of each label is then used to set a corresponding LED color if the probability is greater than 80%, otherwise blue is shown to indicate a failed reading.
Planet Arduino is, or at the moment is wishing to become, an aggregation of public weblogs from around the world written by people who develop, play, think on Arduino platform and his son. The opinions expressed in those weblogs and hence this aggregation are those of the original authors. Entries on this page are owned by their authors. We do not edit, endorse or vouch for the contents of individual posts. For more information about Arduino please visit www.arduino.cc
You are currently browsing the PlanetArduino weblog archives.