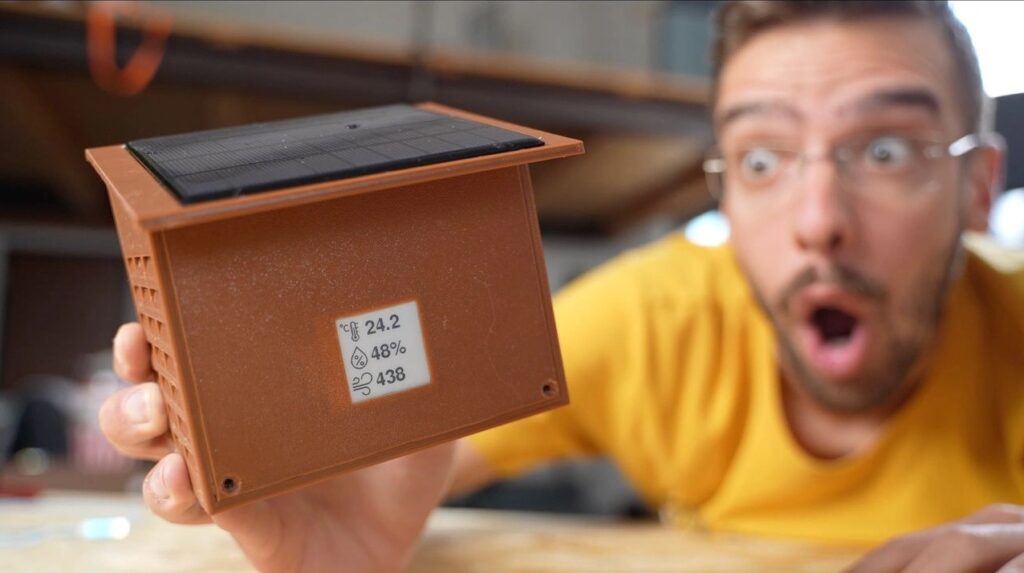
The world just recognized Earth Day and it was a good reminder that we all have a responsibility to protect the planet. Unfortunately, many of our devices suck up energy in direct opposition to that goal. But the market has proven that we aren’t willing to sacrifice convenience. Luckily, that isn’t always necessary. To demonstrate that, overVolt built this solar-powered weather station that features an E Ink display.
The first — and usually easiest — step in the right direction is reducing energy consumption. And it is often possible to make efficient devices that don’t require any sacrifices at all. In this case, overVolt achieved that with the use of an E Ink screen and a power-sipping Arduino Nano ESP32 board.
E Ink technology is perfect for this application, because a weather station doesn’t need to update often. The display only consumes power during a refresh and the rest of the time it continues showing very readable content without any power.
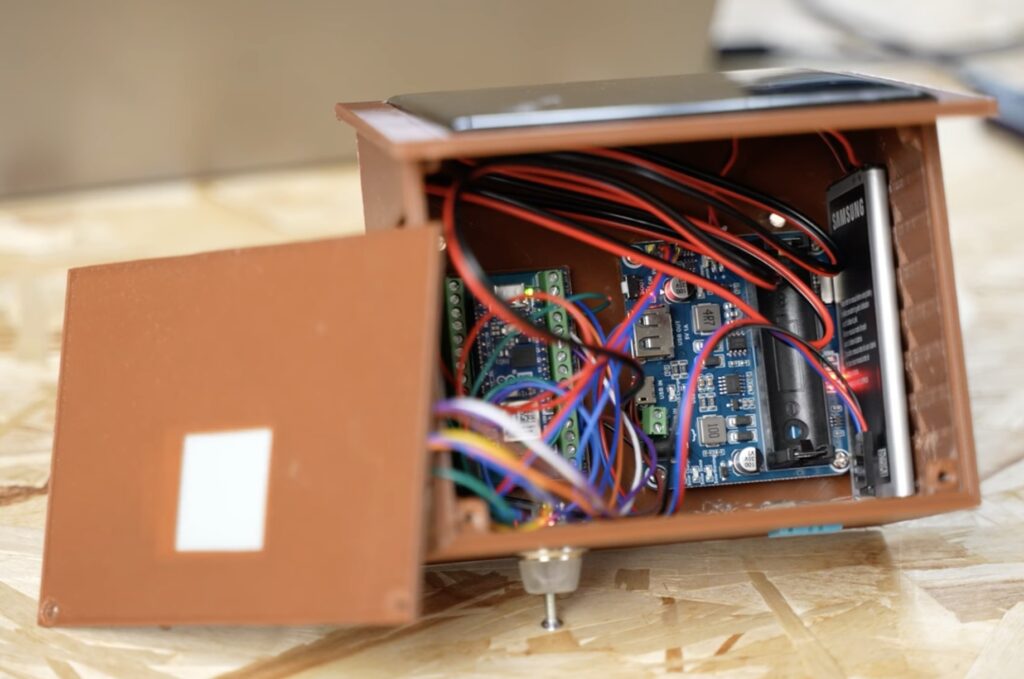
The next step was to eliminate any energy from fossil fuels. Because this weather station consumes so little power, it can run entirely on the power coming from a small solar panel. Sunlight isn’t always available, so overVolt added a lithium battery to store power through dark periods.
The Arduino monitors temperature and humidity with a DHT11 sensor, as well as air quality with an MQ-135 sensor. And because this is a Nano ESP32, it can also connect to the internet to pull weather forecasts.
While lithium batteries aren’t great from an environmental perspective, overVolt’s weather station proves that we can take positive steps without sacrificing convenience.
GitHub user touchgadget converts a Logitech Extreme 3D Pro flight joystick into a Nintendo Switch compatible gamepad. This allows a player to play two thumb stick games using one hand.
No soldering required. This does not work for any other flight stick.
An Adafruit Feather RP2040 with USB Type A Host and joystick are powered by the Nintendo Switch so a battery is not needed. Just plug the joystick into the Feather then plug the Feather into the Switch. The software is coded in Arduino.
See the details and code on GitHub. Under an MIT license.
Hey there, DIY IoT enthusiasts! Ever build a cool gadget with your Raspberry Pi, only to get stuck figuring out how to show off its data? Don’t worry, you’re not alone. Lots of makers like you face the same challenge: turning that awesome sensor data into something easy to see and interact with on your phone or laptop.
The good news is, there are simple and reliable ways to bridge that gap and shed light on your data without losing time.
Visualize your Raspberry Pi data: Get started
Raspberry Pi and other Linux-based platforms have become popular in the IoT space due to their versatility and ease of use. However, a common issue is finding an effective way to visualize their data and connect them to visualization platforms.
At the end of the day, what do you want? You have your code which is producing data and you want to have a dashboard to visualize it both in real time and its historical evolution. Furthermore, you would like to interact directly with your application from that dashboard too!
Let’s explore what kind of solutions you have at your disposal.
Choosing a visualization platform for your Raspberry Pi
You can visualize your device’s data by installing a visualization platform on your device or sending data to an external platform, self- or cloud-hosted. Each has its pros and cons, and the choice depends on your skills, time, and the complexity of the solution.
Installing a visualization platform on your device also implies setting up local data storage, like a database. This process along with the platform installation and maintenance can be complex and time-consuming, especially for beginners.
Transferring data to an external platform is typically easier as they usually offer a simple API to interact with them, but the type of solution can add complexity:
If you opt to establish your own platform and infrastructure, it may seem like you have more control over the solution. However, it can quickly become an overwhelming task for beginners, and ongoing maintenance can be even more challenging.
Choosing a cloud-hosted solution often seems like the most balanced option. However, it can also be complicated due to the wide range of alternatives, varying levels of complexity, and pricing models that can be difficult to understand.
Some of these alternatives were also described in a previous article, where we explored several ways to visualize data coming from Arduino or ESP32 based boards.
Choosing the right programming language for your Raspberry Pi
But now, what? You have to program your application to collect data. Selecting the right programming language can depend on many different factors. Knowledge of the environment or simply your preference can be a deciding factor. But sometimes the decision is not so simple. Here we have some insights about some popular IoT programming languages
Python: Python is a top choice for IoT development due to its simplicity, rich library ecosystem, and active community. Its dominance in AI allows seamless integration of machine learning models.
JavaScript: JavaScript, with Node.js as a server-side runtime environment, is also a go-to language for IoT device development. It’s versatile and its event-driven nature aligns seamlessly with IoT requirements. It’s particularly popular for applications that interact with web pages, thanks to the potential for significant code reuse.
Node-RED: Lastly, low-code programming environments like Node-RED have become very popular for IoT. It allows you to create your applications with an intuitive drag-and-drop interface, connecting hardware and platforms, and controlling anything from tiny sensors to the cloud.
Note: While other languages like C/C++ and Rust are also relevant, this blog post focuses on Python, JavaScript, and Node-RED due to their popularity and relative ease of use.
Creating IoT monitoring dashboards with Arduino Cloud
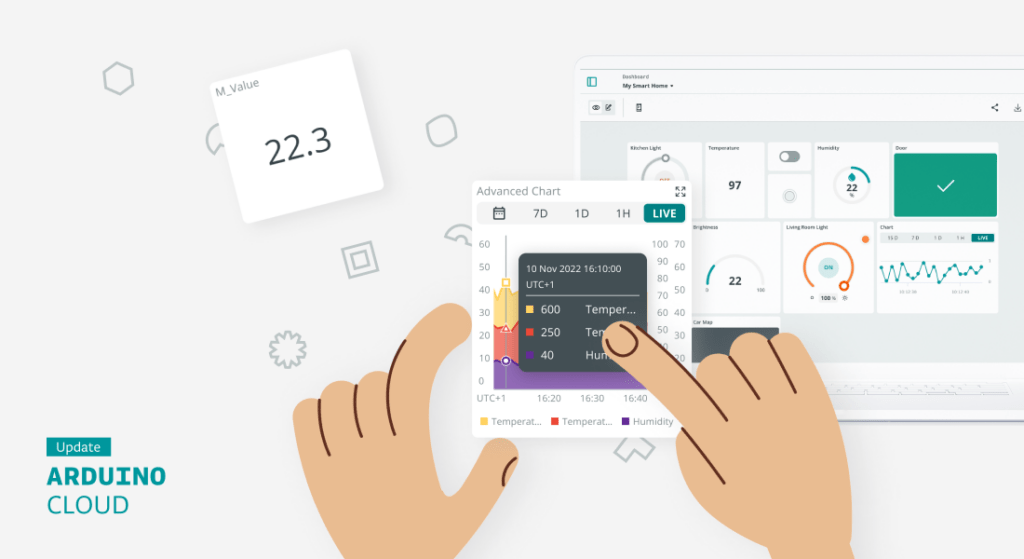
The Arduino Cloud is a cloud-hosted platform that provides a user-friendly environment to create customizable insightful dashboards used to monitor and control your IoT devices.
The main benefit is its ease of use. You get rid of installation or maintenance headaches, while you connect your devices in minutes and visualize the data in your dashboards either from your browser or your mobile phone. You can create and customize your dashboards with an intuitive interface using drag-and-drop widgets. These dashboards provide real time interaction with your IoT devices and insightful historical information that can be additionally downloaded for offline analysis.
But there are many other cool features:
Real time alerts: You can receive notifications based on criteria configured in the Cloud. Learn more in this post.
Mobile phone app: You can access your dashboards using the IoT Remote app.
Work collaboratively: You can share your code and dashboards with others.
Out-of-the box integrations: You have seamless integration with popular platforms like IFTTT, Zapier, Google Services, Alexa or Google Home.
Want to learn more? Check out this recent article announcing four new IoT monitoring dashboard features that may seem small, but pack a big punch for your connected projects. They include the ability to duplicate IoT Dashboards, IoT Value Widget customization, new data aggregation method and more.
How to connect your Raspberry Pi to Arduino Cloud
Connecting your Raspberry Pi to Arduino Cloud couldn’t be easier. You only have to follow these steps:
1. Set up an Arduino Cloud account. 2. Add your device to the Arduino Cloud as a Manual device. 3. Create your Thing and add your variables. 4. Create the code for your Raspberry Pi using your preferred development language and environment. 5. Create the dashboards for data visualization.
So, do you want to remotely monitor your Raspberry Pi creations and control them from anywhere? Stay tuned! Upcoming posts will showcase real-world examples of connecting your Raspberry Pi to the Arduino Cloud, enabling you to visualize sensor data and interact with your projects remotely. In the meantime, here’s a project from ProjectHub showing an integration with Raspberry PI using Python to show VCO2 data from a SGP30 sensor.
Start with Arduino Cloud for Free
Arduino Cloud is free to use. So, if you’re looking to streamline data visualization of your Raspberry Pi applications, consider giving the Arduino Cloud a try and leverage its full potential for your projects. You can explore the premium features for enhanced functionality.
Lesbian/Bi Tales Can Absolutely End Up Being Common By Trish Bendix on June 10, 2015 What makes anything queer? Is-it the person behind the tv tv series or film, or a character that rests with the exact same gender? Possibly it is the subtext alone that some customers latch onto while others remain oblivious. Queer … Seguir leyendo Lesbian/Bi Stories Can Absolutely End Up Being Universal – HER→
Welcome to flirt site india – find your perfect match today If you are looking discover your perfect match, then you’ve visited the best spot.here at flirt site india, we are dedicated to assisting you to discover the person of your desires.with our considerable database of singles, you’re certain to find someone who’s ideal for … Seguir leyendo Welcome to flirt site india – find your perfect match today→
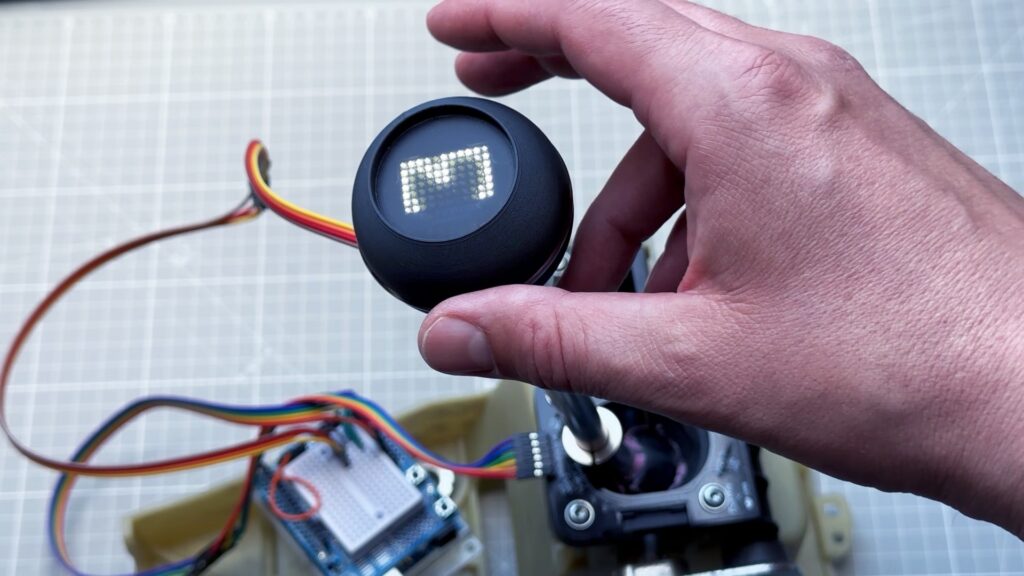
We recently covered Vaclav Krejci’s stick shift project, in which he designed a board that surrounds the shift lever and uses Hall effect sensors to detect its position. It then displayed the current gear on a small OLED screen. The idea was that the user could mount that screen wherever they wanted on the dashboard or center console. But now Krejci is back with a more satisfying solution: an LED display built into the shifter knob itself.
The rest of the hardware, aside from the display, is the same. A custom PCB surrounds the shift lever and contains the Hall effect sensors. Jumper cables connect those to a shield on an Arduino UNO Rev3, which looks at the signals from the sensors and calculates the approximate position of a permanent magnet attached to the shift lever. That position tells the Arduino the current gear.
The difference is in how it displays the gear to the user. Before, it was a loose OLED screen. Now, it is a bright Pimoroni 7×11 LED matrix display integrated into the shifter knob. The knob is an inexpensive aftermarket model that Krejci modified for this project. He removed the top half of the knob and replaced it with a 3D-printed version with a cavity where the LED matrix can sit. A sheet of tinted translucent plastic helps to diffuse the light and hide everything else.
This looks absolutely fantastic and would be really cool to see in a car.
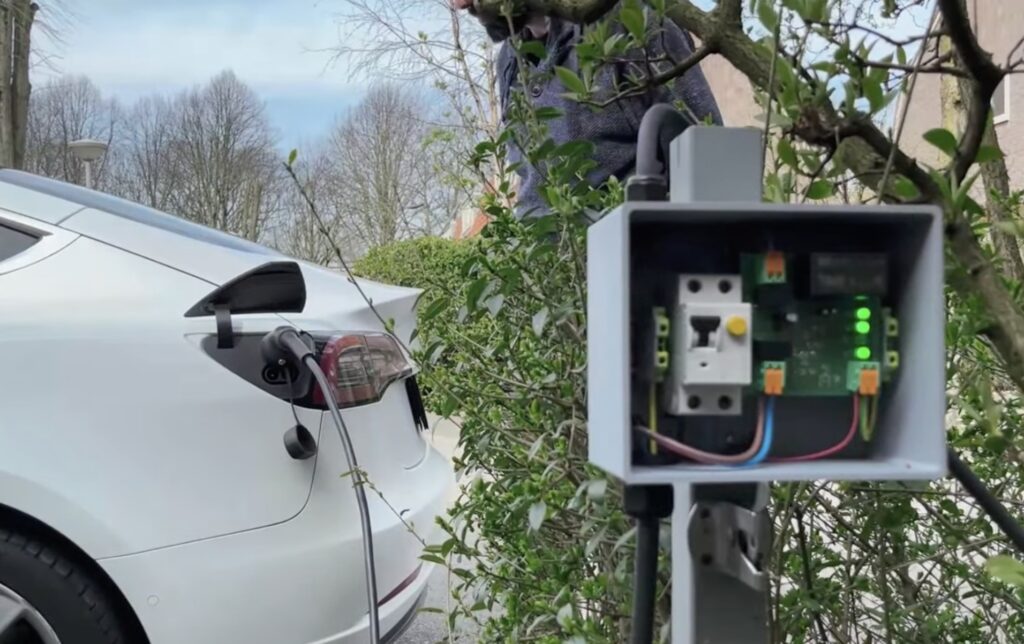
The high cost of EV (electric vehicle) chargers may lead you to believe that they’re complex systems. But with the exception of Tesla’s Supercharger, that isn’t true. They’re actually quite simple — basically just glorified switches. All of the nitty gritty charging details are the responsibility of the car’s onboard circuitry. With that in mind, EV owners may want to follow Pedro Neves’ guide on building an affordable Arduino-based EV charging station.
Because the car deals with all of the particulars of charging, the only purpose of the “charger” is to provide a connection to the electrical grid. “Charger” isn’t even the right word, as this is more accurately EVSE (electric vehicle supply equipment). For safety reasons, the car and the EVSE communicate with each other. The car can tell the EVSE when it is safe to provide power and the EVSE will then connect a switch between the charging plug and the electrical grid. It really isn’t any more complex than a $15 smart outlet and most of the cost of an EVSE is the heavy-gauge wiring.
Here, Neves proves that with a DIY EVSE designed around an Arduino UNO Rev3 board. It has a custom shield with relays for switching power and to power the Arduino itself with mains voltage. A few LEDs act as status indicators. EVSE protocols are standardized, so Neves was able to program the Arduino to communicate with any connected car. Once the Arduino receives permission from the car, it switches the relays to provide mains voltage. A heavy-duty 3D-printed enclosure contains those components, with a breaker switch and weatherproofing.
We love the ingenuity at work in this cuckoo clock project from maker oliverb.
Using an ESP32 WROOM 32D Microprocessor & Stepper Motor to Repair & NTP Time Synchronize a Worn Out Regula 25 Cuckoo Clock. This modification contains 3D printed parts but the parts could be faily easily made from wood/metal.
This project uses a Regula 25 Cuckoo Clock movement which are very common and worn out ones should be cheap and easy to find.
Thank goodness, you can find entire communities that readily acceptance solitary father or mother online dating. These like-minded people be aware of the battles of balancing a romantic union while navigating their family life. Having a comfortable setting-to explore the internet dating scene as an individual parent can help ease the stress of having right … Seguir leyendo Finest Online Dating Sites & Apps For Solitary Parent Dating In 2023→
Planet Arduino is, or at the moment is wishing to become, an aggregation of public weblogs from around the world written by people who develop, play, think on Arduino platform and his son. The opinions expressed in those weblogs and hence this aggregation are those of the original authors. Entries on this page are owned by their authors. We do not edit, endorse or vouch for the contents of individual posts. For more information about Arduino please visit www.arduino.cc
You are currently browsing the PlanetArduino weblog archives.